Retaining wall build process: a practical step-by-step with drainage, base prep, and finishing checks
The right retaining wall can create level space, define clean edges, and manage small slopes. Yet most issues with leaning, bulging, or frost heave trace back to skipped steps early on. This walkthrough explains the retaining wall build process from site assessment to finishing checks so you can plan a durable installation. It highlights how base preparation, drainage, and backfill work together, and offers practical questions to keep your project on track.
What a retaining wall does
Before laying the first block, clarify the job your wall must perform. A retaining wall primarily:
- Holds back soil where grade changes would otherwise slump or erode
- Creates usable flat areas for planting beds, walkways, or seating
- Channels water safely away from structures and traffic paths
- Provides a clean visual edge for transitions between surfaces
Every design decision—from wall height to drainage layer—should support these functions. When in doubt, return to the core purpose: resisting earth pressure and managing water.
Site assessment and design decisions
Good planning reduces rework and protects the wall over time. During the earliest phase of the retaining wall build process, confirm the following:
- Height and length: Measure the vertical rise and run. Many small garden walls are under 1 metre; taller or loaded walls may require engineered design and specific reinforcement. For structural questions, consult a qualified professional.
- Soil conditions: Identify whether soils are sandy (drain well), silty (variable), or clay-rich (hold water). Poor-draining soils demand meticulous drainage layers.
- Setbacks and utilities: Mark any private lines you’ve installed and request utility locates where applicable. Allow room behind the wall for drainage stone and compaction.
- Water pathways: Trace where roof water, downspouts, and surface runoff travel. The design should carry water away from the wall and adjacent structures.
- Loads above the wall: Drives, sheds, pools, or slopes above increase surcharge loads. That may change material selection, base depth, and reinforcement.
Sketch the wall’s plan and profile with dimensions, including any curves, steps, or grade transitions. Simple drawings help anticipate cut volumes, drainage runs, and block counts.
Materials and tools overview
Match materials to the wall’s height, curvature, and look. Common choices include:
- Segmental retaining wall (SRW) blocks: Designed for stacking with a setback (batter). Often feature interlocking lips or pins.
- Armour stone or natural stone: Large, heavy units with a natural look. Require careful placement and equipment for handling.
- Concrete units with caps: Provide a finished top course and consistent dimensions.
- Drainage stone: Washed angular aggregate (typically 19 mm or similar) behind the wall and under drains.
- Base material: Well-graded gravel that compacts densely to support the wall and distribute loads.
- Perforated drain pipe: Collects and redirects water; outlet must daylight or connect to an approved drainage path.
- Adhesive or pins (as specified): For capstones or to secure certain block systems.
Helpful tools include a builder’s level or laser, string lines, a plate compactor, hand tampers, dead-blow mallets, a masonry saw (if cuts are required), shovels, rakes, and PPE.
Step-by-step retaining wall build process
This staged approach focuses on repeatable practices. Always follow manufacturer specifications for your chosen block or stone system and seek professional guidance for engineered walls.
-
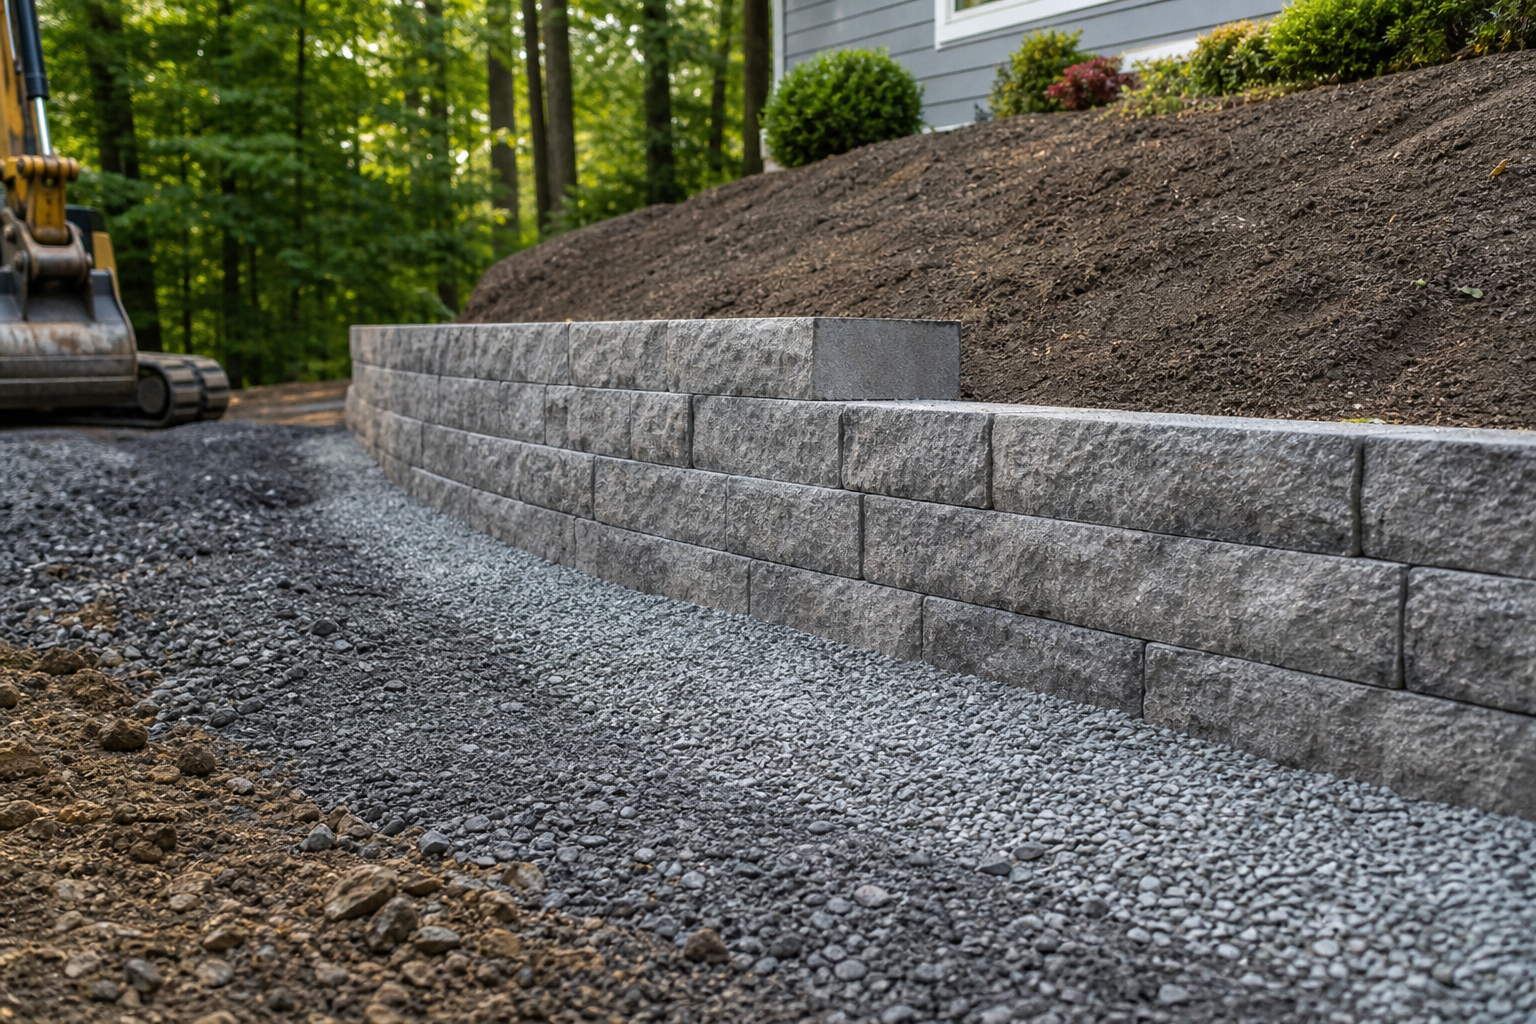
Layout and excavation: Stake and string the wall line. Excavate a trench wide enough for the wall plus at least 150–300 mm of drainage zone behind. Depth should allow for the compacted base layer and partially burying the first course (often 10% of wall height or one full block, depending on system). Remove organic material and loose soil until you reach undisturbed, compactable subgrade.
-
Subgrade shaping and compaction: Shape the trench to be level side-to-side and, where appropriate, with a slight pitch forward to encourage water to move out of the structure. Compact the native subgrade using a plate compactor or hand tamper in thin lifts to reduce future settlement.
-
Base installation: Add a well-graded, compactable base aggregate in 50–75 mm lifts, compacting each lift to a dense, level platform. Target a uniform thickness suited to wall height and site conditions. The finished base must be level and smooth; use a screed board and check with a level in multiple directions.
-
Setting the first course: This is the most critical step. Place the first row of blocks or stones on the compacted base, ensuring each unit is level front-to-back and side-to-side. Tap adjustments with a dead-blow mallet and check alignment with a string line. Maintain consistent joint spacing per manufacturer guidance.
-
Drain pipe and initial backfill: Lay perforated drain pipe at the back of the first course with the perforations oriented per product instructions. Provide a consistent fall toward an outlet that daylights or connects to an approved discharge point. Cover with washed angular stone to at least the height of the first course, keeping the stone clean of soil.
-
Stacking subsequent courses: Sweep each course clean before stacking to prevent rocking on debris. Stagger vertical joints (running bond) and maintain the built-in batter or pin/lip setback. Periodically check level and alignment; minor corrections are far easier now than later.
-
Continuous backfill and compaction: After each course, add drainage stone directly behind the wall (typically at least 300 mm thick) and compact native or structural fill in the zone beyond, working in thin lifts. Keep the drainage stone separated from soil by the geotextile to prevent clogging. Do not compact directly against the wall face with heavy equipment; use controlled, incremental passes.
-
Geogrid reinforcement (if specified): For taller or loaded walls, some systems require geogrid at specified elevations. Install grids to the correct length and tension, pinned into compacted backfill per the engineering or manufacturer’s plan. If your design calls for geogrid, follow the exact layout and overlap rules.
-
Top course and caps: Install the final course and adhere capstones with a compatible exterior-grade construction adhesive if your system calls for it. Maintain straight lines or smooth curves, checking the visual flow as you go.
-
Final grading and surface protection: Grade the backfill to slope gently away from the wall to shed surface water. Where planting or mulch is planned, keep organic soils and mulch out of the drainage stone zone using geotextile separation. Consider edging to protect adjacent lawn or beds from mixing with the stone backfill.
-
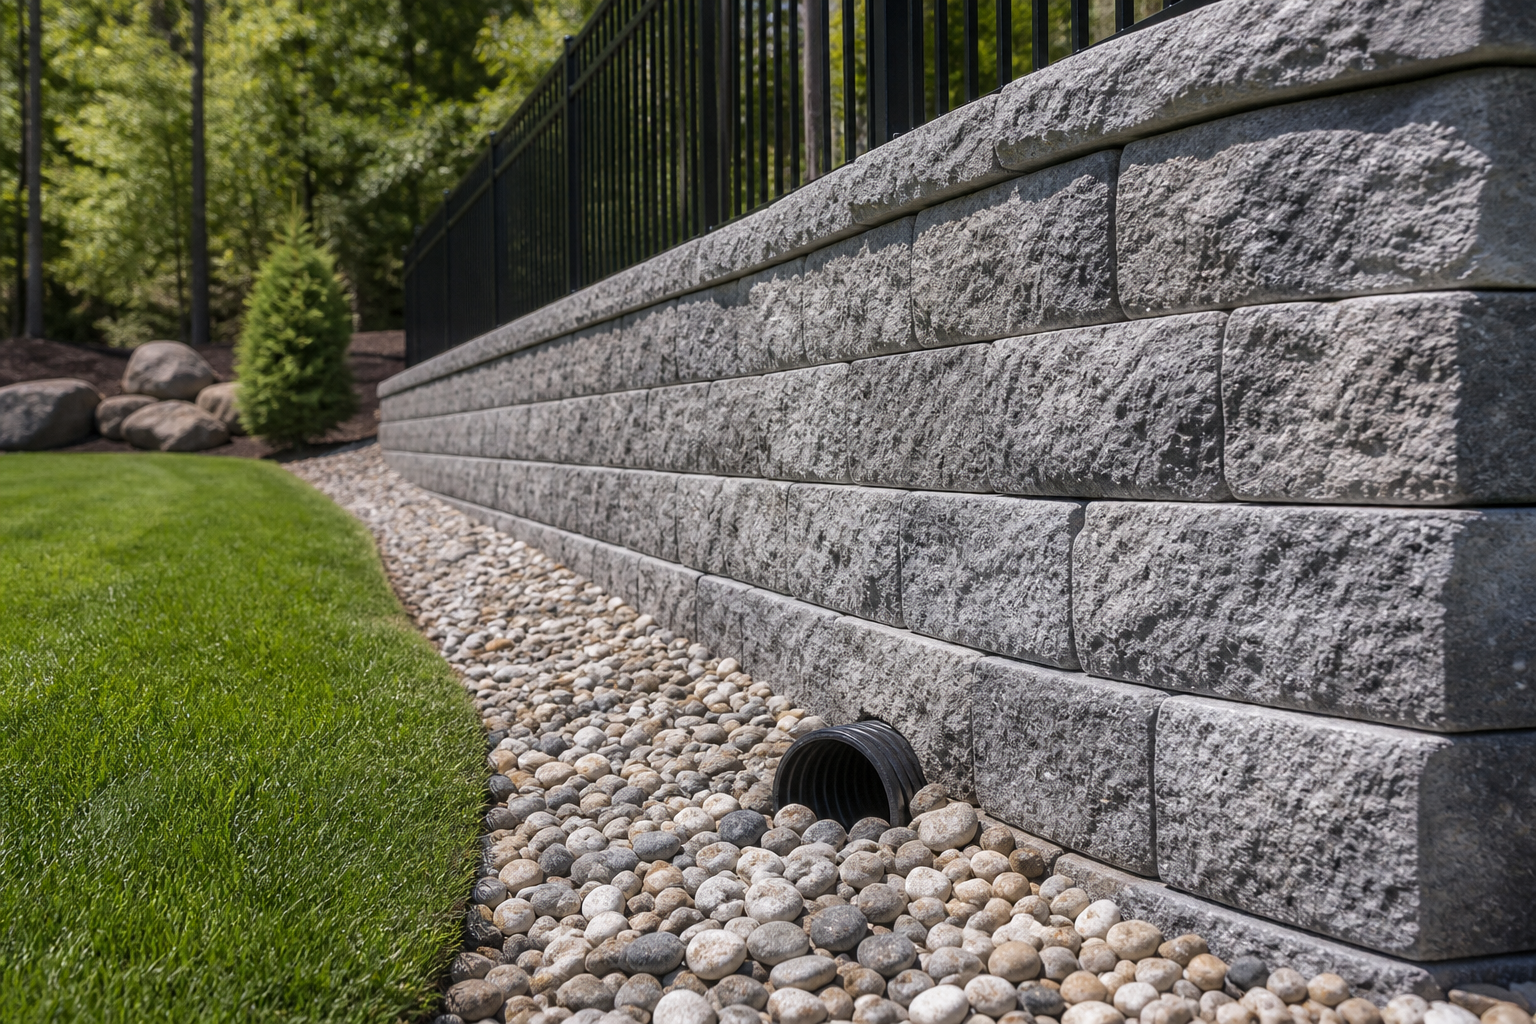
Drain outlet and clean-up: Confirm that the drain discharges freely. Protect the outlet from clogging with an appropriate grate or termination detail. Clean dust from the wall face and joint lines for a finished look.
Drainage and backfill essentials
Water is the primary long-term threat to retaining walls. The retaining wall build process must treat drainage and backfill as core structural elements:
- Free-draining aggregate: Use washed, angular stone behind the wall—not round pea gravel and not soil. Angular stone locks together while allowing water to move.
- Pipe placement and fall: The perforated pipe should sit low and maintain consistent slope to an outlet. Avoid high spots that trap water.
- Surface water control: Grade the finished surface to shed water away from the wall. Keep downspouts from discharging behind or over the wall.
- Compaction discipline: Place and compact soil in thin lifts beyond the drainage zone. Uneven or loose backfill leads to settlement and stress on the wall.
Quality checks and common mistakes
Build in short, predictable checks between steps to prevent cumulative errors.
- Base levelness: Verify the base every 1–2 metres. Small dips telegraph into misaligned courses.
- First course alignment: Sight down a string line and correct deviations immediately. Rework here is fastest and cheapest.
- Joint staggering and batter: Confirm the designed setback each course. Skipped bonding patterns weaken the stack.
- Clean interfaces: Brush debris from each course before stacking. Even small stones can create rocking points.
- Protected drainage outlet: Ensure the outlet remains open and protected from silt or mulch accumulation.
Frequent pitfalls to avoid include:
- Insufficient base depth or compaction
- Poor or missing drainage stone and pipe
- Mixing soil into the drainage stone (no geotextile separation)
- Placing caps before final alignment checks
- Ending the drain line without a clear, open discharge
Maintenance and longevity
Even well-built walls benefit from simple upkeep that protects structure and appearance:
- Seasonal inspection: After freeze-thaw cycles or heavy rains, look for new gaps, bulges, or soft spots in backfill.
- Keep outlets clear: Ensure drain outlets remain visible and unobstructed by leaves, mulch, or snow.
- Surface grading: Re-establish gentle slopes away from the wall if settlement flattens them over time.
- Cap integrity: Re-adhere any loosened capstones with compatible adhesive after cleaning mating surfaces.
Decision checklist before you start
Use this quick checklist to confirm you’re ready to break ground:
- Purpose, height, length, and curve locations are clearly defined
- Soil type assessed; water pathways mapped
- Materials selected to match height and loads; specs on hand
- Base depth and trench dimensions calculated
- Drain pipe route and outlet confirmed with positive fall
- Geotextile, drainage stone, and backfill strategy documented
- Compaction tools and safety gear available
- Quality checks planned at base, first course, and each lift
FAQs
How deep should the base be for a small retaining wall?
Base thickness depends on wall height, soil, and product specifications. For many small garden walls, a compacted base of well-graded aggregate is installed in multiple thin lifts to reach the design thickness, and the first course is often buried partially below grade. Always follow the block manufacturer’s guidance and consult a qualified professional for walls that are tall, loaded, or near structures.
Do I need a drain pipe behind every retaining wall?
Providing a free-draining aggregate zone and a perforated drain with a clear outlet is best practice for most segmental and stone walls. Trapped water increases pressure and can cause movement or frost damage. Verify details with your chosen system and ensure the outlet daylights or connects to an approved discharge path.
What’s the most common cause of wall failure?
Insufficient drainage and poor base preparation account for many issues. A level, dense base supports alignment, while clean, angular drainage stone and a functioning pipe reduce hydrostatic pressure. Skipping geotextile separation can also clog the drainage zone, leading to water buildup.
Can I build a retaining wall next to a driveway or shed?
Walls that support loads from vehicles or structures experience higher forces and often require specific reinforcement (such as geogrid) and engineered design. For load-bearing conditions or walls above typical homeowner heights, consult a qualified professional.
How do I keep the top course straight on a curved wall?
Use manufacturer guidance on minimum radius. Dry-lay caps before adhesive to fine-tune the curve, make small, consistent cuts where allowed, and maintain the same setback pattern on each course. Frequent checks with a string line and visual sighting along the curve help preserve a smooth arc.
Note: This article provides general information about landscape construction. For project-specific requirements, engineering questions, or code compliance, consult a qualified professional.
A practical next step
To discuss the options that apply to your situation, contact HR Greenroots Landscaping and request the relevant details before moving forward.