Fence privacy options are the materials and design choices that block sightlines and reduce noise at your property line. For Mississauga homeowners near 100 Matheson Blvd E unit 202, HR Greenroots Landscaping designs and builds durable privacy solutions that align with local norms, integrating fences with decks, interlocking, and plantings for a cohesive yard.
By HR Greenroots Landscaping • Last updated: 2026-04-21
Quick Summary
A privacy fence shields your yard from view, softens noise, and defines safer space. Choose materials (wood, vinyl, composite, metal with slats, or living screens) based on upkeep and style. In our GTA projects, code-aware layout, frost-depth posts, and clean integration with decks/interlock deliver the longest-lasting results.
- What privacy fencing is and how it works in real yards
- Fence privacy options compared by durability, upkeep, and look
- Best practices for posts, rails, panels, and drainage
- Tools, planning checklists, and local considerations for Mississauga
- Practical examples from HR Greenroots Landscaping projects
Above the fold: why privacy fences matter + what you’ll learn
A well-built privacy fence immediately reduces visibility, buffers street noise, and defines safe, usable space. This complete guide compares materials, shows proven layouts, and explains code-aware installation so you can choose the right approach—and know when professional design-build coordination pays off.
- Understand screening levels: solid, overlapping, or louvered
- Pick materials that match your maintenance style
- Plan posts, footings, and rails for Ontario freeze-thaw cycles
- Connect fences cleanly with decks, interlocking, and sheds
- Use living screens to soften long runs and add height legally
What is a privacy fence?
A privacy fence is a continuous barrier—typically 6 to 8 feet tall—built to block views and reduce distractions. Overlapping or tongue-and-groove boards create a gap-free surface, while stout posts and rails resist wind and seasonal soil movement for a quiet, stable perimeter.
In residential settings, most privacy fences rely on wood, vinyl, or composite panels with minimal spacing. Metal frames with composite or wood slats are strong and modern. Dense plantings, hedges, or espalier can double as living screens. The shared goal: a calm, defined space with predictable circulation.
- Typical height: 72–96 inches, depending on lot lines and corner rules
- Common post spacing: 6–8 feet center-to-center for stability
- Board thickness: often 5/8–1 inch to balance weight and rigidity
- Gate openings: 36–48 inches to pass mowers and patio furniture
Why privacy fencing matters for GTA properties
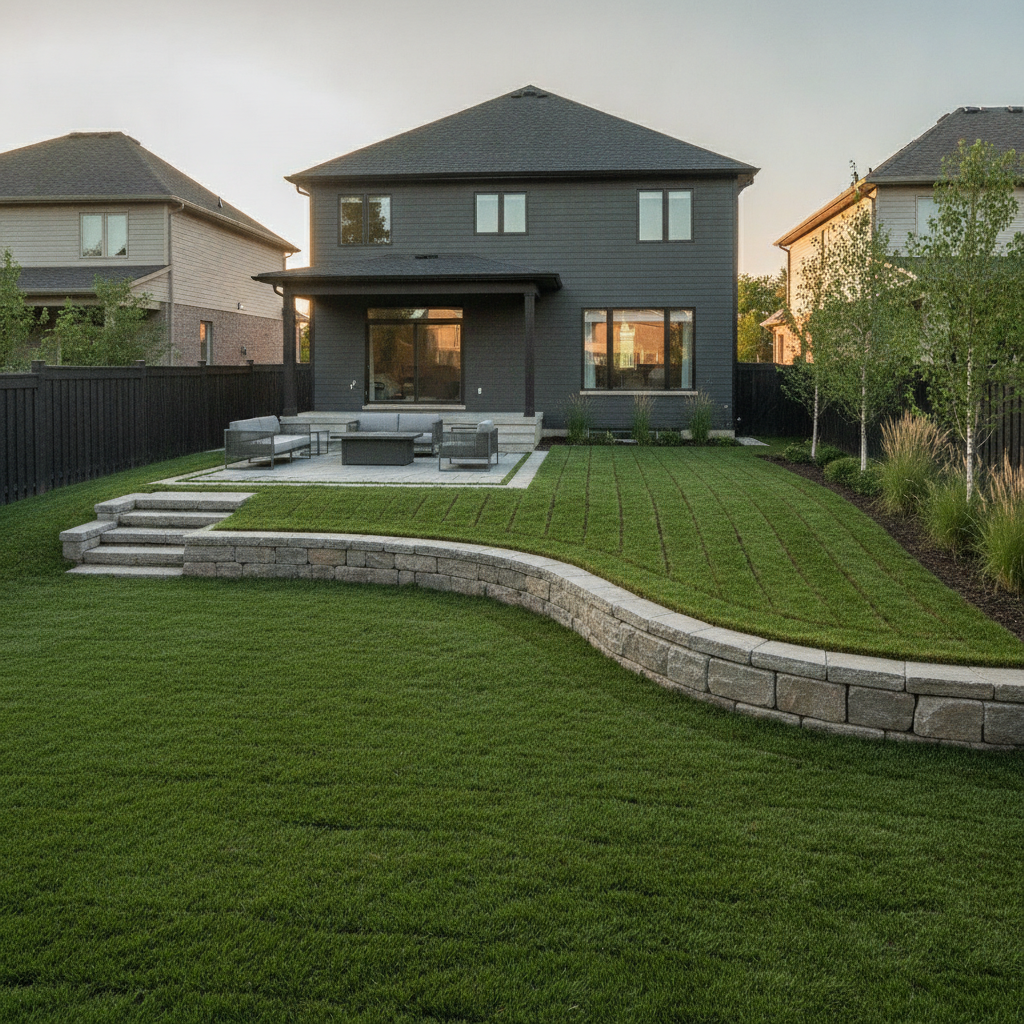
Privacy fencing protects daily comfort. Solid panels limit line-of-sight from sidewalks and nearby windows, dampen road noise, and steer foot traffic. In busy neighborhoods, a defined perimeter helps keep kids and pets safer while improving the way outdoor space actually functions.
In our Mississauga and GTA work, fences frequently do double duty: they reduce wind on exposed corners and help manage snow drifting. A uniform fence line can create a sheltered microclimate for patios or beds. When we sync fence placement with interlocking patios or deck stairs, circulation improves and maintenance drops.
- Wind awareness: taller, uniform runs reduce gust tunnels and rattling
- Snow storage: plan 24–36 inches of interior space along runs for winter piling
- Sightline mapping: address second-story windows first for the biggest comfort gain
Fence privacy options explained
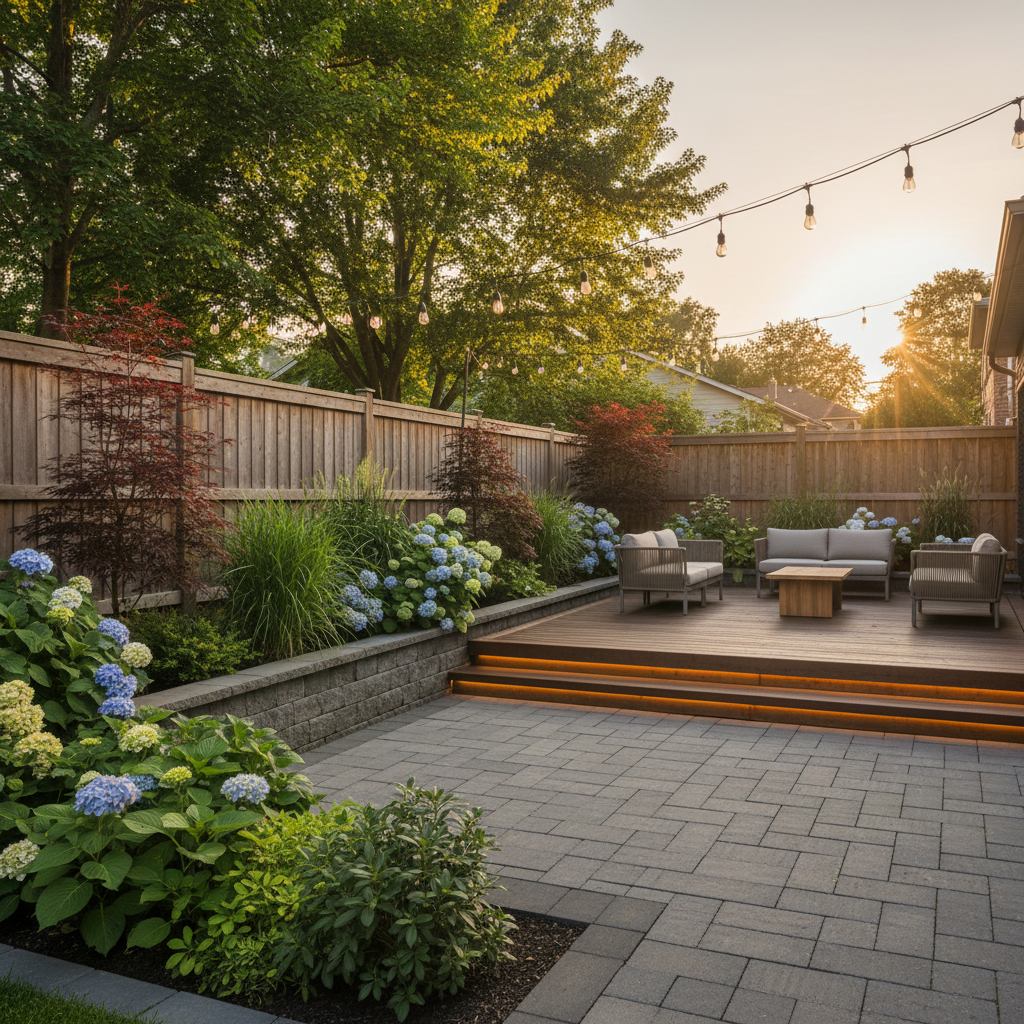
Fence privacy options span solid board-on-board wood, shadowbox, horizontal slats, vinyl and composite systems, metal frames with slats, and living screens. Choose based on screening, wind behavior, upkeep, and style—often blending two approaches for the right balance.
We often combine overlapping wood sections in high-exposure zones with horizontal deck screens near seating, then add hedging where bylaws limit height. This layering keeps yards open where you want airflow and enclosed where you need true seclusion.
- Board-on-board: overlapping vertical boards for near-zero gaps
- Shadowbox: alternating boards on either side for airflow and shared aesthetics
- Horizontal slats: modern look; 1/4–1/2 inch controlled gaps maintain privacy
- Vinyl/composite: prefabricated panels with low upkeep and color consistency
- Metal + slats: rigid frames resist warping; accepts wood or composite infill
- Living screens: hedges, columnar trees, and trellised vines for soft edges
How privacy fence systems work
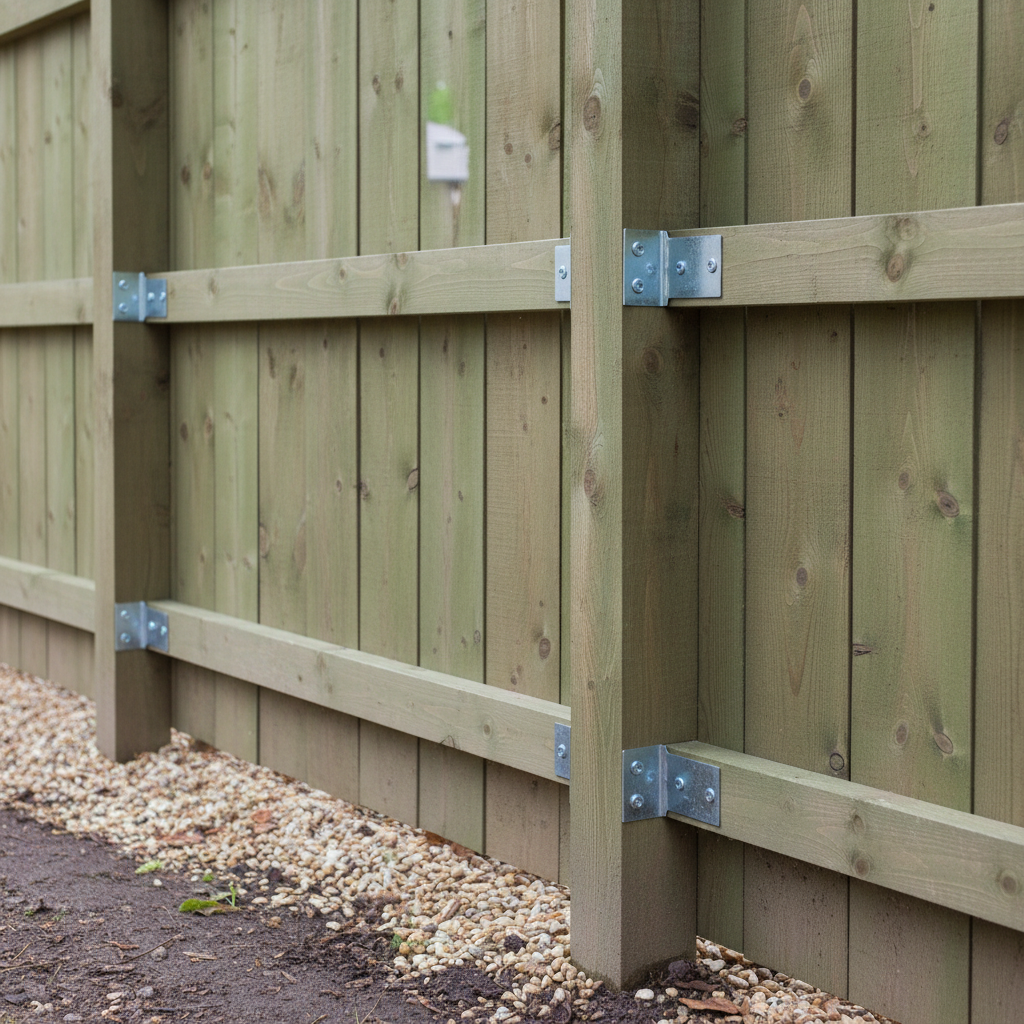
A fence succeeds when structure meets weather. Posts extend below frost depth, rails transfer loads cleanly, and panels shed water. Caps protect end grain, and corrosion-resistant fasteners prevent stains. This detail-first approach keeps lines straight and panels quiet through storms.
Think of posts and rails as the skeleton and boards as the skin. Post holes are typically 8–12 inches in diameter, with concrete or compacted gravel. Rails fasten with exterior-rated brackets or notches. Boards overlap (board-on-board), interlock (tongue-and-groove), or align tightly (shiplap) to eliminate sight gaps.
- Fastener spec: exterior-rated screws 2–3 inches; avoid mixed metals
- Moisture control: top caps and sealed cuts limit water entry
- Movement joints: leave controlled expansion gaps on long composite runs
- Noise control: continuous spans, heavier boards, and plantings reduce resonance
Types of privacy fence materials and styles
The big families are wood, vinyl, composite, metal with slats, and living screens. Wood is warm and customizable. Vinyl and composite minimize maintenance. Metal frames add strength with crisp lines. Living screens soften long runs and boost biodiversity when width allows.
Scan the comparison below to match goals to materials quickly.
TypePrivacyMaintenanceLifespanWind/NoiseNotes Board-on-board woodHighModerate10–20 yrsGoodSeal or stain for longevity Shadowbox (good neighbor)Medium–HighModerate10–20 yrsGood airflowAlternating boards reduce sail effect Horizontal slat woodMedium–HighModerate10–20 yrsModerateStyle-forward; precise gaps matter Vinyl panelsHighLow20+ yrsGoodColorfast; simple cleaning Composite systemsHighLow25+ yrsGoodRecycled content; consistent finish Metal frame + slatsMedium–HighLow25+ yrsVery goodRigid frame; low movement Living screen/hedgeMedium–HighMediumN/AGoodNeeds width; seasonal care- Design details: lattice or louvered toppers bring light while adding 12–18 inches of height
- Gates: self-closing hinges and 4-inch posts add durability
- Slopes: stepped sections keep tops level; racked panels follow grade
Best practices for durable, code-friendly privacy fences
Start with layout: verify property lines, mark utilities, and confirm height and corner rules. Set posts below frost depth, use exterior-rated fasteners, and protect end grain. Plan drainage along the line to avoid heave and puddling. These steps prevent rework and keep fences tight for years.
In our experience across Mississauga and the GTA, successful installs come from clean string lines, consistent post spacing, and thoughtful transitions to decks, interlocking, and sheds. We also plan for winter: snow storage, gate clearances, and protected latch hardware reduce seasonal wear.
- Utility locates before digging; mark gas, hydro, and telecom routes
- Post depth below frost line; diameter 8–12 inches for typical residential runs
- Drainage swales kept open; use river rock or permeable base at water-prone points
- Seal cut ends; avoid water-wicking end grain at caps and rails
- Gate planning: 3–4 feet clear width and 2 inches ground clearance
Local considerations for Mississauga
- Seasonal winds: prioritize overlapping panels or shadowbox layouts on exposed sides to reduce rattling and sail effect.
- Freeze–thaw: schedule installs during drier windows and ensure subgrade compaction so posts don’t heave after the first winter.
- Neighbor elevations: step or taper sections where yards sit at different heights to maintain both privacy and a tidy top line.
Planning and installation process (step-by-step)
Great fences start on paper. Map sightlines, confirm property markers, and pick a material that matches upkeep goals. Then set string lines, dig frost-depth posts, assemble rails, and mount panels. Finish with caps, sealed cuts, and clean tie-ins to patios, decks, and beds.
- Discovery and goals: list exposures (side windows, patios) and target heights (72–96 inches).
- Site checks: property markers, slope, drainage, and utility locates.
- Layout: string lines, gate positions, and snow-storage zones.
- Footings: dig 8–12 inch holes to frost depth; set posts plumb.
- Framing: install rails with brackets; confirm elevations every 12–16 feet.
- Panels: overlap or interlock boards; keep gaps controlled (0–1/2 inch).
- Protection: caps, sealed cuts, and corrosion-resistant fasteners.
- Integration: align ends to decks, interlocking, sheds, and beds for clean transitions.
Tools and resources
Use layout tools (string, line level, laser), digging gear sized to your soil, and exterior-rated fasteners and brackets. Keep a short checklist for utility locates, frost-depth posts, and gate hardware so the finished fence works flawlessly day to day.
- Layout: string lines, tape, laser level, marking paint
- Digging: clamshell digger, auger, spade, bar for roots/rock
- Framing: miter saw, impact driver, exterior brackets, screws
- Protection: top caps, sealant/stain, post skirts, stainless or coated fasteners
- Checklist: utilities marked, property line confirmed, gate swing clearances set
Homeowners often combine privacy fencing with interlocking patios or deck screens. A coordinated plan avoids awkward corners and ensures foundations don’t compete.

Approaches to boost privacy in existing yards
If replacement isn’t practical, layer privacy with deck screens, pergola louvers, tall planters, and targeted hedging. Block the worst sightlines first—usually second-story windows and side-yard gaps—and you’ll feel relief fast without rebuilding the entire perimeter.
- Topper panels: 12–18 inch lattice or louvered sections add height and light
- Screen walls: horizontal slats near seating for on-demand privacy
- Green layers: columnar evergreens (where width allows) for four-season cover
- Planters: tall boxes create an instant buffer around patios and hot tubs
- Sound dampening: denser panels plus shrubs reduce reflected noise
Scenario-based recommendations
Different yards call for different solutions. Corner lots benefit from overlapping boards and stepped heights. Pool zones need compliant gates and non-climbable surfaces. Small urban yards lean on horizontal screens and planters to avoid a walled-in feel.
- Corner lots: board-on-board with stepped sections; align with sidewalk sightline rules
- Pool areas: self-closing, self-latching gates and non-climbable designs near water
- Small yards: horizontal screens with 1/4–3/8 inch gaps; add planters for softness
- Pet-focused: dig-guard strips and 4-foot gates; solid bottoms reduce distractions
- Multi-level neighbors: add trees or pergola louvers to counter top-down views
Maintenance and longevity
Longevity comes from moisture control and periodic checks. Seal wood within the first season, keep soil and mulch off boards, and re-tighten hardware annually. Vinyl and composite need simple washing. Metal frames resist warping and pair well with composite slats for stability.
- First season: seal or stain wood after it acclimates; recheck fasteners
- Ground contact: maintain 1–2 inches clearance above soil or mulch
- Drainage: keep pea gravel or river rock at splash zones to dry fast
- Plants: prune hedges/screens to preserve airflow and panel clearance
- Winter: latch protectors and gate stops reduce freeze damage
Sustainability and material choices
Sustainable privacy solutions favor durable materials, protected end grain, and designs that minimize replacements. Composite systems with recycled content, metal frames with replaceable slats, and well-sited living screens reduce lifecycle maintenance and waste.
We also look at shade, wind, and water. For example, a living screen of columnar evergreens or trained vines can offset the visual weight of a long fence, add pollinator habitat, and cool patios during peak sun. Where space is tight, a metal frame with composite slats concentrates durability in a narrow footprint.
- Choose finishes that extend service life and reduce repainting cycles
- Reuse existing posts if structurally sound; replace only failed sections
- Direct downspouts to swales so panels and posts dry quickly after storms
How privacy fences fit into Landscaping GTA plans
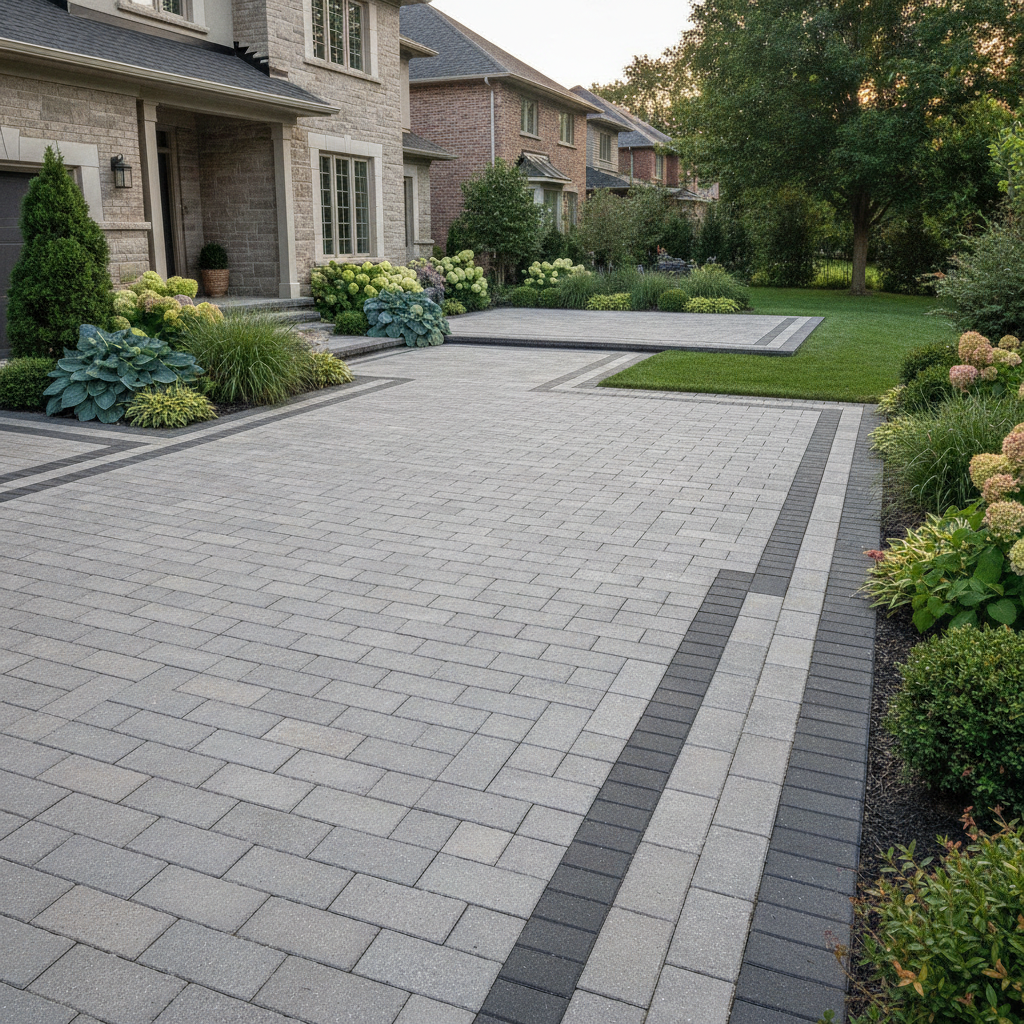
Privacy works best as part of a coordinated plan. Align fence lines with interlocking patios, deck stairs, sheds, and planting beds so circulation feels natural. This design-build approach is central to HR Greenroots Landscaping projects across the GTA.
In our design process, we map movement (from driveway to gate to deck), then select materials with consistent color and texture. Interlocking near fence lines gets tight edge control; beds receive crisp edging and mulch. The result: better privacy and faster upkeep because transitions are tidy and durable.
- Match fence tones to pavers and deck boards for visual cohesion
- Use raised planters to add height and soften long runs
- Place sheds where fence angles can hide storage and bins
Case studies and real examples from Mississauga
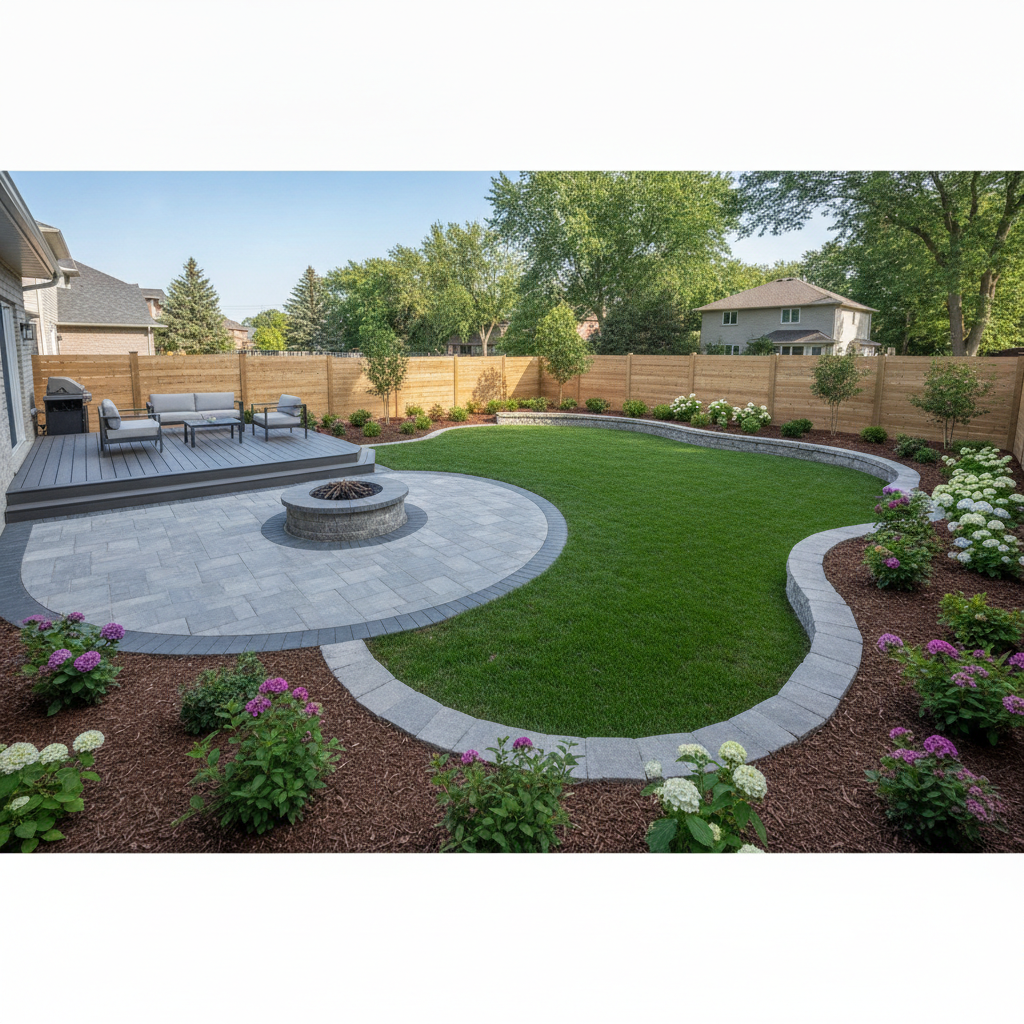
Mississauga yards vary widely, so privacy strategies must adapt. We’ve delivered results by pairing board-on-board runs with deck screens, using shadowbox on windy exposures, and mixing fencing with raised planters to add height and soften long lines without overwhelming small lots.
Corner lot with exposure on two sides: We installed board-on-board sections with stepped tops to meet sightline rules, then extended a sheltered interlocking patio inside the quiet zone. The family reports calmer outdoor dinners and less wind swirl during shoulder seasons.
Pool yard with second-story overlook: A horizontal slat screen creates a private lounge zone while columnar evergreens block top-down views. A self-closing gate and non-climbable spans near water keep safety front and center.
Narrow urban backyard: We combined a compact metal frame with composite slats to save inches, then added planter boxes at the seating edge. The layers brought privacy without a boxed-in feel.
Considering a privacy upgrade? Book a Mississauga consultation and we’ll map exposures, bylaw constraints, and maintenance goals—then recommend the fewest moves that make the biggest difference.
Frequently Asked Questions
Homeowners ask about height, wind resistance, upkeep, and how to add privacy without replacing an entire fence. These quick answers cover what we discuss most during Mississauga site visits.
What height should a privacy fence be?
Many residential privacy fences are about 6 feet tall, with options for 12–18 inch toppers. Always confirm local rules on maximum heights, corner visibility, and pool safety before building.
Which fence material needs the least upkeep?
Vinyl and composite systems require the least maintenance. They avoid staining and typically clean with soap and water. Wood delivers a warm look but benefits from sealing and seasonal inspection.
Can I add privacy without replacing my entire fence?
Yes. Add topper panels, board-on-board inserts, horizontal deck screens, or living layers like hedges to block key sightlines. Prioritize seating areas and second-story exposures for the biggest improvement.
Do privacy fences reduce noise?
Solid, gap-free fences can noticeably dampen neighbor and street noise. Use continuous panels, heavier boards, and layered plantings to reduce reflections and improve comfort.
How do privacy fences tie into decks and interlock?
Plan tie-ins during design. Align fence posts with deck or patio edges, keep gates clear of steps, and use matching tones for boards and pavers. Clean transitions reduce upkeep and improve flow.
Conclusion and next steps
The right privacy strategy balances screening, style, and maintenance—then connects cleanly to decks, interlock, and planting. Confirm rules, plan for wind and water, and pick materials that match your upkeep mindset. Design-build coordination ensures fewer surprises and a better daily experience.
- Map exposures and traffic patterns before choosing materials
- Design posts, rails, and panels for freeze–thaw movement
- Integrate with patios, decks, sheds, and beds for cohesive results
- Use living layers to soften long runs and boost biodiversity
Key takeaways
- Fence privacy options include solid panels, horizontal screens, and living layers—mix as needed
- Structure first: frost-depth posts, exterior fasteners, sealed cuts, and drainage
- Plan for winter, wind, and second-story views to get the biggest gains
- Coordinate with interlocking and decks to reduce maintenance long-term
Ready to get specific? Schedule a Mississauga site consultation and we’ll translate your privacy goals into a right-sized plan.
Related articles and resources
Privacy rarely stands alone. Explore interlocking, decks, and retaining strategies that reinforce privacy lines, guide traffic, and stabilize soil. A coordinated plan keeps materials consistent and upkeep simple.
If you’re weighing surface choices near a fence line, these perspectives on paving and outdoor layout can help shape decisions you’ll live with for years. For broader inspiration on backyard layouts, you can review design ideas that work well in suburban settings, including step-by-step planning guides and contractor advice drawn from real projects.
For example, this overview shares actionable backyard ideas that apply to many suburban lots, while this planning guide explains sequences that reduce rework. A brief best-practices summary also highlights how hardscape and planting choices interact during the first season and beyond.