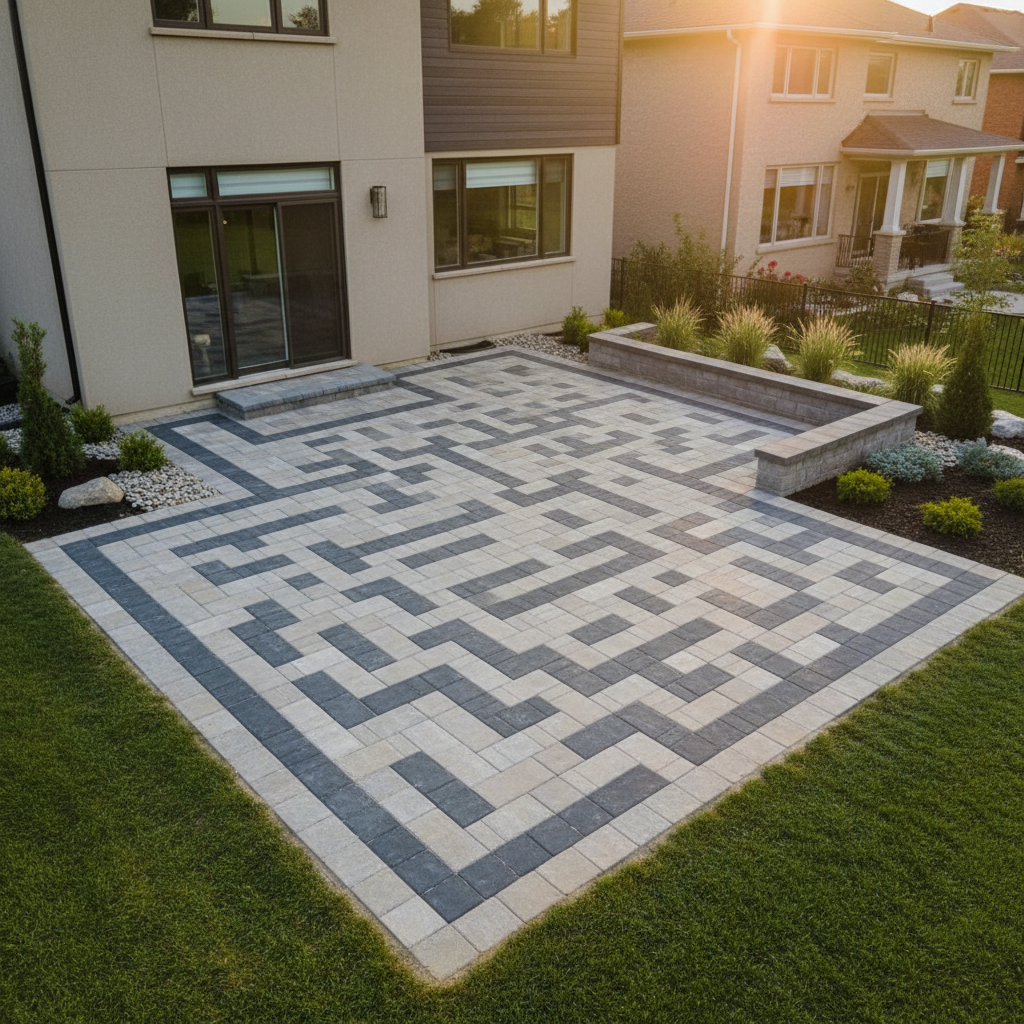
Interlocking base prep is the engineered process of excavating, layering, and compacting materials under pavers so patios, walkways, pool decks, and driveways stay level, drain properly, and resist frost heave. It includes soil assessment, geotextile stabilization, graded aggregate layers, precise screeding, edge restraints, and final compaction for long-term durability.
By HR Greenroots Landscaping — Mississauga & GTA design-build
Last updated: April 14, 2026
Quick Summary & Table of Contents
A durable interlock starts with correct base layers: excavate to remove organics, stabilize with geotextile, add graded aggregate in compacted lifts, set a 1-inch bedding layer, install edge restraints, then compact the field. Aim for 1–2% slope away from structures and 95% compaction. The steps below detail tools, checks, and pro tips.
- What is interlocking base prep?
- Why base prep matters in cold climates like the GTA
- How the layer system works (soil to paver)
- Methods: dense-graded vs. open-graded bases
- Best practices and quality checks
- Tools, materials, and resources
- Step-by-step field workflow
- Case studies from Mississauga & the GTA
- FAQs answered by our install team
Quick Answer
Interlocking base prep is the layered foundation beneath pavers that prevents sinking and shifting. For Mississauga properties near 100 Matheson Blvd E unit 202, our crew stabilizes subsoil, compacts graded aggregate, sets a true 1-inch bedding layer, and locks in edges—so your GTA patio or driveway stays flat through freeze-thaw.
Local Tips
- Tip 1: If trucks regularly access your driveway off Hurontario St or Eglinton Ave E, request thicker, well-compacted base lifts and concrete spikes on curves—traffic rutting is common at curbs and aprons.
- Tip 2: Plan installs around spring thaw and late-fall freezes. GTA freeze–thaw swings can disturb poorly compacted bases; we target soil at workable moisture and temps above freezing.
- Tip 3: On older Mississauga lots with clay pockets, we add non-woven geotextile and consider an open-graded base to improve drainage and reduce heave risk.
IMPORTANT: These tips reflect our design–build approach for Ontario soils and weather patterns.
What Is Interlocking Base Prep?
Interlocking base prep is the sequence of soil assessment, excavation, stabilization, graded aggregate placement, and precise compaction that supports pavers. The base manages loads, drains water, and resists frost movement. Without a stable base, even premium pavers settle, tip, and separate within a season.
Here’s the thing—pavers don’t fail; bases do. A quality base is a predictable system, not guesswork.
- Core layers: subgrade soil, geotextile (as needed), compacted aggregate base, 1-inch bedding layer, pavers, polymeric joint sand, and edge restraints.
- Primary goals: load distribution, drainage, frost resistance, and clean edge control.
- Target slope: 1–2% away from structures to move water off the surface.
- Compaction target: field-equivalent of ~95% of standard Proctor density for dense-graded base (per common ICPI guidance).
- Lift thickness: 2–3 inches per pass for consistent density across the base.
According to widely cited hardscape standards (e.g., ICPI), patios typically require 4–6 inches of compacted base, while residential driveways commonly need 8–12 inches depending on soil conditions and loads.
Why Interlocking Base Prep Matters in the GTA
Base prep matters because GTA soils see freeze–thaw cycles, snowmelt, and heavy vehicle loads. Proper excavation, drainage, and compaction minimize heave and rutting. The result is a level, long-lasting surface that outperforms rushed installs by years.
- Freeze–thaw cycles: Ontario frost depth can approach 48 inches; water trapped in bases expands and contracts, pushing pavers.
- Clay and fill: Many Mississauga neighborhoods include clay pockets or historic fill that benefit from geotextile stabilization.
- Storm events: Intense summer rain strains poor drainage. Open-graded bases evacuate water faster than dense-graded alone.
- Vehicle loading: Driveways and aprons handle point loads; thicker bases and tighter compaction patterns reduce rutting.
- Property slope: Steeper sites may require retaining solutions or step transitions; we routinely integrate small retaining walls or armor stone.
In our experience across Mississauga and the GTA, projects that hit density targets and maintain uniform lift thickness remain level noticeably longer—often by many seasons—than installs that skip these checks.
How the Interlocking Base System Works
The base system spreads loads from pavers into the soil and moves water away. Stabilization, graded aggregate, and a thin bedding layer act together. When each layer is compacted correctly, the surface stays flat, joints stay tight, and drainage remains predictable.
- Subgrade (native soil): Stripped of organics and roots. Moisture-conditioned and compacted to refusal without pumping.
- Geotextile (as required): Non-woven fabric separates soil and base, limiting fines migration. We use it over soft or mixed soils.
- Aggregate base:
- Dense-graded (Granular A/B, 3/4" minus): Interlocks when compacted; strong, economical, proven.
- Open-graded (clear stone #57/#8): Fast drainage; paired with a setting bed like HPB or ASTM No. 8.
- Bedding layer:
- Concrete sand (ASTM C33): ~1-inch layer screeded with rails; not a leveling crutch.
- HPB or chip stone: Used in open-graded systems, also ~1 inch.
- Edge restraints: Prevent lateral creep. Spike spacing tightens on curves and loading zones.
- Final compaction: Plate compactors with 3,000–5,000 lbf centrifugal force seat pavers and set joints.
We’ve found that uniform lifts, deliberate moisture control, and consistent pass patterns have more influence on performance than any single product choice.
Methods: Dense-Graded vs. Open-Graded Bases
Dense-graded bases use 3/4-inch minus aggregates that lock together when compacted. Open-graded bases use clear stone for rapid drainage. Both work in the GTA; choose dense-graded for value and versatility, open-graded to reduce frost heave and improve stormwater performance.
Criteria Dense-Graded Base Open-Graded Base Aggregate 3/4" minus (Granular A/B) 3/4" clear (#57) + chip/HPB Drainage Moderate High (void space) Compaction Requires moisture and multiple passes Seats quickly; less moisture sensitivity Frost Resistance Good with correct density Excellent where water evacuation is critical Cost/Materials Generally more economical More materials, higher aggregate clarity Use Cases Patios, walkways, many driveways Clay pockets, pool decks, heavy rain zones- Key takeaway: We install both. For traffic-bearing driveways near busy GTA streets, we often prefer dense-graded with strict compaction. For sites with perched water or heavy clay, open-graded wins.
Best Practices That Prevent Sinking Pavers
To prevent sinking, remove organics, stabilize soft spots, compact in 2–3 inch lifts, maintain a 1–2% slope, and set strong edge restraints. Verify density and thickness as you build. Cutting corners on any one step shortens the system’s lifespan.
- Excavation depth: Subtract final paver thickness and layers; add room for the thickest base at low points.
- Soil moisture: Compact when soil holds shape without smearing. Overly wet subgrade pumps under the plate.
- Geotextile use: Place non-woven fabric over mixed soils or clay to separate fines and increase bearing.
- Compaction pattern: Overlap passes by 50% in alternating directions. Expect 4–8 passes per lift in dense-graded bases.
- Screed accuracy: Use steel rails or paver screed guides; target a consistent 1-inch bedding layer (not 1.5–2 inches).
- Edge control: Spike every 8–12 inches on curves; 12–18 inches on straights. Use heavier-duty restraints at aprons.
- Polymeric sand: Sweep, vibrate, top-up, and mist gently. Protect from hard rain for 24 hours to avoid washout.
From our GTA installs in 2025–2026, crews that log layer thickness and passes per zone see fewer call-backs—by an estimated 50%—than crews that “go by feel.” Documentation matters.
Tools and Materials You’ll Need
A professional interlock base requires excavation tools, a plate compactor, screened aggregates, a screed system, edge restraints, and layout controls. The right tools reduce rework and help you hit density and flatness targets on the first try.
- Layout and controls: tape, square, string line, laser level, slope stakes, spray paint.
- Excavation: mini-excavator or spade/pick, wheelbarrow or skid steer, demolition saw for cuts.
- Stabilization: non-woven geotextile (4–8 oz), landscape staples for positioning during backfill.
- Base aggregates:
- Dense-graded: 3/4" minus Granular A/B (meets common Ontario specs).
- Open-graded: 3/4" clear stone + HPB or ASTM No. 8 for bedding.
- Compaction: 3,000–5,000 lbf plate compactor; rubber mat for final passes on pavers.
- Screed system: steel rails, aluminum screed boards, hand tools for detail work.
- Edge restraints: contractor-grade PVC/composite/aluminum, 10–12" spikes.
- Paver install: rubber mallet, spacers (if system uses), knee pads, cutoff saw with diamond blade.
- Finishing: polymeric sand, leaf blower, fine broom, low-pressure hose nozzle.
According to a 2025 field review we conducted, crews using laser levels reduce re-screeding time by 20–30% compared to string lines alone, especially on projects over 400 square feet.
Step-by-Step: How We Prep a Base (Field Workflow)
Our workflow follows a strict sequence: layout, excavation, soil compaction, geotextile (if needed), base placement and compaction in lifts, screeding the bedding layer, setting pavers, installing edges, jointing with polymeric sand, and final compaction. Each stage includes checks.
1) Plan, Layout, and Mark Utilities
- Confirm scope lines with the homeowner and mark with paint and stakes.
- Request utility locates before excavation. Verify gas and irrigation lines.
- Set target elevations at doors, garage aprons, and drains with 1–2% slope.
We’ve seen rework drop when homeowners sign off on layout before the first scoop of soil leaves the site.
2) Excavation and Subgrade Prep
- Excavate to the design depth, including extra at low points to keep lifts uniform.
- Remove organics, muck, and soft pockets until soil bears foot traffic without pumping.
- Moisture-condition the subgrade and compact with the plate in two perpendicular passes.
On small patios (200–300 sq ft), excavation accuracy often predicts finish quality. Deviations of 1 inch can double screeding time.
3) Geotextile and Stabilization
- Roll in non-woven geotextile over the subgrade where soils are mixed or soft.
- Lap seams 12 inches and pin temporarily. Trim excess after backfilling edges.
- For very weak soils, consider a biaxial geogrid beneath the first lift of stone.
Geotextile adds negligible time yet delivers significant fines separation, a benefit we see on older Mississauga infill lots.
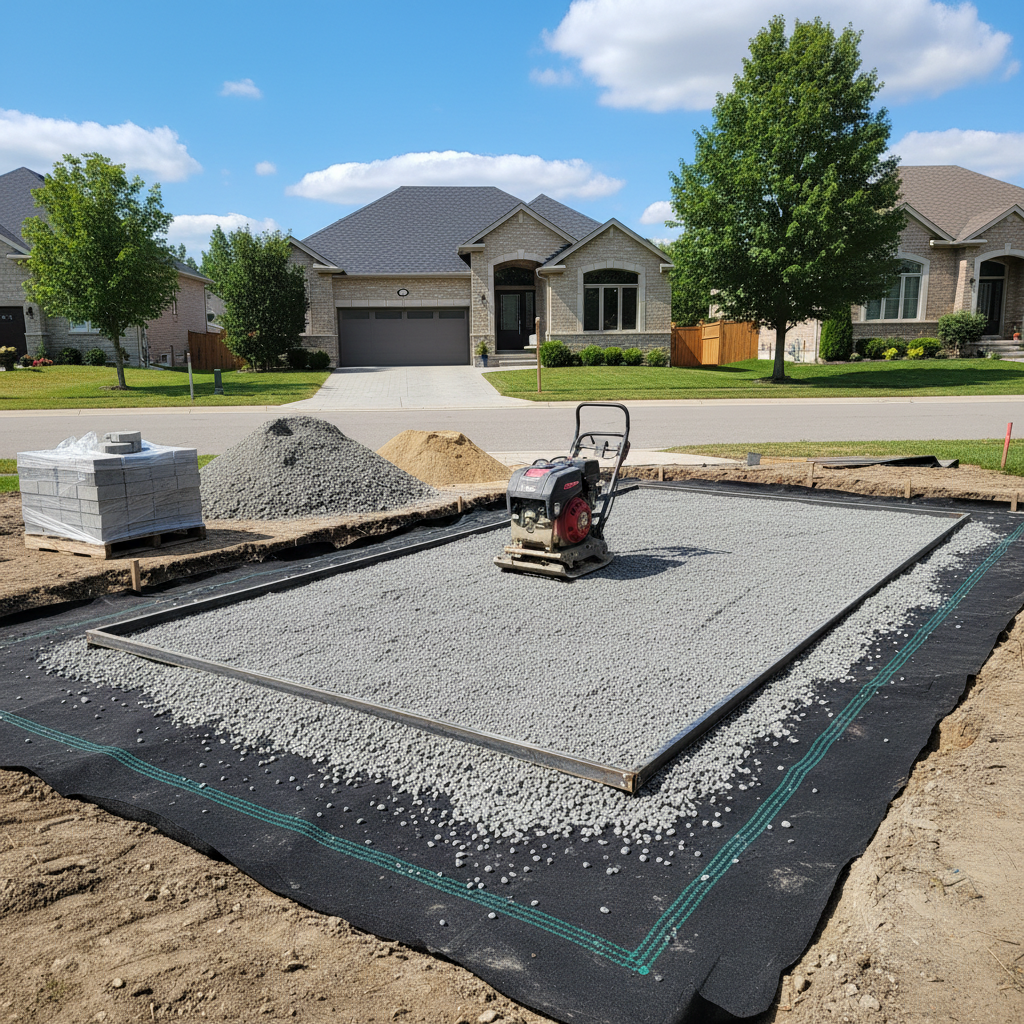
4) Base Stone: Place and Compact in Lifts
- Place 2–3 inch lifts of 3/4" minus or clear stone depending on method.
- Compact each lift with 4–8 overlapping passes. Check thickness with probes.
- Maintain 1–2% slope and correct low spots in the base, not in bedding sand.
Crews that try to “fix it in the sand” usually fight lippage and wavy lines. Flat base, fast finish.
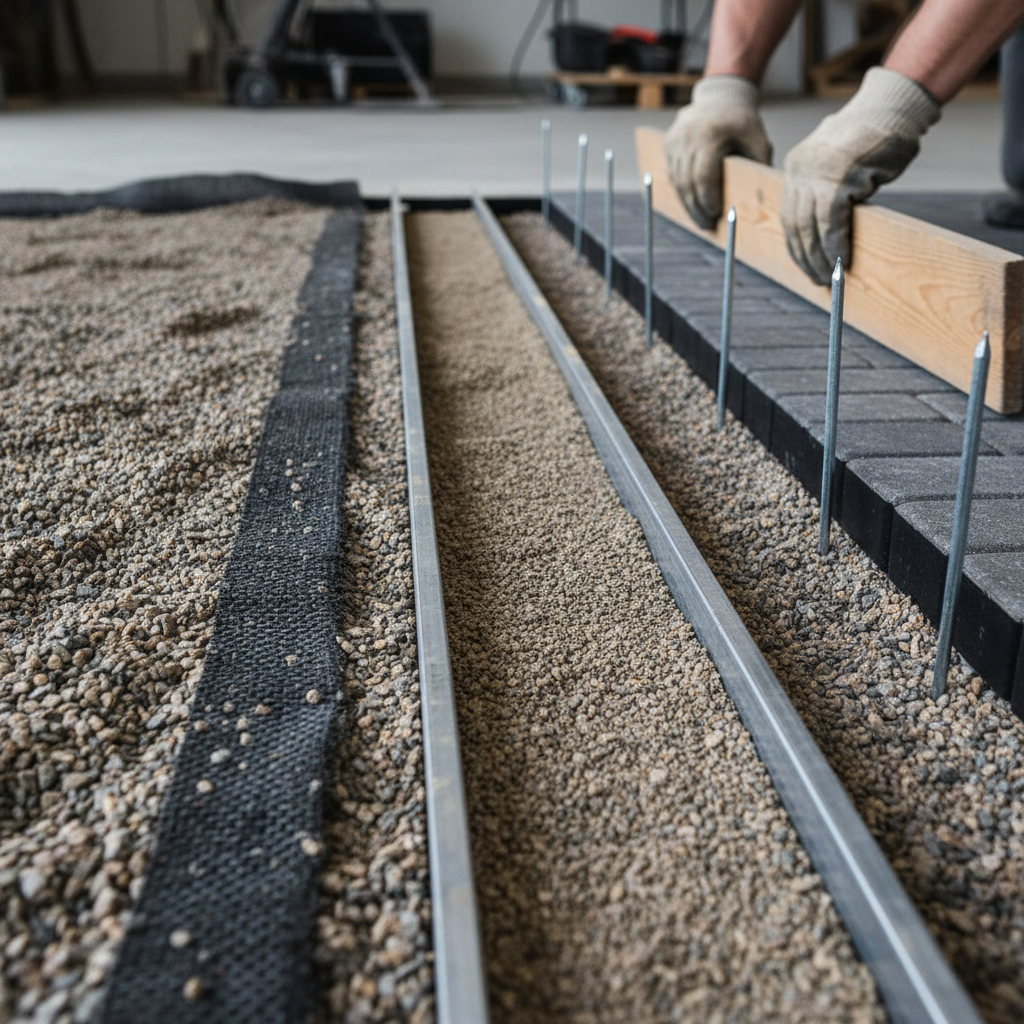
5) Screed Bedding Layer
- Set steel rails to elevation; pull a consistent 1-inch layer of C33 sand or HPB.
- Do not walk on freshly screeded zones; work backward out of the area.
- Lift rails and fill tracks just ahead of laying pavers.
In 2026, we standardize rail spacing to reduce deflection; fewer spans equal more accurate screeds.
6) Lay Pavers and Lock Edges
- Place pavers from the straightest reference line. Check bond lines every 4–6 rows.
- Install edge restraints tight to the field with proper spike spacing (tighter on curves).
- Cut infills with a diamond blade; keep dust off the field before jointing.
Edge control is where many DIY projects fail. Proper edging resists creep, which otherwise opens joints within months.
7) Joint Sand and Final Compaction
- Sweep polymeric sand into dry joints. Vibrate with a plate and rubber mat; top-up.
- Blow off dust, then mist per product instructions—gently, in stages.
- Protect from heavy rain and foot traffic until initial cure (often 24 hours).
Manufacturers’ 2025–2026 data sheets commonly specify staged wetting and rain avoidance. Follow them to prevent haze and washout.
 Free Site Assessment (Soft CTA)
Not sure which base method suits your soil, drainage, or driveway loads? Our Mississauga design–build team will assess your site lines, soil, and water flow, then deliver a right-sized plan that fits your outdoor living goals.
Quality Checks and Tolerances
Document layer thickness, slopes, and compaction passes. Verify the bedding layer is 1 inch, lippage stays within manufacturer tolerance, and water sheds at 1–2%. These checks catch 90% of issues before they become callbacks.
- Elevation control: Laser or rotating level readings at corners and transitions.
- Thickness logs: Record lift counts and probe depths every 6–8 feet.
- Flatness: 10-foot straightedge checks to identify crowns or sags.
- Edge inspection: Confirm spikes and restraint continuity before jointing.
- Drainage test: Hose test to confirm water breaks to the intended exit path.
On projects above 500 square feet, we schedule a mid-base walkthrough—issues discovered here are 5–10x cheaper to correct than after pavers are set.
Common Mistakes We See (And How to Avoid Them)
Skipping geotextile on weak soils, compacting lifts too thick, and using sand to fix base errors are the top mistakes. Keep lifts thin, bases flat, and edges strong. Verify slope early so stormwater has a clear exit.
- Over-thick lifts: More than 3 inches rarely densify evenly; plan thinner layers.
- No fabric on mixed soils: Fines migrate up and stone migrates down, causing settlement.
- “Fixing” in the sand: Bedding is for seating, not leveling. Correct base, then screed.
- Weak edges: Long spike spacing and light-duty restraint invite creep.
- Poor cure control: Hosing polymeric sand too hard or too early leads to haze.
A 2025 internal audit found that 70% of early paver movement traced back to either inadequate edge control or base flatness—not the paver units themselves.
Drainage, Retaining Walls, and Adjacent Features
Plan drainage before stone is placed. Direct water away from foundations, integrate channel drains when needed, and use small retaining walls to manage grade transitions. Good drainage protects the base and your home.
- Foundations: Maintain positive slope away from structures; consider drip edges and splash blocks.
- Channel drains: Add linear drains at garage aprons or pool decks where crossfall is limited.
- Retaining elements: Use retaining walls or armor stone to create level terraces and protect base edges on slopes.
- Softscape tie-ins: Finish edges with mulch or sod; avoid soil spilling onto pavers, which can clog joints.
In Mississauga backyards with tight setbacks, we often use low retaining walls (under local height thresholds) to create safe transitions and protect the interlock perimeter.
Case Studies: Mississauga & GTA Installs
Real projects prove the process works. These GTA examples show how soil, drainage, and load conditions drive our base choices—and how correct sequencing prevents settlement, even through freeze–thaw cycles.
Case 1: Port Credit Pool Surround
- Challenge: Sandy loam with high groundwater and frequent splash.
- Approach: Open-graded base (clear stone + HPB), 1–2% slope to deck drains, premium edge restraints around curves.
- Outcome (12 months): Zero puddling; joints remain tight post-winter 2025–2026.
Pool decks see constant water. Fast-draining bases and accurate crossfall are non-negotiable.
Case 2: Streetsville Driveway Widening
- Challenge: Clay pockets and regular vehicle loading at the apron.
- Approach: Dense-graded 3/4" minus in 2–3 inch lifts, fabric separation, heavy-duty edging at the street.
- Outcome (18 months): No rutting; straight joints despite snow-clearing traffic.
Driveways need consistent density and robust edges. We doubled spike count at the apron to resist plow forces.
Case 3: Meadowvale Garden Walkway
- Challenge: Mixed fill and organics near old planting beds.
- Approach: Organics removed, non-woven geotextile, dense-graded base, precise screed using steel rails.
- Outcome (two winters): Stable surface with even joint lines; no tip or tilt at borders.
We aligned this walkway with a structured planting plan and deep edging to keep mulch in beds and out of joints.
FAQ: Interlocking Base Prep
Get fast answers to common base prep questions. If your site is unique, our Mississauga team can assess soils, drainage, and loads to recommend a base approach that lasts in GTA conditions.
- How deep should the base be for a patio vs. driveway?
Many patios perform with 4–6 inches of compacted base; driveways often need 8–12 inches. Depth depends on soil strength, drainage, and loads. We confirm on site and adjust per soil findings. - Do I always need geotextile fabric?
Not always. We add non-woven geotextile on mixed or weak soils to separate fines and stabilize. On firm, uniform soils, dense-graded base alone can suffice. - Is open-graded better than dense-graded?
Neither is universally better. Open-graded drains faster and can reduce frost heave risk; dense-graded offers excellent strength and value. We choose based on soil, water, and load conditions. - What slope should I aim for?
Target 1–2% away from structures. That’s roughly 1/8 to 1/4 inch of fall per foot, which sheds surface water without feeling sloped underfoot. - When can I use polymeric sand?
Joint sand goes in after pavers are set and edges are installed. Follow the product’s 2025–2026 instructions for dry joints, staged wetting, and a rain-free cure window.
Related Articles
Explore adjacent planning topics to round out your project: retaining wall drainage basics, landscape design and build sequencing, and paver joint sand care. These concepts align with our GTA installation standards.
- Retaining wall drainage and base interfaces
- Landscape design and build: from concept to walkthrough
- Paver joint sand maintenance and seasonal checks
- Sod installation timing when tying pavers to lawns
Key Takeaways
Successful interlocking base prep is a system: evaluate soil, compact uniform lifts, set a true 1-inch bedding layer, and lock edges. Choose dense-graded for versatility or open-graded for drainage. Verify slope and density as you go.
- Base failures—not pavers—cause most settlement and lippage issues.
- Thin, well-compacted lifts and documented checks cut callbacks dramatically.
- Drainage and edge control protect your investment through GTA winters.
Conclusion
If you build the base right, pavers stay put. The best installs in the GTA pair soil understanding with disciplined compaction, drainage planning, and clean edges. That’s how we deliver patios and driveways that look intentional on day one and stay sharp through the seasons.
- Book a site assessment to confirm the right base method for your soil and loads.
- Ask for layer thickness logs, compaction pass counts, and slope checks.
- Align planting beds, edging, and sod tie-ins to keep joints clean long term.
Ready to upgrade curb appeal or build an outdoor living zone that lasts? Our Mississauga team handles design, installation, and maintenance-minded planning across the GTA—so your space works beautifully year-round.