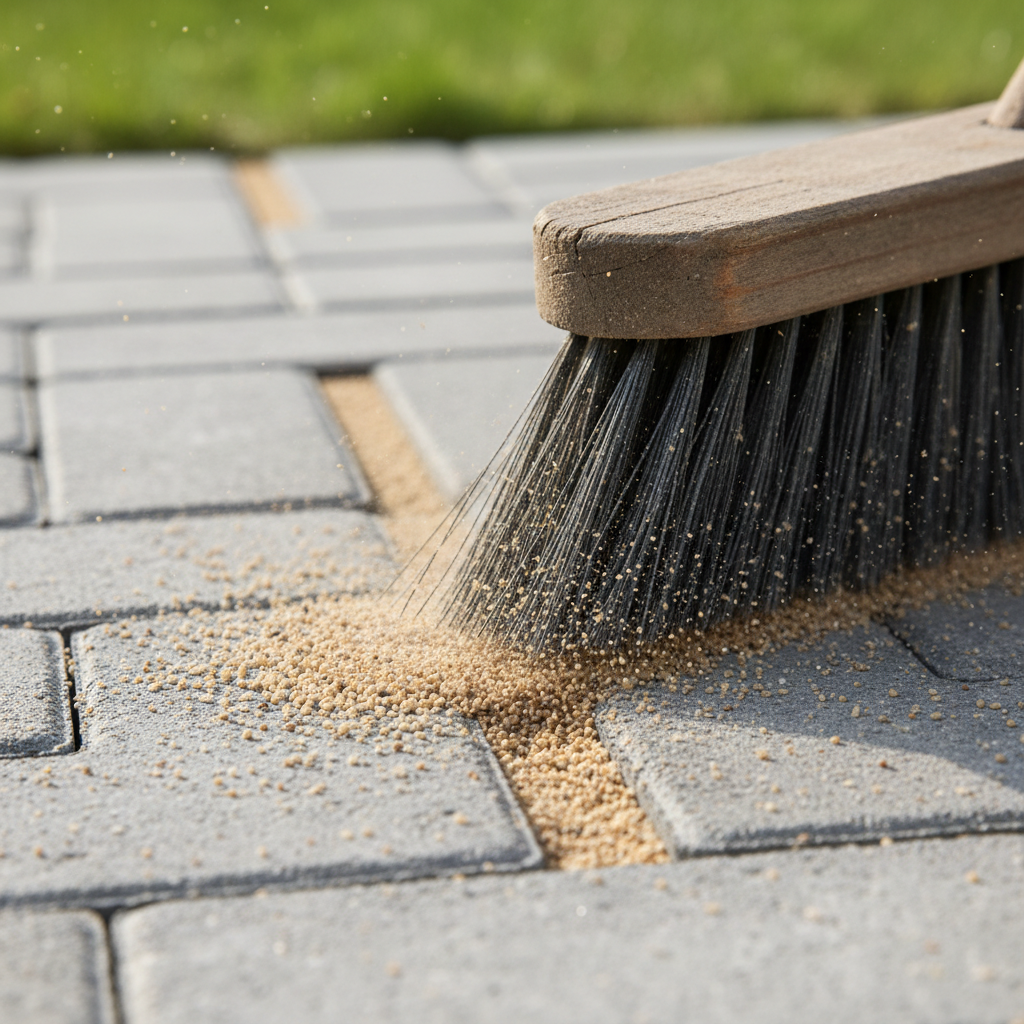
Paver joint sand tips are specific, proven practices that keep interlocking paver joints tight, stable, and weed-free. The essentials are dry conditions, correct joint width (about 1/8–3/8 inch), thorough sweeping, plate compaction in multiple passes, meticulous cleanup, and, for polymeric sand, low-pressure watering and a 24–48 hour cure without rain or traffic.
By HR Greenroots Landscaping — Mississauga, ON • Last updated: April 15, 2026
Summary
Use kiln-dried or polymeric sand matched to your joint width, compact pavers 2–3 times, and activate polymeric sand with a fine mist. Maintain a 1–2% surface slope, clean dust before wetting, and block traffic for 24–48 hours. These paver joint sand tips stop weeds, resist washouts, and keep GTA hardscapes crisp.
- Who this is for: Homeowners and property managers in Mississauga and the GTA maintaining patios, walkways, and driveways.
- What you’ll learn: Sand types, step-by-step installation, weather windows, winterization, weed/ant prevention, and pro checklists.
- Why trust this guide: HR Greenroots designs and builds interlocking in Ontario’s freeze–thaw climate with strong base prep and edge control.
- When to use: New installations, seasonal refreshes, and post-repair touch-ups—especially after heavy rain or spring thaw.
Quick Answer
For reliable Mississauga results, sweep kiln-dried or polymeric sand into 1/8–3/8 inch joints, compact 2–3 passes, then lightly mist if polymeric. Shield the area for 24–48 hours. At our 100 Matheson Blvd E unit 202 base, HR Greenroots Landscaping follows these paver joint sand tips on GTA projects to keep joints tight and weed-free.
What Is Paver Joint Sand?
Paver joint sand is the graded material that locks interlocking pavers together by friction and interlock. It fills 1/8–3/8 inch gaps, limits lateral movement, drains surface water, and blocks weeds and ants. Polymeric sand includes binders that harden after misting, while kiln-dried sand remains free-draining and flexible.
- Core purpose: Stabilize pavers by friction and interlock, limiting shifting during traffic and freeze–thaw.
- Two common formulas:
- Polymeric sand: Silica sand with binders that set after water activation.
- Kiln-dried sand: Dry, clean, angular sand that remains unbound for drainage and flexibility.
- Typical joint widths: ~1/8–3/8 inch for most modular concrete pavers (ICPI/CMHA practice). Wider joints may need specialty sands.
- Drainage role: Joints let rainfall infiltrate, reducing puddling when surfaces are sloped 1–2% (about 1/8–1/4 inch per foot).
- Ontario reality: Freeze–thaw cycles can exceed 60 per year in Southern Ontario, so stable, well-compacted joints are non-negotiable.
In our experience across Mississauga and the broader GTA, correctly selected and installed joint sand is the difference between a patio that stays sharp for years and one that needs constant touch-ups.
Why Paver Joint Sand Tips Matter in the GTA Climate
Correct joint sanding prevents heaving, washouts, and weed growth in Ontario’s freeze–thaw climate. Stable, well-compacted joints distribute loads, protect bedding layers, and keep edges intact. Following proven paver joint sand tips extends service life and reduces maintenance across patios, walkways, and driveways.
- Freeze–thaw stress: Repeated expansion and contraction demand joints that can flex yet hold shape.
- Storm intensity: Summer downpours can exceed 1 inch/hour; poorly filled joints wash out, undermining bedding sand.
- Winter deicers: Chloride products increase water cycling; neat joints reduce brine pooling and edge raveling.
- Weed pressure: Windblown seeds find shallow, dusty joints. Dense, well-filled joints limit germination surfaces.
- Safety around pools: Clean, level joints reduce toe-stubs and improve traction on pool surrounds.
Across Mississauga neighborhoods from Hurontario Street to Erin Mills, we see the same pattern: where joints are full and compacted, pavers stay aligned and edges remain crisp even after heavy spring melts.
How Paver Joint Sand Works (Friction, Interlock, and Water)
Joint sand locks pavers by friction and vertical confinement. Compaction vibrates grains deeper, increasing contact points. With 1–2% surface slope, joints pass water down to the bedding and base, while edge restraints and clean joints prevent migration, washouts, and weed harboring.
- Friction and interlock: Angular grains wedge against paver sides, resisting lateral movement under foot and vehicle loads.
- Compaction effect: Two to three plate-compactor passes typically raise joint density by 10–20% compared with a single pass.
- Edge control: Solid edge restraints (concrete, spike-in, or stone) hold the field; without them, sand migrates and joints open.
- Water behavior: With a 1–2% slope, surface water drains instead of ponding. Polymeric sand reduces washouts when cured.
- Traffic distribution: Full-height joints share loads across multiple units, reducing point pressure on bedding sand.
Here’s the thing: joint sand is not a cosmetic step. It’s structural. Skipping compaction or rushing the cure almost always shows up as wobbly edges and early weed growth.
Types of Joint Sand and When to Use Each
Choose polymeric sand for high-traffic, weed- or ant-prone areas and kiln-dried sand for maximum drainage and flexibility. Match the sand to joint width: standard blends for 1/8–3/8 inch, specialty mixes for wider gaps. Always compact and clean before activation or rain.
Polymeric Sand
- What it is: Silica sand plus binders (polymers) that harden after misting.
- Best for: Driveways, walkways with slope, pool surrounds needing tighter joints, and areas with ant or weed pressure.
- Activation window: Apply when the surface is dry; mist in 2–3 light passes. Keep traffic and rain off for 24–48 hours.
- Temperature: Most products prefer air/surface temps above ~50°F (10°C) during cure; always verify the bag instructions.
- Pros: Reduces washouts, limits weed growth, resists ants when fully cured.
- Watchouts: Haze risk if dust remains on the surface; over-watering can strip binders and cause joint settlement.
Kiln-Dried (Regular) Joint Sand
- What it is: Clean, angular, oven-dried sand that sweeps easily into tight joints.
- Best for: Permeable or highly drained patios, heritage looks, and low-traffic areas where flexibility is valued.
- Behavior: Remains unbound; seasonal top-ups may be needed after heavy rains or winter plowing.
- Pros: Excellent drainage, no polymer haze risk, easy to reapply.
- Watchouts: Can migrate with runoff; less weed and ant resistance than fully cured polymeric sand.
Comparison at a Glance
Criteria Polymeric Sand Kiln-Dried Sand Typical joints 1/8–3/8 inch 1/8–3/8 inch Weed/ant resistance High after cure Moderate Drainage Moderate High Maintenance Low–moderate Moderate (periodic top-ups) Haze risk Possible if dust left NoneAccording to long-standing Interlocking Concrete Pavement Institute guidance (now part of CMHA), joint width, base prep, and compaction quality matter more than brand labels; the right material, installed correctly, wins every time.
Paver Joint Sand Tips: Best Practices That Work in the GTA
Work dry, fill joints to within 1/8 inch of the chamfer, compact 2–3 passes, clean all dust, then mist polymeric sand lightly in stages. Maintain a 1–2% slope and block traffic 24–48 hours. Re-sweep low joints after cure. These paver joint sand tips keep joints tight and clean.
Work Only in Dry Conditions
- Moisture check: Sand must pour and sweep like sugar. Damp sand bridges and leaves voids.
- Weather window: Aim for 24–48 rain-free hours post-activation for polymeric sand.
- Surface dryness: Pavers should be bone-dry to avoid binder haze.
Fill to the Right Height
- Target height: Finish about 1/8 inch below the paver chamfer or surface edge.
- Why it matters: Prevents edge spalling and keeps sand from tracking onto shoes.
- Reality check: After first rain, joints can settle 1/16–1/8 inch—re-sweep if needed.
Compact More Than Once
- Pass count: Two to three plate-compactor passes (rubber mat recommended) for patios and walks; up to four on driveways.
- Effect: Each pass vibrates sand deeper, increasing contact points and reducing future settlement.
- Edge first: Start compaction along edges, then move inward in overlapping paths.
Clean Before You Wet
- Dust removal: Use a leaf blower on low, angled upward, to lift fines off the paver faces.
- Why it matters: Residual polymer dust is the main cause of haze after activation.
- Final sweep: A soft broom pass leaves faces spotless before misting.
Mist, Don’t Drench (For Polymeric)
- Technique: Two to three light mist passes, 2–3 minutes apart, are better than one heavy soak.
- Goal: Wet the joint fully without washing binders out of the top 1/2 inch.
- Temperature: Many products specify activation above ~50°F (10°C).
Protect the Cure
- Block time: No foot traffic for at least 24 hours; keep vehicles off for 24–48 hours.
- Rain risk: Early rainfall can pit or soften the surface—use tarps if an unexpected shower pops up.
- Inspect next day: Top up low joints after the first rinse-down.
Pro Tip Box
- Keep a stiff broom and a soft broom—use stiff to drive sand down, soft for final cleaning.
- Add a rubber pad to the compactor to protect textured pavers.
- For pool surrounds, choose lighter sand colors to manage heat absorption on bare feet.
Step-by-Step: Install and Refresh Paver Joint Sand
Dry the surface, sweep sand in multiple passes, compact 2–3 times, re-sweep to fill low spots, clean faces, then mist polymeric sand lightly and protect for 24–48 hours. Re-inspect after the first rainfall. This repeatable process delivers consistent, tight joints.
- Verify conditions: Surface and joints are fully dry; wind is light; temperature is above 50°F (10°C) for polymeric.
- Initial sweep: Distribute sand across the field and work it diagonally to the joints.
- First compaction: Plate-compact edges first, then the field. Expect joints to drop 1/8–1/4 inch.
- Top-up sweep: Refill low joints to ~1/8 inch below the chamfer.
- Second compaction: Repeat passes. On driveways, consider a third pass.
- Clean faces: Use a blower on low and a soft broom to remove all dust.
- Activate (polymeric only): Mist in 2–3 light passes, allowing soak-in between passes.
- Protect: Rope off the area for 24–48 hours. Keep sprinklers off.
- Next-day check: Top up any visible lows and brush away residues.
Quick Process Table
Stage Target Checks Dry setup No moisture Sand pours freely; paver faces dry Sweep-in Full joints About 1/8 inch below chamfer Compaction 2–3 passes Edge-to-center, overlapping paths Clean No dust Soft broom + low blower Activation Light mist 2–3 passes, no flooding Cure 24–48 hours No traffic or rainLocal Tips
- Tip 1: In Mississauga, schedule polymeric activation after morning dew burns off—late morning along Matheson Blvd E usually gives the driest surface.
- Tip 2: Aim spring refreshes for late April to mid-May, after freeze–thaw swings slow and before Victoria Day gatherings.
- Tip 3: Near busy corridors like Hurontario, dust settles fast—do your final blower pass immediately before misting to avoid haze.
IMPORTANT: These tips reflect HR Greenroots’ Ontario-focused, maintenance-minded approach from our 100 Matheson Blvd E unit 202 base.
Tools and Materials We Recommend
Use a stiff broom, soft broom, plate compactor with a rubber pad, leaf blower on low, and clean watering nozzle. Choose polymeric or kiln-dried sand matched to your joints. Keep tarps, edging repair spikes, and a hand tamper ready for touch-ups.
- Stiff-bristle broom for driving sand into joints.
- Soft push broom for final surface cleaning.
- Plate compactor (add a rubber pad for textured pavers) for 2–3 passes.
- Leaf blower on low power to remove dust without blowing joints out.
- Hose with fine-spray nozzle to mist polymeric sand.
- Tarps for sudden showers and to shade hot surfaces.
- Hand tamper for tight areas steps and corners where plates can’t reach.
- Edge restraint materials (spikes or concrete) to fix any movement you discover while compacting.
For a deeper hardscaping overview from another Ontario contractor’s perspective, this interlocking overview outlines regionally relevant considerations. And if you’re comparing applications, see a driveway pros and cons discussion for real-world tradeoffs.
Weed, Ant, and Winterization Strategies
Keep joints full and compacted, brush debris weekly, and avoid overuse of salt. For ants and weeds, polymeric sand plus clean edges and slope control deliver the best results. In winter, use plastic shovels and gentle deicers to protect joints.
- Weed control: Dense, clean joints deny seedbeds. Spot-treat invaders early with manual removal or targeted treatments.
- Ant deterrence: Fully cured polymeric sand makes tunneling difficult; seal entry points along edges.
- Snow tools: Use plastic blades and raise snowblower skids to avoid scraping joints.
- Deicers: Go easy—over-application accelerates water cycling. Sand or calcium magnesium acetate are gentler options.
- Spring check: After thaw, expect 1/16–1/8 inch settlement in spots; re-sweep to top up.
We’ve found that a simple 10-minute weekly sweep prevents 80% of issues homeowners report in late summer—most problems start with dust and debris that hold dampness.
Case Studies: Mississauga and GTA Examples
On real GTA projects, consistent sanding and compaction kept joints tight after storms and through winter. Driveways improved stability with a third compactor pass. Pool surrounds stayed smooth by finishing joints slightly lower and choosing lighter sand for comfort.
- Cooksville driveway refresh: A 600 sq ft interlocking driveway near Dundas St E had recurring weed growth. We switched to polymeric, did four plate passes, and protected for 48 hours. The following season showed virtually no regrowth and no washout after two major storms.
- Erin Mills patio tune-up: A shaded, tree-lined patio collected pollen dust. After deep cleaning, we used kiln-dried sand for better drainage and set joints 1/8 inch below the chamfer. Weekly sweeping kept surfaces clean and slip-resistant.
- Pool surround in Meadowvale: Barefoot comfort was a priority. We selected a light-colored polymeric blend, emphasized meticulous dust removal, and enforced a 48-hour cure. Post-install checks showed smooth joints and no edge abrasion.
These projects mirror our standard interlocking and pavers practice: strong base prep, clean edge control, and maintenance-minded planning across the GTA.
FAQ: Paver Joint Sand
Use polymeric sand for tighter, longer-lasting joints and kiln-dried sand for maximum drainage. Work dry, compact multiple times, clean faces, and protect the cure. Refill low spots after the first rainfall. Avoid heavy deicers and scraping tools in winter.
How dry does the surface need to be before sanding? Bone-dry. Any surface moisture traps fines and causes bridging. If you can pinch sand and it clumps, wait. We aim for at least a few consecutive dry hours (often late morning to afternoon) before sweeping and compaction. Is polymeric sand always better than regular sand? Not always. Polymeric is great for weed/ant resistance and storm stability. Kiln-dried sand drains better and is simpler to reapply. We match the sand to joint width, traffic, drainage goals, and nearby vegetation. How many compactor passes are enough? For patios and walkways, 2–3 passes usually achieve good density; driveways may benefit from a fourth. Overlap your paths and start at the edges. Use a rubber pad for textured pavers to protect the surface. Why do I see haze after polymeric sand? Dust left on paver faces binds during activation, leaving a whitish film. Prevent it with a thorough soft-broom and low-power blower pass before misting. If haze appears, mild cleaning solutions and gentle agitation can reduce it. When should I re-sand joints? Inspect every spring and after heavy storms. If joints sit more than ~1/4 inch low or you see movement near edges, re-sweep and compact. Address edge restraint issues before adding more sand.Thinking about a full refresh?
If your patio or driveway also needs grading fixes, edge restraint repairs, or new pavers, our design–build team can integrate re-sanding into a cohesive plan. We coordinate interlocking, sod installation, fencing, and stone work so the space functions as one system.
Conclusion
Dry conditions, correct joint height, multiple compactor passes, spotless faces, and a protected cure are the proven formula. Match sand to your use-case, re-check after first rain, and keep edges tight. These steps deliver durable, weed-resistant joints across Mississauga and the GTA.
- Key Takeaways
- Work dry and fill joints to ~1/8 inch below the chamfer.
- Compact 2–3 times (up to 4 on driveways) for stable interlock.
- Clean faces before any polymeric misting to avoid haze.
- Protect for 24–48 hours, then top up low spots.
- Adopt weekly sweeping and spring checks for long-term results.
- Next steps: Walk your space, note low joints, and pick a sunny, calm day to refresh. If edges or grading look questionable, bring in a pro.
Talk to HR Greenroots Landscaping for coordinated interlocking, landscape design and build, and maintenance planning across Mississauga and the GTA. We’ll right-size the scope and set you up for an easier season.