
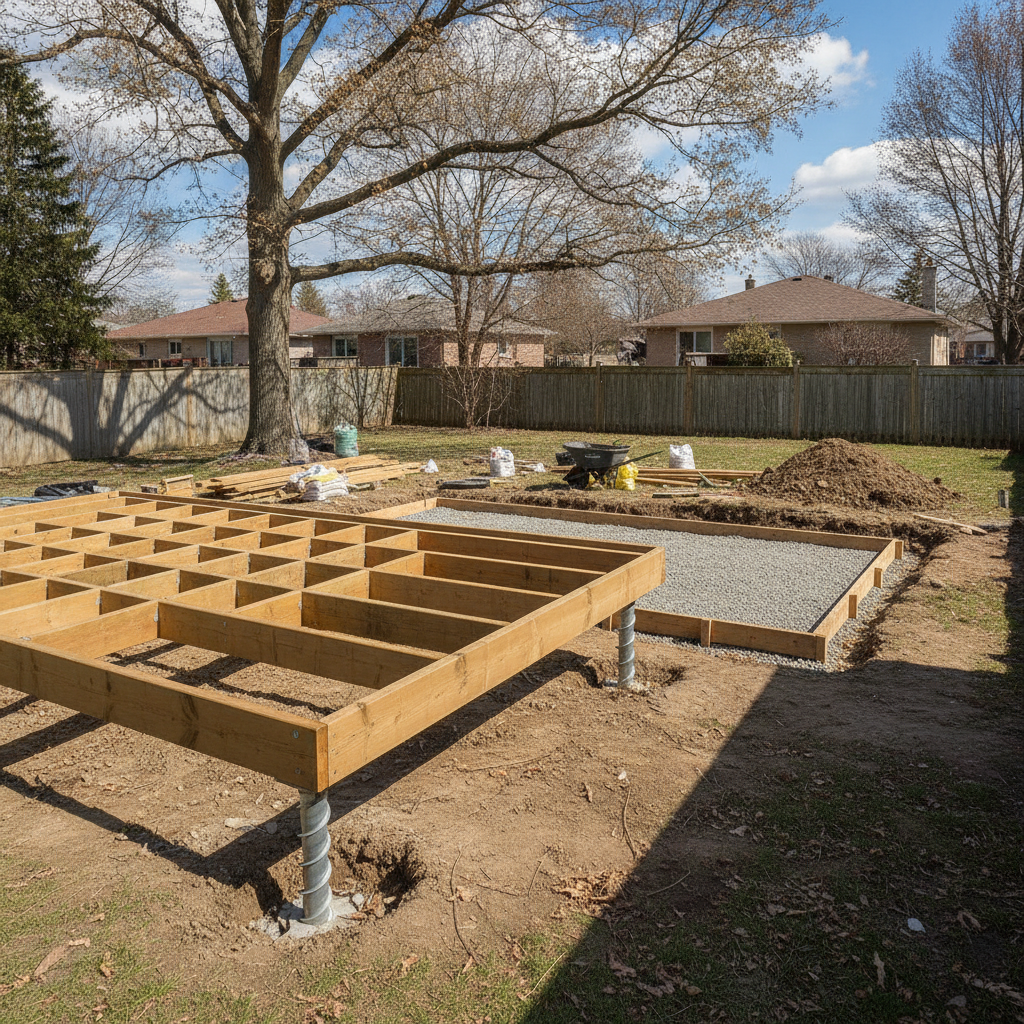
Mississauga deck installation planning is a structured process: define how you’ll use the space, verify City permit triggers, engineer footings below local frost, set grading and drainage, and tie the deck into interlocking, fencing, retaining, sod, and planting. We handle this end-to-end so your yard functions as one coordinated system.
Quick answer: Plan a Mississauga deck by confirming permit thresholds, designing footings to about 1.2 m (≈48 in) below grade for frost, coordinating drainage and grading, and integrating stairs and landings with interlocking and planting. HR Greenroots Landscaping sequences these pieces so you avoid rework and delays.By HR Greenroots Landscaping • Last updated: 2026-07-10
Service area Mississauga and the Greater Toronto Area (GTA) Core services Deck design-build, interlocking & pavers, fencing, retaining walls, sod, stone work, sheds, landscape design Consultation On-site assessment with coordinated design-build plan Hours Open daily (24/7 scheduling availability) Average rating 4.9/5 from verified client reviews- Overview: what you’ll learn
- What planning involves
- How to plan a deck (7 steps)
- Permit requirements to know
- Choose the right deck for your lot
- Connect the deck to your landscape
- Common planning mistakes
- FAQ
Local tip from our Mississauga crews
Around Lambton College and Saigon Park, we routinely hit dense clay under 6–10 inches of topsoil. We pre-plan helical pile or deep footing elevations, route downspouts to drains, and set paver bases before framing. Doing it in this order avoids heavy-equipment remobilization and keeps lawns intact.
Overview: what you’ll learn
This guide shows exactly how we plan Mississauga decks: the seven-step workflow we use, typical frost and guard thresholds we design around, soil and grade realities, and how to synchronize decks with interlocking, fencing, retaining walls, sod, and planting so everything works as one space.
We’re a design-build team. That means the same crew that plans your deck services also coordinates grading, landscape design, stone work, and fencing so edges, stairs, and drainage line up the first time.
What Mississauga Deck Installation Planning Actually Involves
Practical deck planning in Mississauga matches use, structure, and site. We size to real furniture and traffic, design footings to about 1.2 m below finished grade, plan guard and stair details early, and lock in drainage, downspouts, and paver landings so the deck ties cleanly into the rest of the yard.
We start with use. Dining for six, a grill zone clear of doors, or a shaded lounge? Those choices set square footage and circulation. We aim for 36–48 inches of clear walking space around dining and grill areas so doors don’t pinch movement.
Structure follows soil. In our experience, clay around Mississauga moves with freeze–thaw. We favor galvanized helical piles on most backyards because they torque into stable strata and resist heave better than shallow tubes. Where access or budget suggests tubes, we still design for ~1.2 m embedment and a compacted granular base.
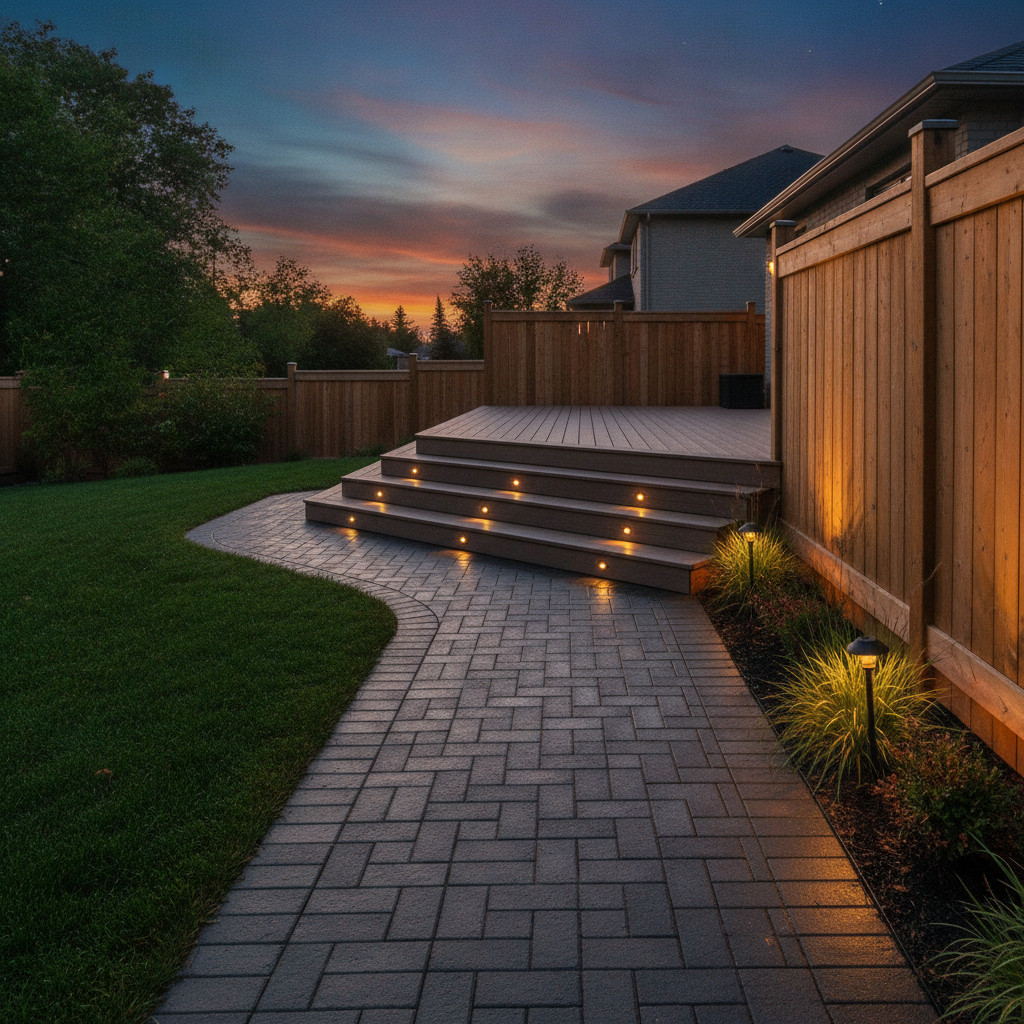
Details like guards and stairs aren’t afterthoughts. We coordinate them with interlocking landings and lighting at the concept stage, not once framing is up. That’s where standalone deck quotes often unravel—interfaces get improvised, and you inherit trip edges and awkward risers.
Step-by-Step: How to Plan a Deck Installation in Mississauga
Our seven-step plan: define uses and size, map site constraints, choose piles/footings and framing, set preliminary grades and drainage, check permit triggers, design interfaces with pavers and planting, and lock in build sequencing. One drawing set pulls this together for smooth approvals.
- Define uses and size. Seat counts, grill placement, shade options, and 36–48 inch walk lanes. We sketch traffic from door to yard so chairs and doors never fight each other.
- Map constraints. Utility locates, downspouts, hose bibs, AC units, trees, and slopes. Note window sills and door thresholds to avoid odd step heights.
- Choose structure. We default to helical piles on clay, set roughly 1.2 m below grade; pick joist spans and beams that keep bounce down and stair treads consistent.
- Set grades and drainage. Before framing, we design paver base elevations, trench drains if needed, and downspout routes so water never cuts across wood or walkways.
- Check permit triggers. We treat decks ≈600 mm (≈24 in) or higher above grade, attachments to the house, and guard/stair conditions as likely to need permits. We prepare clear drawings for fast review.
- Design interfaces. Align stairs with interlocking landings, add lighting conduits, plan bed edges and sod transitions so everything looks built-together.
- Sequence the build. Excavation and retaining wall footings first, then piles, framing, pavers, fencing, and finally sod/planting. One schedule, no backtracking.
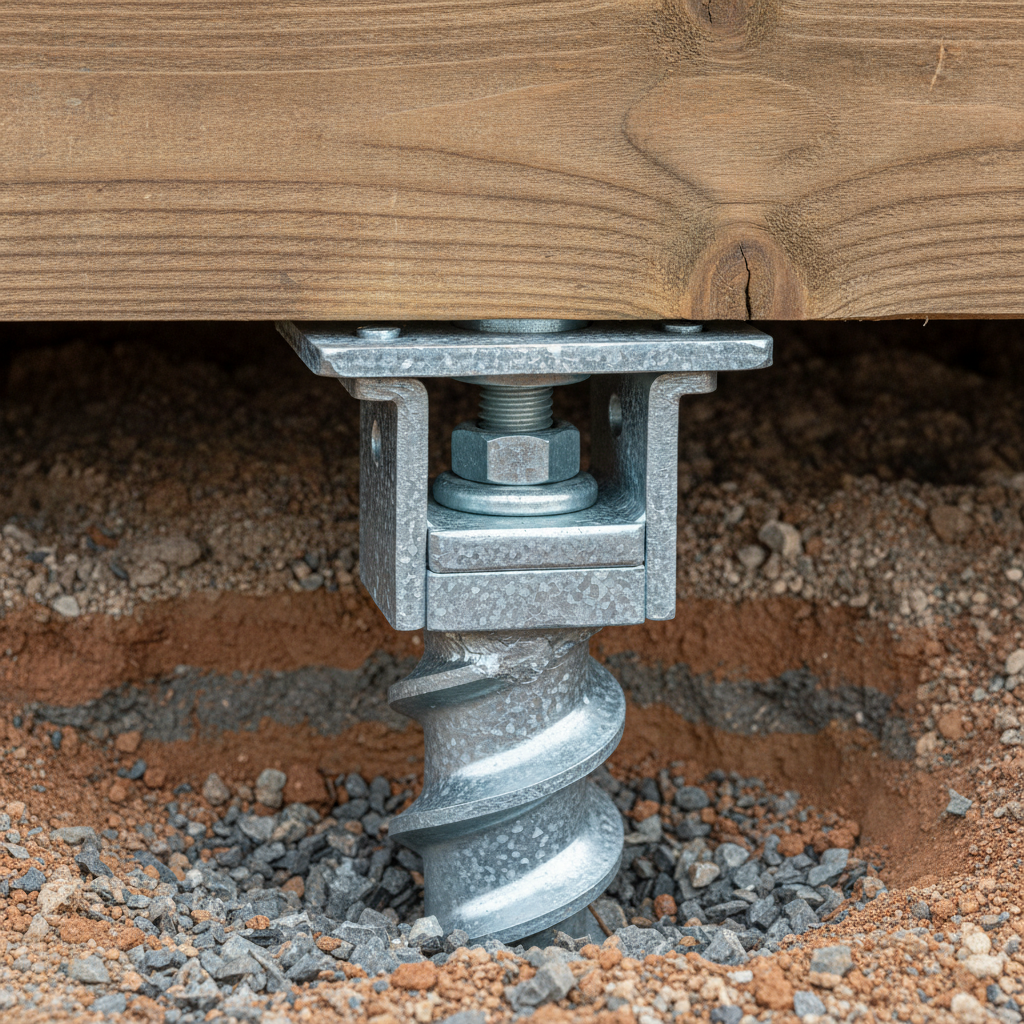
Field note: We once rebuilt a landing for a Cooksville homeowner who skipped a downspout reroute. One winter later the interlocking settled ~40 mm beside the step. We now route water on paper first, then dig.
Mississauga Permit Requirements You Must Know Before You Build
Plan for a permit when your deck is around 600 mm (≈24 in) or higher above grade, attaches to the house, or needs guards and stairs. Footings should reach frost depth, and drawings must show structure, guards, and site drainage. Submit a clear set to speed up ePlans review.
We’ve found City reviewers move faster when your drawings include: footing depth and type (helical or concrete), beam/joist sizing and spans, guard layout, stair details, and a simple grading diagram. The City’s ePlans portal accepts layered PDFs—we label each sheet so inspectors find details quickly.
Many homeowners compare approaches—from network installers promoted by big-box stores to boutique designers like Paul Lafrance Design. Those teams can deliver great decks. Our angle is different: we integrate grading, interlocking, fencing, retaining, and planting under one plan so the deck works with the whole yard.
For layout inspiration that pairs well with permit-ready decks, see this regional take on landscape design ideas. While not City policy, it helps visualize circulation you’ll later document on plans.
Choosing the Right Deck for Your Mississauga Property (Lot Size, Grade, and Soil)
Match deck size to activities, design multi-levels for slopes, and choose materials that fit maintenance goals. In clay-heavy areas, we favor helical piles and pay close attention to drainage. Integrate stairs with interlocking landings so movement feels natural across the yard.
Small lots. Efficient layouts shine: corner benches, slim-profile railings, and 36-inch walk lanes. We often set a 10–12 ft main span with built-in seating to save space.
Sloped yards. Short runs of steps beat one tall stair. We use low retaining walls to hold base and create level pads for grills or lounge zones.
Materials stance. Pressure-treated is economical but needs finishing. Composite resists moisture and is our go-to for shade or drip lines where wood weathers fastest. We compare specifics in our pressure-treated vs. composite guide.
Local considerations for Mississauga
- Clay pockets near Lambton College hold water. We set piles deep and slope pavers 1–2% away from risers to avoid ice at stair bottoms.
- Spring thaws saturate topsoil. We schedule heavy excavation before framing to prevent rutting around future lawn and beds.
- Plan conduits for step lights and soffit outlets during design; retrofits through finished framing are messy and slow.
How Your Deck Connects to the Rest of Your Outdoor Space
Great decks are connectors. We align landings to interlocking joints, add low retaining where slopes require, coordinate fencing for privacy, and finish with sod and planting plus clean edge control. The result feels intentional from driveway to back door.
Real-world sequencing that saves money:
- Retaining walls first. We pour retaining footings and set drains while the excavator is already on site—no second mobilization.
- Piles, then framing. With retaining set, we torque piles to capacity and frame to final elevations.
- Pavers, then fence. Interlocking landings go in before fence posts so step clearances and gates are perfect.
- Sod and planting last. Fresh turf and beds go in once all heavy work is done, with sharp edging to hold lines.
See how we keep edges and grades crisp in our seasonal maintenance planning notes. For driveway-to-deck flow, consider driveway widening so guests arrive on lit, stable paths. For paver interface ideas, this regional patio and walkway planning piece shows joint patterns and edge control that translate well here.
 Plan once, build right. Book a design-first site assessment so your deck, interlocking, fencing, retaining, sod, and planting align in one plan.
Explore our deck services to get started.
Common Planning Mistakes Mississauga Homeowners Make
We see five repeat issues: undersized walk lanes, no drainage routing, stair landings without hard surface, shallow footings in clay, and treating the deck as a standalone trade. Fix them on paper and you’ll save weeks during construction—and winters afterward.
- Too tight around furniture. We design 36–48 inches of clear path so doors, chairs, and grills don’t collide.
- No drainage plan. Water follows gravity. We slope surfaces 1–2% and pipe downspouts to safe outlets.
- Soft landings. Stairs into lawn turn to mud. We integrate interlocking landings with clean edges.
- Shallow or inconsistent footings. Clay moves. We set piles or tubes to roughly 1.2 m and verify capacity.
- Disjointed trades. Deck up first, then rework everything else. One coordinated plan prevents that.
For broader renovation context in the city, local builders outline coordination challenges across permits and trades here: regional construction services. Different specialty, same lesson—sequence wins.
FAQ: Mississauga Deck Installation Planning
These quick answers cover permits, soils, materials, timing, and trade coordination. Use them as a pre-build checklist for Mississauga backyards.
Do I always need a permit for a new deck in Mississauga?
Not always, but plan for one if your deck is about 24 inches (600 mm) or higher above grade, attaches to the house, or includes guards and stairs. We prepare clear drawings—structure, guards, and drainage—to streamline ePlans review.
How do clay soils affect my deck plan?
Clay holds water and moves during freeze–thaw. We favor galvanized helical piles torqued to capacity or set concrete tubes roughly 1.2 m below grade with proper base prep. We also slope pavers and route downspouts away from stairs and wood.
Should I plan interlocking and fencing with the deck?
Yes. Designing landings, walkways, and privacy together locks in clearances and prevents trip edges. We align stairs to interlocking joints and set fence posts after pavers so gates and step heights feel right.
What’s the best time of year to build?
We build spring through fall and use winter for design and permits. On clay sites, aiming pile work for drier windows keeps adjacent beds and future lawn in better shape.
Can you help if I already hired a deck builder?
Often. We coordinate grading, interlocking, fencing, sod, and planting around an in-progress deck. A short design huddle prevents clashes and keeps lighting, drainage, and edges consistent.
Key takeaways
- Design for frost and clay: ~1.2 m footings and clear drainage routes.
- Use helical piles where possible; they resist movement on clay.
- Lock in interfaces: interlocking landings, lighting, and clean bed edges.
- Sequence saves: retaining and drainage first, then piles, pavers, fence, and planting.


