
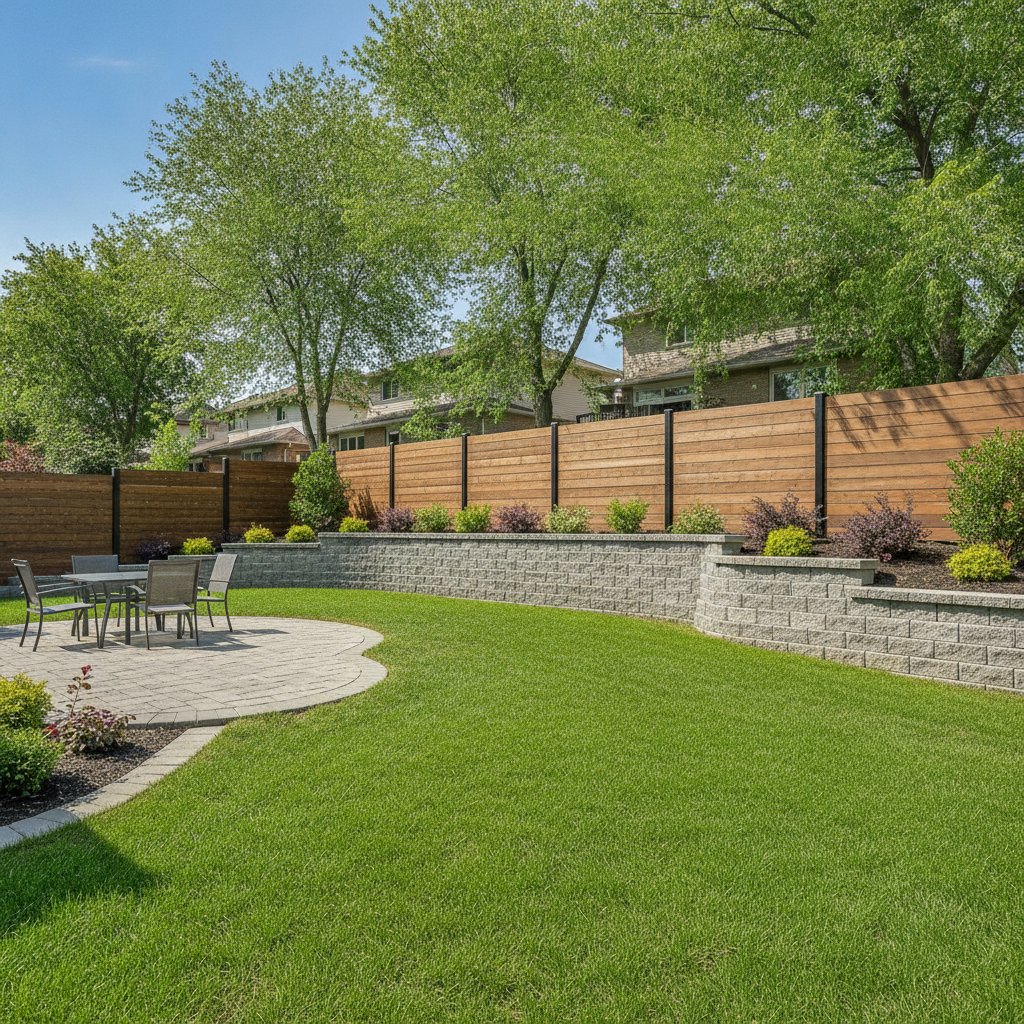
Fence and retaining wall coordination is the integrated planning and construction of both structures so they share proper footing, drainage, setbacks, and frost-depth design. In Mississauga’s clay-heavy soils and freeze–thaw cycles, treating them as one system prevents leaning fences, bulging walls, water issues, and permit headaches. HR Greenroots handles both as a single, coordinated build.
Quick answer: Coordinate the fence and retaining wall as one engineered system: matched elevations, correct post placement (behind or through the wall with sleeves), geogrid and drainage tied together, and frost-depth footings. In Mississauga, this integrated approach avoids post heave, wall bowing, and bylaw conflicts—and it’s exactly how HR Greenroots builds.By HR Greenroots Landscaping · Last updated: July 8, 2026
Service areaMississauga and the Greater Toronto Area (GTA) HoursOpen 24/7 (Google Business profile) Verified rating~4.9–5.0 average from verified client reviews Core servicesFence installation, retaining walls, interlocking & pavers, sod, decks, stone work Coordination advantageSingle-team design–build for fences + walls to align elevations, drainage, and setbacks- Overview: why coordinate fence + wall
- Why separate contractors fail
- How we plan both together
- Choosing the right combo for your slope
- Common mistakes to avoid
- What to expect in the GTA
- FAQ: Fence and retaining wall coordination
Mississauga-specific design insight
In Erin Mills and Cooksville we routinely hit frost depths near 36 inches with slow-draining clay; in Port Credit, sandy loam percolates faster but needs erosion control. We plan outlet locations to daylight and use riverstone bands so freeze–thaw and spring melt don’t load the wall.
Overview: The case for a coordinated fence + wall
Coordinating your fence and retaining wall means engineering them as one system: shared layout, compatible foundations, and integrated drainage. This prevents differential movement in freeze–thaw seasons, keeps lines straight, and satisfies city setbacks. It’s the best way to protect property lines, privacy, and long-term stability.
You’ve got a 4-foot drop along the property line, a neighbor asking for privacy yesterday, and two contractors who’ve never spoken. By spring, the fence blames the wall and the wall blames the fence. One design–build team eliminates that finger-pointing and owns the result.
At HR Greenroots, we coordinate retaining walls, privacy fencing, and adjacent interlocking patios. We plan frost-depths, geogrid lengths, and post locations before the first shovel hits the ground—and we document every stage.
For related planning guidance, see our Mississauga fence planning guide and our retaining wall service details.
Why fence and retaining wall coordination fails when treated separately
Split scopes create structural conflicts: posts drilled into block cores, geogrid cut short to “fit,” drains blocked by patios, and frost-depth footings ignored. One winter later, walls bow and fences lean. A single engineered plan prevents those conflicts.
Failures we repair in Mississauga
- Posts in the wall core: We’ve pulled 4x4s and even 6x6s set right through block cells. Water follows the post, saturates backfill, and the wall loses confinement.
- Geogrid chopped to make space: On Cooksville slopes, cutting grid short turns a reinforced wall into a gravity stack. That’s a rebuild waiting to happen.
- Shallow, non-frost footings: Posts heave in February and rack panels. We set footings to local frost depth and lock hardware torque on handoff.
- Buried outlets: We’ve uncovered drains hidden under mulch or interlock. We extend to discrete grates so water actually leaves.
Every manufacturer install guide says the same thing—and we’ve seen what happens when crews ignore it: walls move, fences fail, and neighbors get involved.
How HR Greenroots plans both structures together (step-by-step)
We align property lines, elevations, and frost-depth footings; then sequence excavation, base prep, wall build, drainage, and fence installation. Posts go behind the reinforced zone by default; where setbacks are tight, we use engineered sleeves—never cutting geogrid.
- Survey + setbacks: Confirm property lines and utilities (Ontario One Call). We size steps and fence heights to meet Mississauga rules.
- Drainage first: Granular backfill, 4-inch perforated pipe, and outlet locations mapped before any post holes.
- Base + wall: We build with Unilock or Permacon block, laser-level first courses, and install geogrid (commonly every 2–3 courses based on design).
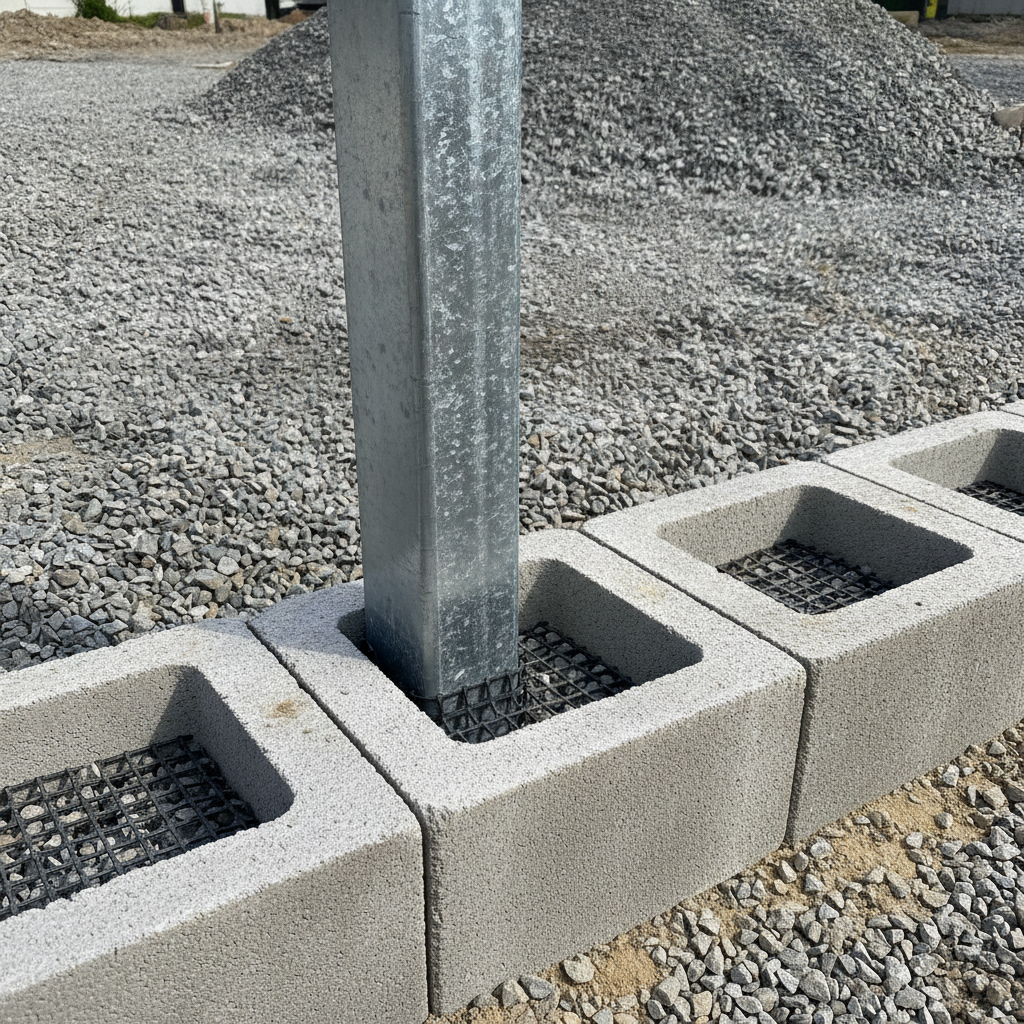
- Fence foundations: Preferred: posts behind the reinforced zone on frost-depth footings. Alternate: engineered sleeves through the wall mass.
- Finishes: Interlocking tie-ins, sod transitions, and riverstone bands to keep faces breathable.
- QA package: Photo log of geogrid lengths, outlet elevations, footing depths, and torque checks.
See how sequencing ties into adjacent hardscape in our retaining wall planning article and our fence installation timeline guide.
 Free site assessment: Get a coordinated layout for your fence + wall, including drainage and step placement. Book your visit via our fence installation service page or our retaining wall page.
Choosing the right wall and fence combination for your slope
For most Mississauga backyards, a segmental concrete block wall (Unilock or Permacon) with a cedar 6x6 post privacy fence works best. We set posts behind the reinforced zone and match step-ups to panel breaks for clean lines and reliable privacy.
Our real recommendations
- Segmental block + cedar privacy (6x6 posts): Warm look, predictable geometry, strong wind resistance.
- Armour stone + separate footings: We push back on armour stone with posts in gaps—it’s guesswork. Use stone for the wall, set fence posts in independent footings behind.
- Composite panels + concrete block: Modern, low-maintenance; sleeves only if setbacks demand, otherwise behind-zone posts.
Design factors that steer the choice
- Soils: Erin Mills clay favors longer geogrid and vigilant drainage; Port Credit sands need erosion control fabrics.
- Exposure: Corner lots with crosswinds call for deeper post embedment and stiffer panels.
- Adjacent hardscape: If an interlocking patio abuts the wall, we preserve outlets and add a riverstone relief band.
For wider hardscape context, manufacturers like Allan Block publish details echoed across trade mags. The takeaway: don’t pierce the reinforced zone, respect drainage, and plan footings as part of one system.
Common mistakes on sloped sites — and how to avoid them
The big three: cutting geogrid, blocking drains, and skipping frost depth. Keep posts out of the reinforced zone, daylight every outlet, and build footings to local frost. One crew, one plan, no conflicts.
- Caps before hardware: Cap chipping and misalignment follow. We set caps last after torque checks.
- Hiding outlets: Mulch and pavers bury weeps. We extend to grates with slope you can verify.
- Planting too tight: We maintain a riverstone band to protect the wall face and let moisture escape.
- No photo record: We log grid lengths, pipe slope, and footing depths so there’s proof.
Want to see how timing affects work? Our fence install timeline explains crew sequencing and inspections.
What to expect from a coordinated build in the GTA
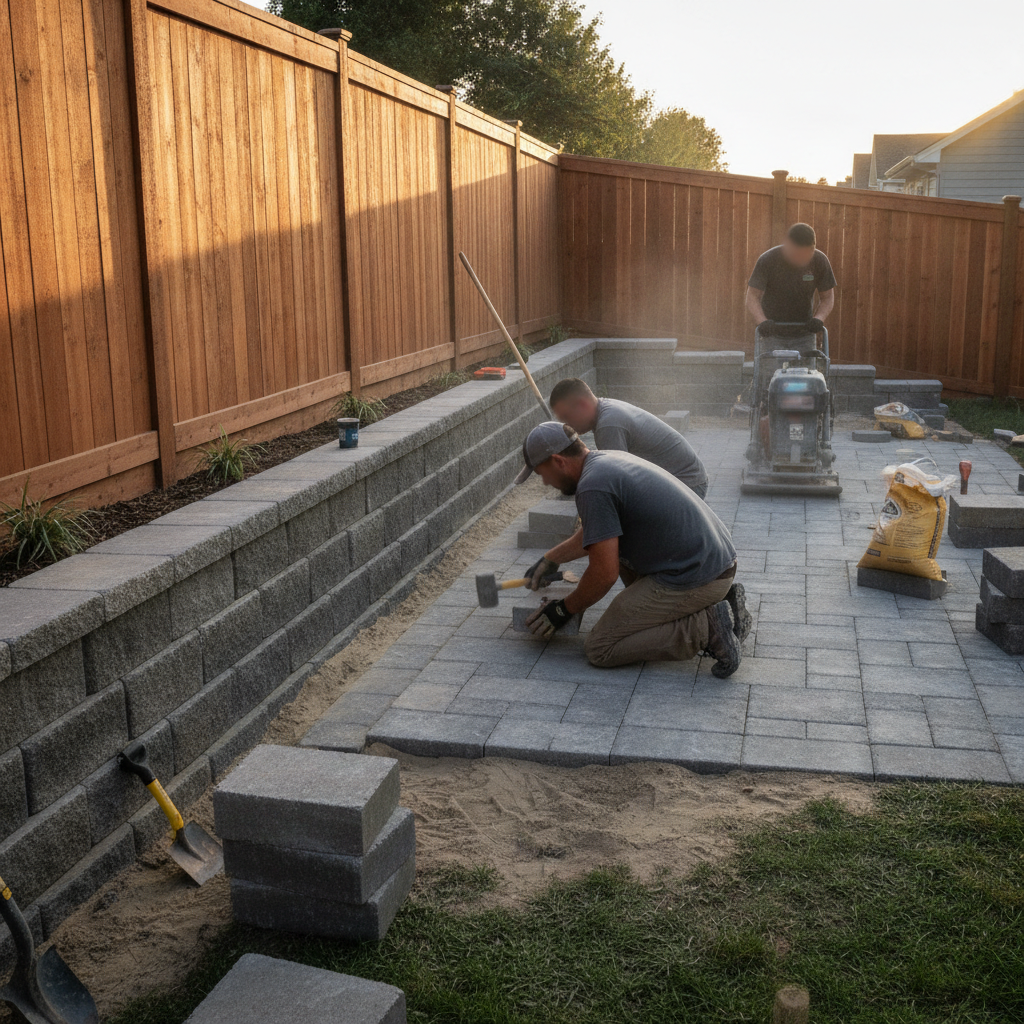
One contract, one schedule, and one accountable team. We finalize design, confirm any approvals, and sequence excavation, wall build, drainage, and fence installation—then finish with interlocking, sod, and planting so the yard reads as one space.
- Planning + approvals: We align heights and setbacks, then confirm requirements with neighbors and the city.
- Sequenced build: Base prep and wall first; drainage tied in; posts behind the reinforced zone; finish surfaces last.
- Care handoff: Maintenance notes for drains, snow loads, and seasonal checks—so the system keeps working.
Local considerations for Mississauga
- Clay-heavy subsoils in Erin Mills and Cooksville hold water. We prioritize clear drain outlets and avoid burying weep points.
- Freeze–thaw cycles demand frost-depth post footings around 36 inches; wind corridors near open parks affect panel choice.
- Setbacks on tight lots: we survey lines early so fences protect privacy without crossing property boundaries.
If you’re mapping a larger refresh, this overview on retaining wall drainage basics pairs well with our fence mistakes to avoid.
FAQ: Fence and retaining wall coordination
Should fence posts go inside the retaining wall?
No. Our default is behind the wall’s reinforced zone on frost-depth footings. If space is tight, we use engineered sleeves through the wall—never cutting geogrid—and we seal penetrations so water can’t track down the post.
Do I need permits for a fence on top of a wall in Mississauga?
Requirements depend on wall/fence height, location, and design. We confirm setbacks and any approvals during planning so the combined structure meets municipal rules. Handling both together simplifies reviews and avoids after-the-fact corrections.
Can a wall and fence be installed in separate seasons?
Yes, if the wall is engineered for the future fence load and post locations are reserved. We design sleeves or mark behind-zone footing spots during the wall phase and protect drainage outlets so the later fence doesn’t compromise performance.
What materials pair best for privacy and durability?
Segmental concrete block walls (Unilock or Permacon) with a cedar or composite privacy fence are proven in the GTA. For a natural look, use armour stone for the wall and set fence posts in separate footings behind. The key is independent fence foundations and preserved reinforcement.
Key takeaways
- Treat the fence and wall as one engineered system to prevent movement and water issues.
- Keep posts out of the reinforced zone; use sleeves only when setbacks force it.
- Plan drainage first; never bury outlets beneath patios or mulch.
- One contractor equals aligned elevations, faster schedules, and clear accountability.


