Fence installation mistakes homeowners make are preventable when you plan your layout, verify utilities and property lines, and set posts below frost depth with drainage. From our Mississauga office at 100 Matheson Blvd E unit 202, HR Greenroots Landscaping builds fences that stay straight, meet by-laws, and age well through Ontario winters.
By HR Greenroots Landscaping • Last updated: 2026-05-18
At a Glance
Avoid fence headaches by confirming property lines, calling utility locators, choosing rot-resistant materials, and setting posts below frost depth with drainage. A measured layout, staggered rails, and code-aware gate planning prevent sag, heave, and disputes—protecting weekends and curb appeal.
This complete guide is a practical blueprint from a Mississauga/GTA design–build team. You’ll get definitions, step-by-step flow, and the 15 most frequent errors we fix. We also include local by-law context, tools, mini case studies, and a quick table comparing post foundation options.
- What counts as a fence mistake—and why it happens
- Step-by-step install checklist with quality gates and rails
- 15 fence installation mistakes homeowners make most often
- Mississauga and Regional Municipality of Peel considerations
- Best practices, tool list, and real project examples
Overview and Table of Contents
- What is a fence installation mistake?
- Why avoiding mistakes matters
- Step-by-step: how installation works
- 15 common mistakes to skip
- Mississauga planning & by-laws
- Fence types & methods
- Best practices
- Tools & resources
- Mini case studies
- Comparison table: post foundations
- FAQ
- Conclusion & next steps
Need a second set of eyes? If you’re in Mississauga or the GTA, our design–build team can confirm lines, layout, and footing specs before you dig—so you don’t redo weekends later.
What Is a Fence Installation Mistake?
A fence installation mistake is a preventable error that shortens service life, violates local by-laws, or creates rework. Typical examples include shallow post depth, poor drainage, incorrect setbacks, and unverified property lines that trigger disputes or tear-outs.
Mistakes cluster in four zones we audit on every project: layout (lines, grades, and gates), structure (depth, bracing, fasteners), materials (species and coatings), and compliance (permits, utilities). Tightening those four removes most failure points. For instance, posts that miss frost depth often heave 0.5–1 inch during freeze–thaw, telegraphing as panel racking.
Why Avoiding Fence Mistakes Matters
Avoiding mistakes protects your investment, safety, and neighbor relations. Correct embedment, drainage, and alignment prevent frost heave, panel racking, and sag—while by-law and utility compliance prevents fines, outages, and rework.
- Lifespan: Posts set below frost line with 8–12 inches of clear stone shed water and resist heave for years longer than waterlogged footings.
- Safety: Plumb posts and braced gates reduce hinge stress; unbraced gates can drop over 0.25 inch in a season.
- Compliance: Height and setback rules keep projects legal and avoid forced relocations.
- Neighbors: Surveyed lines prevent encroachment—one of the most common causes of disputes.
Here’s the thing: the cheapest fix is the one you never need. We’ve rebuilt fences that failed within two winters because concrete trapped water against posts. A free-draining base could have doubled their service life.
How Fence Installation Works: Step-by-Step
Build a straight, durable fence by confirming lines, marking utilities, stringing layout, drilling below frost depth, and setting posts with free-draining bases. Attach rails level and staggered, hang plumb panels, and finish with braced gates and protective seal where appropriate.
- Site check: Confirm property lines, utilities, grades, and obstructions. Photograph corners and markers. Document easements.
- Layout: Set corner posts, pull taut strings 6–8 inches above grade, and mark even bays—commonly 6–8 feet for wood privacy lines.
- Drilling: Bore holes to or below local frost depth (often near 42 inches). Bell the bottom in soft soils for bearing.
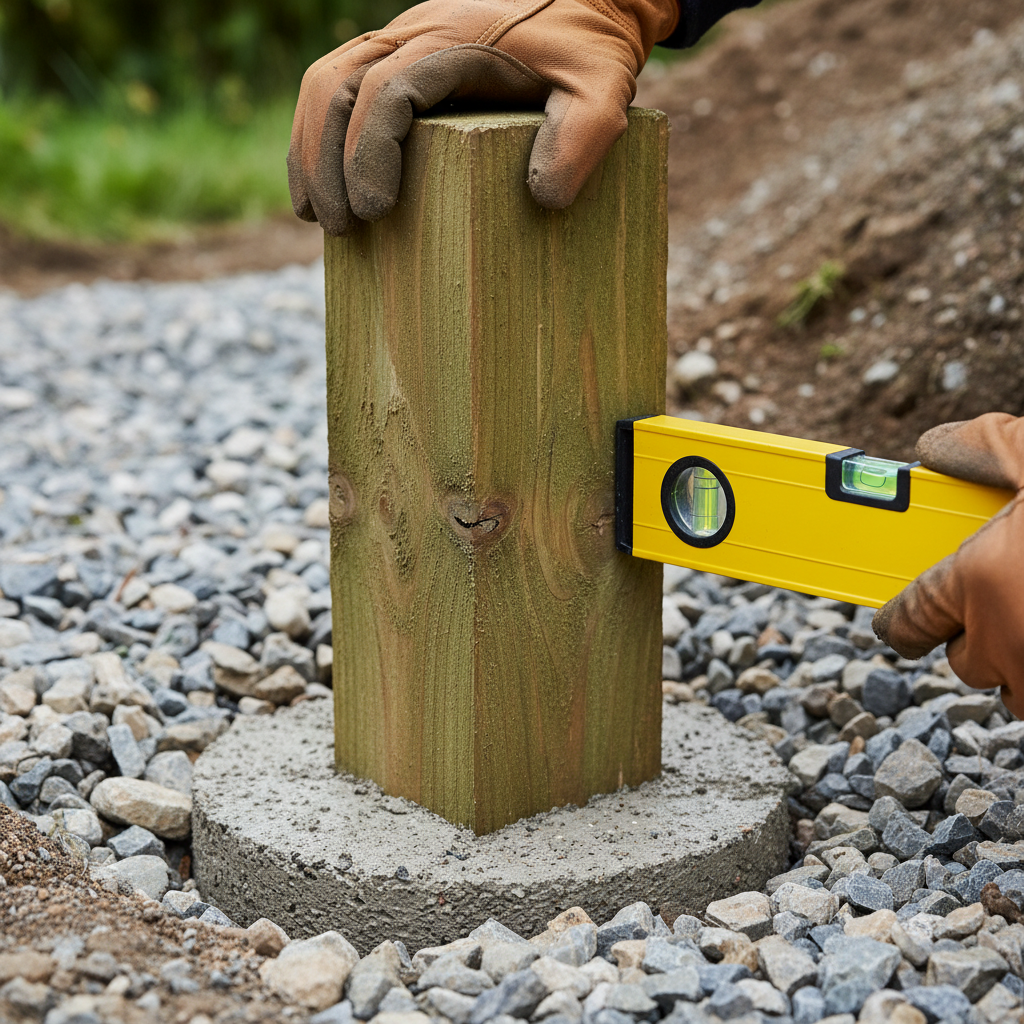
- Base & set: Add 8–12 inches of clear stone; set posts plumb; form a concrete collar at grade to lock and shed water.
- Rails: Stagger 2x4 rails so joints don’t align. Check level across three posts at a time.
- Panels/Pickets: Hang boards with consistent gaps. Predrill near ends to avoid splits. Maintain a 1–2 inch ground clearance.
- Gate: Brace in an inverted “V” or “Z.” Use heavy-duty hinges and a latch sized for the weight. Add a drop rod for double gates.
- Finish: Seal or stain where appropriate. Grade soil to slope away. Add gravel at drip lines to reduce splashback.
Pro tip: Stage hardware and fasteners per run. Mixing coatings—like bare steel screws with treated lumber—accelerates corrosion and shortens the fence’s life.
15 Common Fence Installation Mistakes Homeowners Make
The top fence installation mistakes homeowners make include skipping surveys, shallow post holes, no drainage, ignoring frost, poor bracing, and underspec hardware. Correct layout, embedment, materials, and code checks prevent sagging gates, heaved lines, and neighbor disputes.
Planning & layout errors
- Skipping a survey: Building off assumptions risks encroachment and forced relocation later.
- No utility locates: Striking gas or fiber halts projects and creates serious hazards.
- Ignoring grade: Level panels on slopes cause big ground gaps or binding; step panels or follow grade.
- Uneven bay spacing: Odd short end bays stress rails and look amateur compared to even spacing.
Structure & foundation errors
- Shallow holes: Posts must extend below frost line to resist heave and racking.
- No drainage stone: Waterlogged footings speed rot and movement, especially after spring thaw.
- Monolithic concrete: Full-depth concrete traps water; use gravel embedment plus a shaped collar at grade.
- No bracing during set: Unbraced posts drift out of plumb as collars cure and soil settles.
Material & fastening errors
- Wrong species/treatment: Non-rated lumber fails faster in ground contact; use ground-contact-rated posts.
- Mismatched fasteners: Non-compatible screws corrode with treated lumber; pick exterior-rated, compatible coatings.
- Overdriven nails: Crushing fibers weakens hold; screws offer better withdrawal resistance in many cases.
- Too-small hardware: Light hinges and latches sag under heavier privacy gates.
Finish & compliance errors
- No expansion gaps: Wood needs room to move; tight fits buckle with humidity swings.
- Skipping seal/stain: UV and moisture degrade unprotected boards faster—especially south or west exposures.
- Height/setback violations: Noncompliant fences risk fines and mandatory changes.
Mississauga Planning, By-Laws, and Regional Context
In Mississauga and the Regional Municipality of Peel, success starts with by-law checks, utility locates, and frost-aware footings. Confirm property lines, observe height/setback rules, and drill below local frost depth to keep fences stable through freeze–thaw cycles.
According to Ontario One Call, homeowners must request utility locates before digging—an essential step that protects people and underground infrastructure. City by-laws govern fence height, setbacks, and visibility near corners. For policy details and updates, see the City of Mississauga website. The EPIC College of Technology area has dense services near campuses, so white-line mark carefully.
Fence Types and Installation Methods
Choose materials and methods to match site conditions. Cedar and pressure-treated lumber suit privacy fences; chain-link and ornamental steel excel for durability; vinyl offers low maintenance. For posts, use gravel with a concrete collar or helical piles on saturated or swelling soils.
Popular fence styles (with pros/uses)
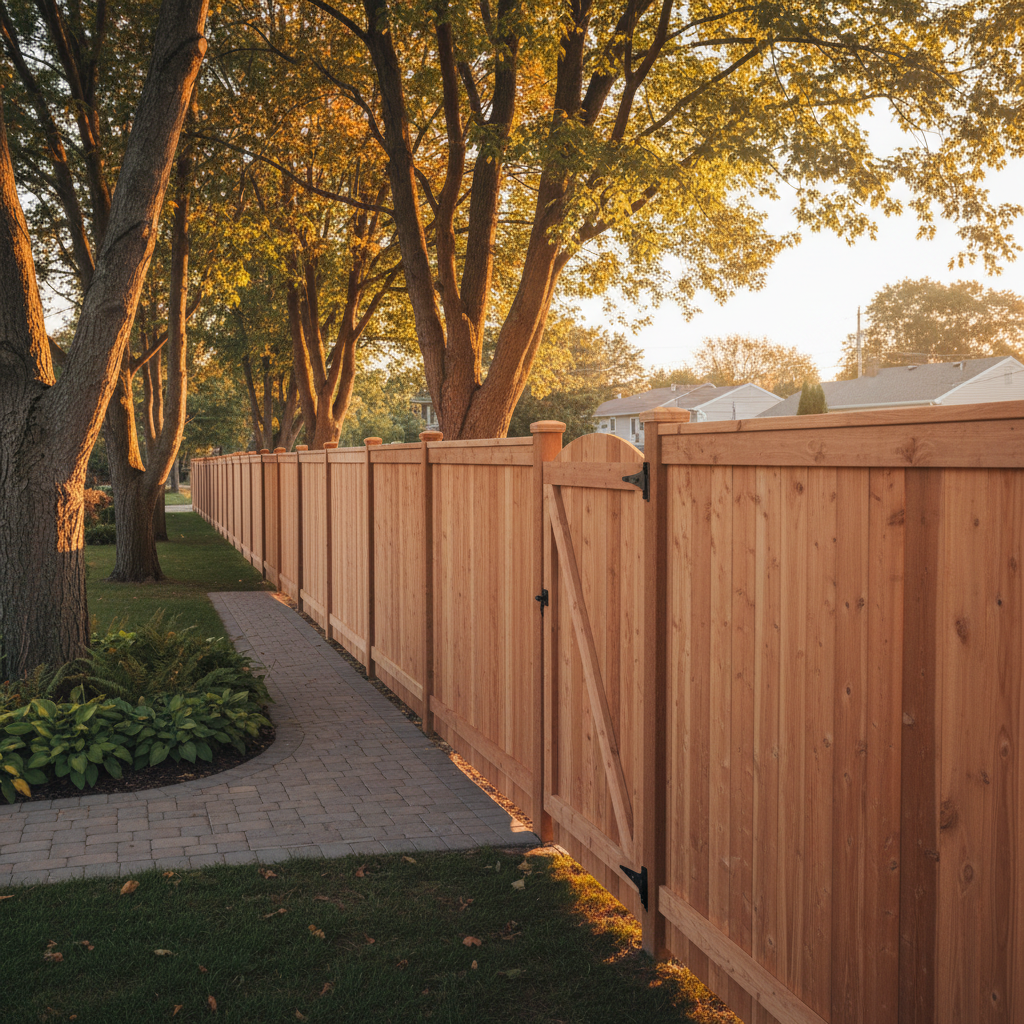
- Privacy (cedar or treated): Excellent screening and noise dampening; pairs well with garden suites or deck lines.
- Board-on-board: Alternating pickets reduce visible gaps when boards move—good near wind corridors.
- Shadowbox: Airflow-friendly; improved wind performance on exposed sites like park edges.
- Ornamental steel: Long lifespan; low upkeep; strong curb appeal at frontages and along interlocking walkways.
- Vinyl: Uniform look; quick cleaning; ensure UV-stable, reinforced panels for longevity.
- Chain-link: Practical boundary or pet containment; privacy slats and hedges soften the look.
Post setting approaches (when to use each)
- Gravel base + concrete collar: Our default for most yards; balances drainage with stability at grade.
- Full gravel set: Maximum drainage; plan for periodic re-tamping in looser soils.
- Helical piles with brackets: Recommended for saturated clay or heavy gates; immediate structural performance.
- Sonotube concrete: Useful where loads concentrate or adjacent to decks—design in drainage pathways.
Not sure which way to go? We match footing method to soils, exposure, and gate loads—similar to how we spec retaining wall bases or deck footings for long-term movement control.
Best Practices to Prevent Mistakes
Prevent mistakes by verifying lines, measuring twice, and building for water movement. Set posts plumb below frost, use drainage stone, select compatible fasteners, brace gates, and seal boards. Document by-law compliance and keep photos of locates and layout strings.
- Depth & drainage: 8–12 inches of clear stone under each post; keep a 1–2 inch gap at grade under pickets.
- Spacing: 6–8 foot bays for most wood fences; shorter spans for heavier styles or windy sites.
- Fasteners: Exterior-rated screws compatible with treated lumber; avoid galvanic mismatches.
- Gates: Use no-sag kits or diagonal braces; add a center support for double gates over wider driveways.
- Weather window: Avoid setting collars during freeze–thaw swings; protect fresh sets from driving rain.
- Documentation: Keep permits, locate tickets, and as-built photos with tape measurements for every run.
We also recommend pre-finishing where feasible. For example, pre-treating fence boards before installation reduces drip lines and speeds first-year maintenance.
Tools, Materials, and Resources
Successful installs pair quality tools with rated materials. Use an auger or post-hole digger, levels, string lines, and saws. Choose ground-contact-treated posts, exterior screws, and gate hardware rated for panel weight. Keep PPE, first aid, and dust control on hand.
- Tools: Auger, post-hole digger, shovels, 2–4 ft levels, string line, tape, circular saw, impact driver, clamps.
- Materials: Ground-contact posts, 2x4 rails, pickets/panels, geotextile (as needed), clear stone (¾ inch), ready-mix for collars.
- Hardware: Exterior screws, structural screws for gates, coated hinges/latches sized by weight.
- Safety: Eye/ear protection, gloves, utility marking paint, first-aid kit, dust masks.
- Regulatory: Request utility locates via Ontario One Call; review current rules on the City of Mississauga site.
Data point: wide privacy gates can exceed 70–90 pounds once framed and clad. Undersized hinges or latches are a leading cause of first-year sag in DIY builds.
Mini Case Studies: HR Greenroots in the GTA
Our Mississauga and GTA projects show how solid prep prevents rework. With surveyed lines and frost-aware posts, we stabilize privacy fences near slopes, fix sagging gates with upgraded hinges and bracing, and add wind relief using shadowbox panels in exposed yards.
- East Mississauga backyard: Replaced monolithic concrete with gravel + collar. After two winters, zero measurable heave; rails remain level.
- Streetsville corner lot: Confirmed setbacks and adjusted corner sightlines; inspection passed on first visit.
- Near Saigon Park: Swapped to board-on-board for wind relief; reduced racking during gusts.
- Port Credit infill: Used helical piles in saturated clay; heavy gate remains level through spring thaw.
- Driveway extension tie-in: Coordinated gate placement with new interlocking; resolved slope and clearance cleanly.
In our experience, the simplest wins are often layout-related: even bay spacing and string-tight alignment instantly elevate the finished look and performance.
Comparison Table: Post Foundations
Different footings manage water and movement differently. Gravel with a concrete collar balances drainage and stability. Full gravel drains best but needs periodic tamping. Helical piles excel in poor or wet soils and for heavy gates.
MethodBest ForProsWatch-outs Gravel base + concrete collar Most yards; freeze–thaw zones Drains well; stable at grade; quick to install Requires proper compaction; collar shape matters Full gravel set High water tables; easy adjustments Maximum drainage; easier to tweak alignment Needs periodic re-tamping; weaker in very soft soils Helical piles Saturated/expansive soils; heavy gates Resists heave; immediate load capacity Requires specialized equipment; bracket planning Sonotube concrete Adjacent structures; concentrated loads Predictable geometry; inspector-friendly Can trap water; must plan drainage pathFrequently Asked Questions
Homeowners ask most about depth, drainage, and by-laws. Set posts below frost, use clear stone, and confirm rules before you dig. Gates need diagonal bracing and rated hardware. Keep photos of locates and string lines to document compliance and layout.
How deep should fence posts be in Southern Ontario?
Plan for holes that reach below local frost depth—often around 42 inches in Southern Ontario. Depth varies by soil and exposure, so confirm rules locally and design for drainage: clear stone at the base and a shaped concrete collar at grade.
What’s the best way to prevent gate sag?
Use heavy-duty hinges, a quality latch, and a diagonal brace forming a “Z” or inverted “V.” Mount hinges on a well-set post below frost depth, and size hardware for the gate’s weight. For double gates, add a center drop rod or wheel support.
Do I need a permit for a backyard fence in Mississauga?
Mississauga enforces fence by-laws covering height, setbacks, and sightlines. Many backyard fences don’t need a building permit when they meet rules, but pool enclosures and special cases do. Check the City’s current by-laws and confirm before starting.
Should I use concrete all the way up the post?
Avoid encasing the full post in concrete without drainage. We prefer clear stone for most of the embedment and a shaped concrete collar at grade to resist movement while shedding water away from the post.
Which wood lasts longest for privacy fences?
Cedar and pressure-treated lumber both perform well when detailed correctly. Use ground-contact-rated posts, exterior-rated fasteners, and proper sealing. Maintenance schedules—cleaning and re-sealing—extend service life significantly.
Conclusion: Build Once, Enjoy for Years
Plan carefully, build for drainage and frost, and document compliance. When you avoid the most common mistakes—shallow depth, no drainage, poor bracing, and code oversights—you get a fence that stays straight, safe, and good-looking across Ontario seasons.
- Key takeaways: Verify lines and utilities; drill below frost; stage compatible fasteners and rated hardware; brace and seal.
- Action steps: Walk your yard with a string line; list gate widths and swings; book utility locates; choose footing method by soil and exposure.
- Next move: If you’re in Mississauga or the GTA, tap our design–build team for a quick site check—before the holes go in.