
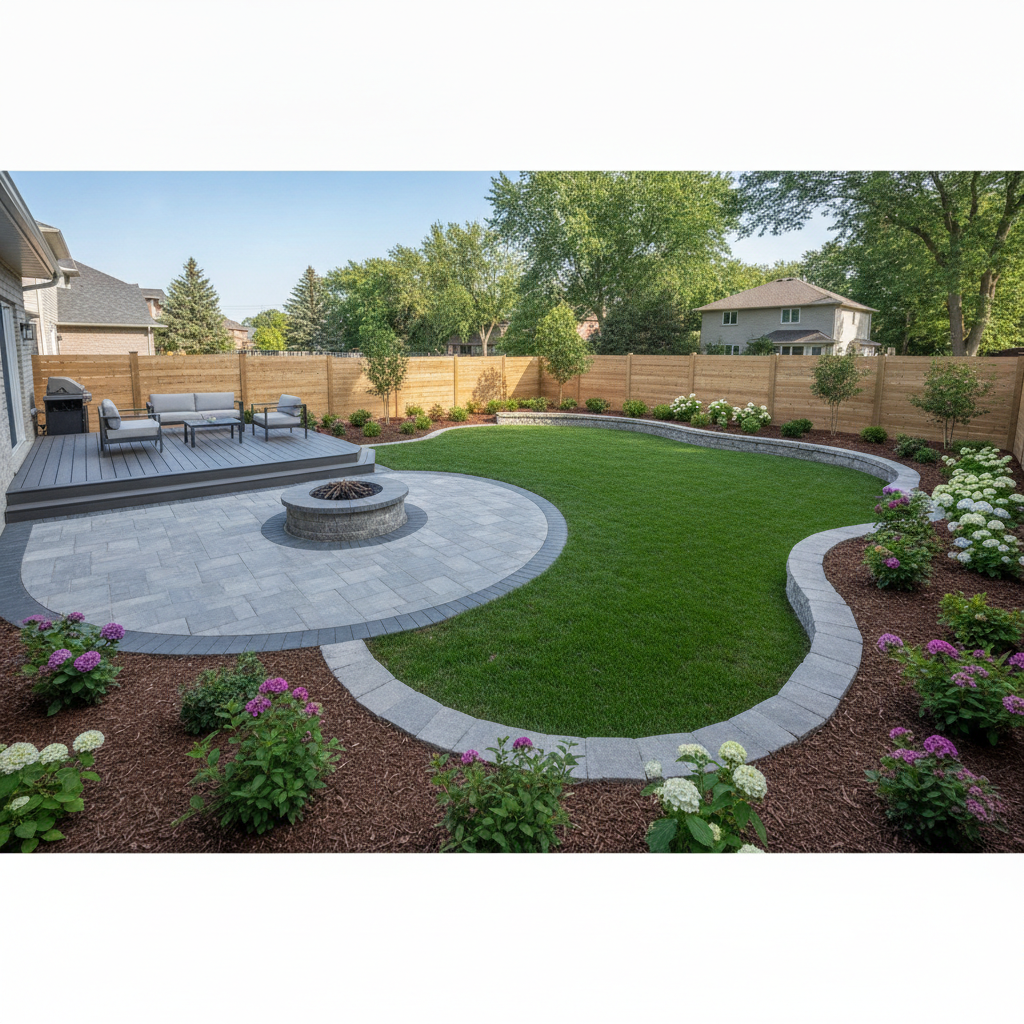
How to plan a landscape design means writing down how your yard will work before any soil moves. Measure the lot, set functional zones, choose durable hardscapes, and map drainage for Mississauga’s clay and freeze–thaw. Then layer plants, mulch, and sod. A clear sequence prevents rework and keeps maintenance simple.
Quick answer: Capture accurate measurements, define zones, select long‑lasting hardscapes (pavers, decks, retaining walls), and design drainage for clay soils. Then add planting, mulch, and premium sod. Document a phased build and maintenance plan so the space performs through Ontario winters.By HR Greenroots Landscaping • Last updated: 2026-07-11
- Overview
- Before you start
- Step‑by‑step plan
- Troubleshooting
- Advanced tips
- When to hire a pro
- Conclusion
- FAQ
- Additional resources
At a Glance: Specs That Actually Hold Up
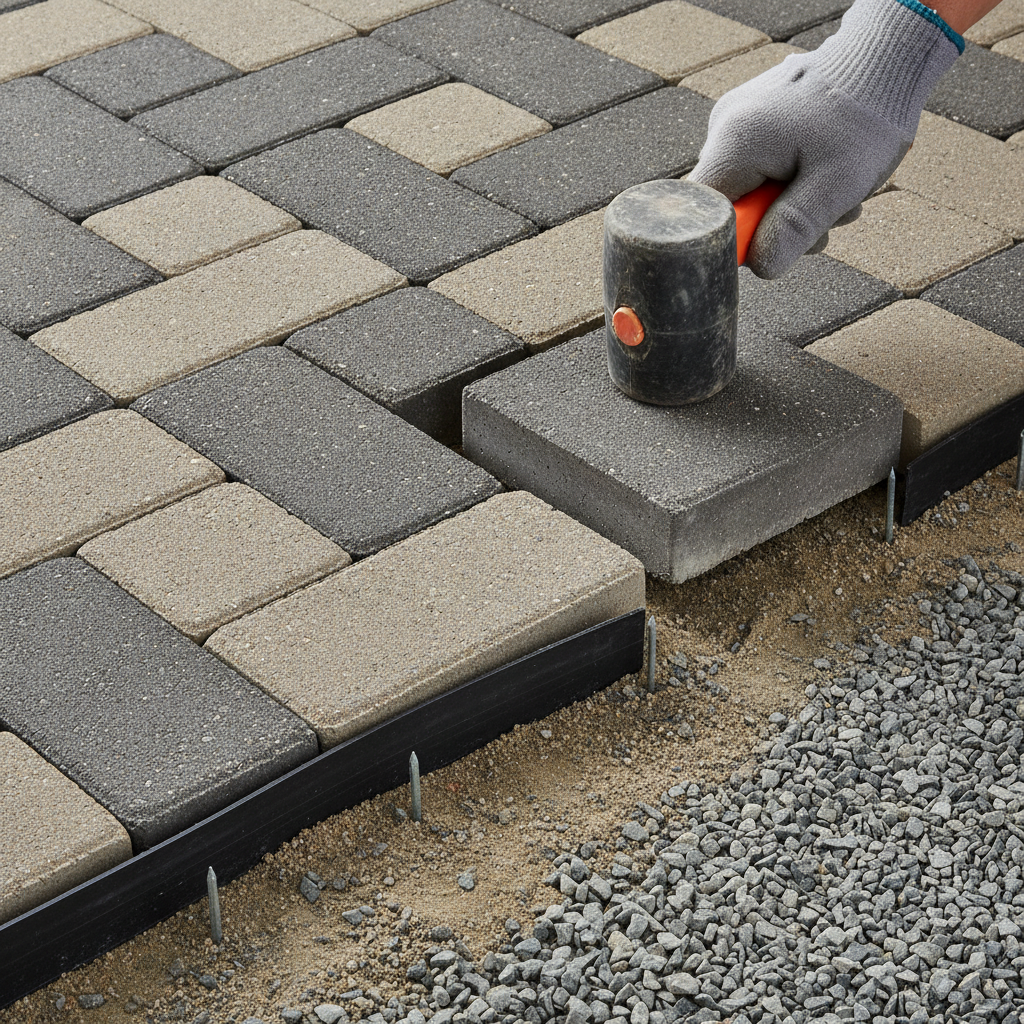
On Mississauga clay, we build interlock patios with 8–10 inches of compacted Granular A (in 2-inch lifts), 1 inch bedding sand, and a 2% surface slope. Driveways get 12–14 inches of base. Retaining walls bury 6–8 inches of the first course. New sod sits on 4 inches of screened topsoil.
Last spring near Saigon Park, we rebuilt a backyard where a skipped swale and a thin base had turned the patio into a wavy sheet of ice. We regraded to 2% away from the house, compacted fresh base, set concrete edge restraint, extended downspouts, and laid premium sod over 4 inches of topsoil. The window well stayed dry through winter, and the patio is still tight.
Mississauga field note
Lots around Lambton College often sit on compacted fill. We always add a woven geotextile under the paver base to separate fines and prevent pumping. It’s a small line item that saves you from frost heave and joint creep.
Before You Start (Prerequisites)
Confirm property lines, utility locates, municipal rules, and drainage paths before designing. Note sun/wind, neighbor privacy, and equipment access. This prep avoids permit delays, rework, and unsafe digs.
- Boundaries and setbacks: Stay inside lines and keep driveway sightlines clear.
- Utility locates: Mark gas, electric, and telecom before posts, walls, or trees.
- Wind and sun: Place seating in afternoon sun; screen prevailing winds.
- Grades: Find low spots, icy paths, and downspout outlets; sketch arrows.
- Access: Plan a route for compactors and materials before fences narrow gates.
When you’re ready to formalize the concept, our Landscape Design service turns notes into a buildable plan with specs and sequencing.
Local considerations for Mississauga
- Frost depth is roughly 4 feet (about 1.2 m). Footings must go below frost.
- Seasonal timing: finish hardscape by late fall; plant trees/shrubs in early fall or spring.
- Heavy snow and de‑icers: reinforce paver edges; choose units rated for freeze–thaw and salt.
How to Plan a Landscape Design: Step‑by‑Step
Start with a scaled sketch, set purpose‑built zones, and lock in durable hardscape. Map drainage and base depths to local soils, then wrap anchors with layered planting, sod, and mulch. Document a phased sequence so you can build cleanly and maintain easily.
- Measure and sketch your lot, house footprint, fixed features, and slope arrows.
- Define zones: entry, seating, dining, play, storage, utilities, and side‑yard access.
- Choose hardscape anchors: interlock patios/walks, deck footprint, retaining/stone features.
- Map drainage and base specs: slopes, swales, and base depths for each surface.
- Plan softscape: lawn where practical, mulched beds with layered shrubs/perennials.
- Pre‑plan access and sleeves: equipment routes and conduits for lighting/irrigation.
- Write the phased build and maintenance list so future add‑ons don’t disturb finishes.
Step 1: Assess Your Outdoor Space
- Measure house, lot lines, patios, trees, and slopes; take photos of each side.
- Mark water flow; note downspouts and puddles after rain.
- List pain points: muddy side yard, tight parking, lack of privacy, glare.
Many homeowners start with a short consult to right‑size scope. Our design‑build overview shows how drawings translate to clean construction.
Step 2: Define Zones — Function First
- Entry, dining, lounge, grill, play, storage, utilities, and pet area.
- Draw paths between doors and destinations; 36–42 inch clear walk width feels natural.
- Reserve a 36‑inch service lane for mowers, snow removal, and future access.
Need more parking? A planned driveway extension can relieve street congestion while respecting setbacks and drainage.
Step 3: Choose Hardscape Anchors (Pavers, Decks, Retaining Walls)
- Interlocking & Pavers: For pedestrian patios/walks, we excavate 8–10 inches, compact Granular A in 2‑inch lifts, add 1 inch bedding sand, and slope 2% away from the house. For interlocking driveways, we target 12–14 inches of base.
- Edge restraint: On clay, we prefer concrete or aluminum over plastic spikes—it actually holds through freeze–thaw.
- Deck Services: Footings extend below frost (~4 ft). We size platforms to your furniture and stairs that feel safe.
- Retaining Wall & Stone Work: Bury the first course 6–8 inches, add drainage stone and a 4‑inch socked pipe behind, and stack to manufacturer specs. See our stone work planning guide for embed and step details.
For layout inspiration before you lock materials, a hardscape planning primer like this patio and walkway advice can help you visualize traffic and furniture zones.
Step 4: Plan Softscape Around Your Hardscape
- Sod Installation: Final grade, then 4 inches of screened topsoil; stagger seams and roll heavy. Water daily for 10–14 days.
- Mulching & Garden Beds: Shape curves with crisp edges; 2–3 inches of mulch suppresses weeds and holds moisture.
- Planting layers: Evergreens for structure, flowering shrubs for color, perennials for texture—matched to your sun and wind.
Our sod prep checklist and seasonal maintenance planning keep beds neat with quick touch‑ups.
Step 5: Map Drainage, Grading, and Soil Prep
- Pitch hardscapes 1–2% away from the house and toward a swale or safe outlet.
- French drain (only when needed): 4‑inch perforated pipe with sock, set in washed 3/4‑inch stone, topped with fabric and soil; daylight to a legal outlet. If you can achieve positive grade, skip the drain—gravity is cheaper and more reliable.
- Downspouts: extend to splash pads or tie into drains clear of walkways.
Coordinating pool decks, patios, and lawn grades early avoids standing water later—see this pool and patio homeowner guide for layout ideas that respect drainage.
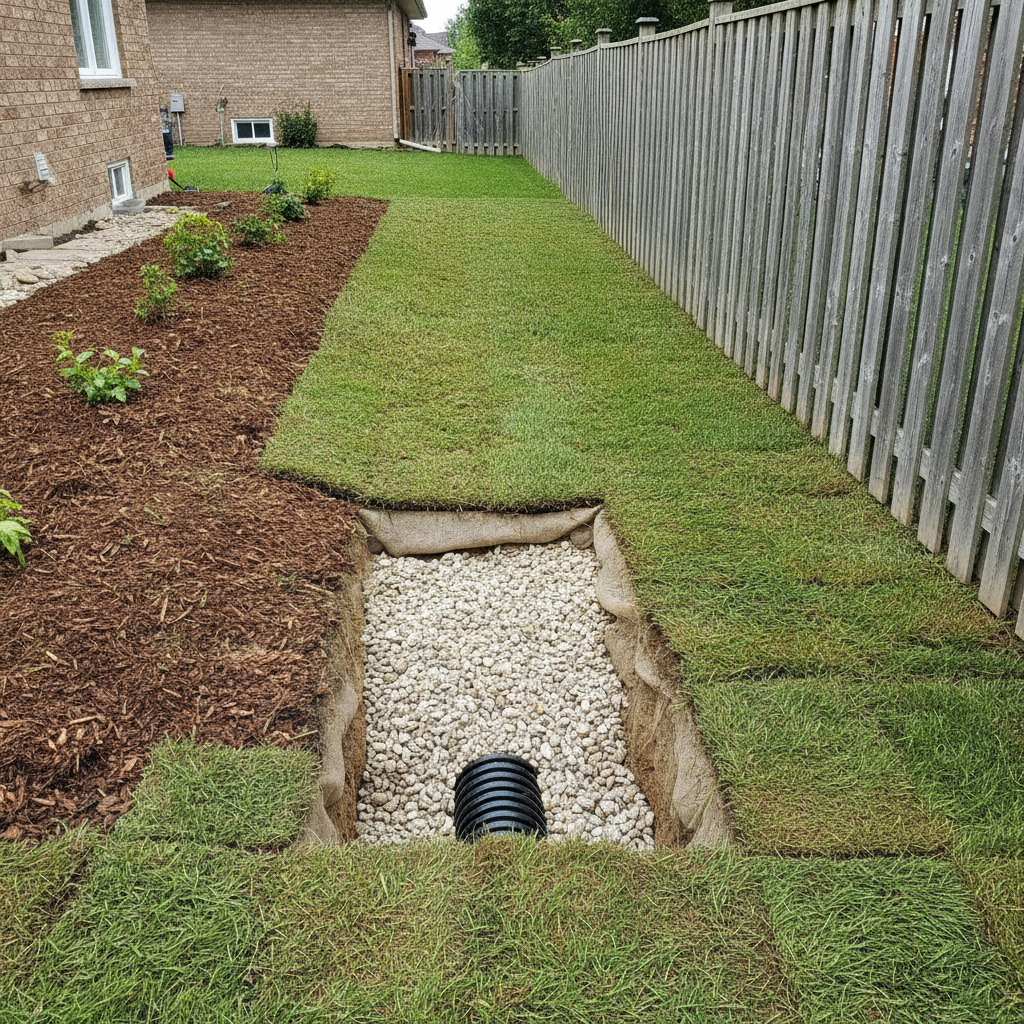
For fence lines along wet corridors, plan a narrow path or stepping bands; our fence installation planning notes cover clearance and drainage.
Step 6: Build a Phased Timeline and Maintenance Plan
- Phase 1: Access and main hardscape; Phase 2: Walls and structures; Phase 3: Planting and sod.
- Run empty conduits for future lighting/irrigation before surfaces are closed.
- Create a seasonal care list: mulch refresh, edge touch‑ups, and shrub pruning.
A clear sequence avoids tearing up finished areas and keeps upkeep straightforward. Explore our interlocking base prep notes to match phases to crews and equipment.
Soft consult: Book a quick site review in Mississauga. We’ll mark grades, lay out zones, and recommend the right mix of interlock, decks, walls, sod, and planting.Troubleshooting Common Planning Issues
Most planning issues trace to missing specs or skipped sequencing. Add base depths, edge details, and water routes to drawings, then phase work so access stays open and finished areas remain protected.
- Puddles at patio edges: Recut a shallow swale or add a perforated line to a safe outlet.
- Paver movement: Rebuild edges with concrete/aluminum restraints and compacted aggregate—not topsoil.
- Muddy side yards: Install stepping bands or a narrow interlock path pitched 2%.
- Privacy gaps: Pair fencing with layered evergreens, not just taller posts.
- Shade lawns failing: Reduce turf; expand beds with mulch and shade‑tolerant plantings.
Advanced Tips: Specs that Survive Freeze–Thaw
Use well‑graded aggregates, geotextiles under pavers in weak soils, and edge restraints that lock courses. Keep step risers consistent, consider permeable options where helpful, and pre‑run conduits for low‑voltage lighting.
- Geotextile: We always add a woven separator on clay to stop fines pumping into the base.
- Permeable choices: In problem pockets, permeable pavers with open‑graded bases reduce icing.
- Human factors: 7‑inch risers and 11‑inch treads feel natural; 36–42 inch paths are comfortable.
For broader regional layout ideas that complement these specs, scan these design ideas and adapt them to Mississauga lot sizes and frost depth.
When to Hand the Plan to a Professional
Bring in a design‑build contractor when grade changes, structures, or drainage are involved. Pros integrate layout, specs, and sequencing, then build to those details—saving time and rework.
HR Greenroots delivers end‑to‑end work in Mississauga: interlocking patios and walkways, deck services, retaining walls, sod installation, fence installation, stone work, sheds, driveway extensions, and maintenance‑minded planting. We plan for longevity and easy care.
Conclusion: Build the Plan That Builds Itself
A durable landscape starts with a measured drawing, set zones, durable anchors, and defined water paths—then planting and sod tie it together. Write the sequence and you’ll build once, not twice.
Key takeaways
- Map function and water first; finishes come after.
- Use real numbers: 2% slopes, 8–10 inch patio bases, 12–14 inch driveway bases.
- Edge control and geotextiles prevent movement on clay.
- Phase work so access stays open and tidy.
Frequently Asked Questions
How wide should my walkway be?
Aim for 36–42 inches for daily use; 48 inches is comfortable for two people side‑by‑side. Widen near driveways and entries to avoid snow pinch points.
Do I need a French drain?
Only if you can’t achieve positive grade. If you can slope surfaces 2% to a swale or daylight, skip the drain and invest in base prep. Drains add complexity and require a legal outlet.
How much topsoil under new sod?
We target 4 inches of screened topsoil over a smooth, compacted subgrade. This gives roots room to establish and evens out small grade ripples so mowing stays smooth.
What goes first, hardscape or plants?
Hardscape first—patios, decks, walls, and steps—because they need excavation and machine access. Then shape beds, amend soil, plant, and finish with sod and mulch. This sequence protects finished planting areas.
Additional Resources
Use a scaled base plan, a simple checklist, and local specs (frost, base depths, slopes). Validate details with a site walk so the drawing matches your soil and access.
- Bring your sketch to a site walk for practical adjustments.
- Review our internal guides on interlock base prep, sod prep, and stone work planning.
- Create a seasonal maintenance list while the plan is still on paper.
About HR Greenroots Landscaping — A Mississauga design‑build team delivering interlock, decks, retaining walls, sod, fencing, stone work, sheds, driveway extensions, and maintenance‑minded planting across the GTA.


