Lawn grading basics refers to shaping the soil so water drains away from your home and toward safe outlets. For most yards, target a 2% slope (about 1/4 inch per foot) for the first 10 feet, and maintain steeper grades (up to 5%) right next to the foundation. This prevents pooling, erosion, and moisture damage.
By HR Greenroots Landscaping — Mississauga & GTA landscape design-build
Last updated: 2026-04-11
Quick Answer
Lawn grading basics means creating a consistent slope that carries runoff away from buildings and hardscapes. At our Mississauga shop (100 Matheson Blvd E unit 202), we guide homeowners to maintain 5% grade within 5–10 feet of the foundation and about 2% across open lawn to stop pooling and protect new sod.
Overview
Grade is the subtle shape that directs water. A lawn that’s graded correctly sheds 1–2 inches of rainfall without pooling, keeps patios and walkways clean, and protects foundations. You’ll measure with string lines or lasers, add or remove soil, and compact layers to lock the shape for seasons of trouble-free drainage.
- What you’ll learn:
- How to measure and set a 2% lawn slope in minutes
- Foundation and patio drainage rules that actually work
- Step-by-step grading and sod prep you can follow
- When to choose swales, berms, or drains
- Tools pros use (and what you can rent locally)
- Who this is for:
- Mississauga & GTA homeowners tackling soggy yards
- Small-business owners managing storefront landscapes
- Property managers maintaining large turfed areas
- Why trust this guide:
- HR Greenroots Landscaping prioritizes strong base prep and grading across sod, interlocking, and retaining walls
- End-to-end design-build with maintenance planning for Ontario climates
- Proven reliability backed by verified reviews and an average 4.9 rating
What Is Lawn Grading?
Lawn grading is the planned shaping of soil to achieve predictable drainage. The surface is pitched away from structures—typically 5% within the first 5–10 feet, then about 2% across lawn areas—so rainfall flows to swales, drains, or safe outlets instead of pooling near foundations or patios.
A yard’s grade determines where water goes. On flat or poorly pitched lawns, runoff stalls and saturates the root zone, creating muddy patches and frost heave risks. Proper grading pushes water along a gentle path to lower areas or drains. In practice, that means setting reference lines (string, laser, or rotary level), adding or redistributing soil, and compacting in lifts so the shape holds. When we install premium sod in Mississauga, we finalize grade after base compaction and before turf, ensuring a smooth finish that drains predictably.
- Key elements of grade:
- Pitch: Slope percentage (rise over run). Common targets are 5% near foundations and ~2% through open lawn.
- High/low points: Intentional crowns or drains that direct flow along a set path.
- Transitions: Smooth tie-ins at patios, walkways, and driveways to prevent trip lips or water dams.
- Why “basics” matter:
- A consistent 2% slope moves water at a controlled rate without eroding topsoil.
- Small errors (1 inch at the wrong spot) can reverse flow and create puddles.
- Correcting grade before sod installation avoids rework later.
- Typical numbers you’ll use:
- 2% slope = 0.24–0.25 inch per foot (3 inches over 10 feet)
- 5% slope = 0.6 inch per foot (6 inches over 10 feet)
- Topsoil depth for lawns: 4–6 inches for healthy rooting
Why Lawn Grading Matters
Good grading reduces foundation moisture, prevents puddles and mosquito breeding, protects interlocking joints, and keeps lawns usable after storms. It sets the base for durable sod and hardscapes, lowering maintenance and improving curb appeal across seasons and freeze–thaw cycles.
Without proper slope, water infiltrates slowly, especially in clayey soils found across Peel Region. Pooled water compacts soil, starves roots of oxygen, and accelerates winter frost heave. A 5% grade near the house helps keep basements drier, while a consistent 2% across the yard pushes water toward swales or drains. For hardscapes, correct subgrade pitch reduces joint washout and edge migration on interlocking pavers. In our experience, lawns graded before sod stay even, tolerate spring thaws better, and rebound faster after heavy summer downpours.
- Foundation protection:
- Maintain at least 6 inches of fall in the first 10 feet to move water away from walls.
- Extend downspouts 6–10 feet away from the foundation to keep discharge off the wall line.
- Hardscape longevity:
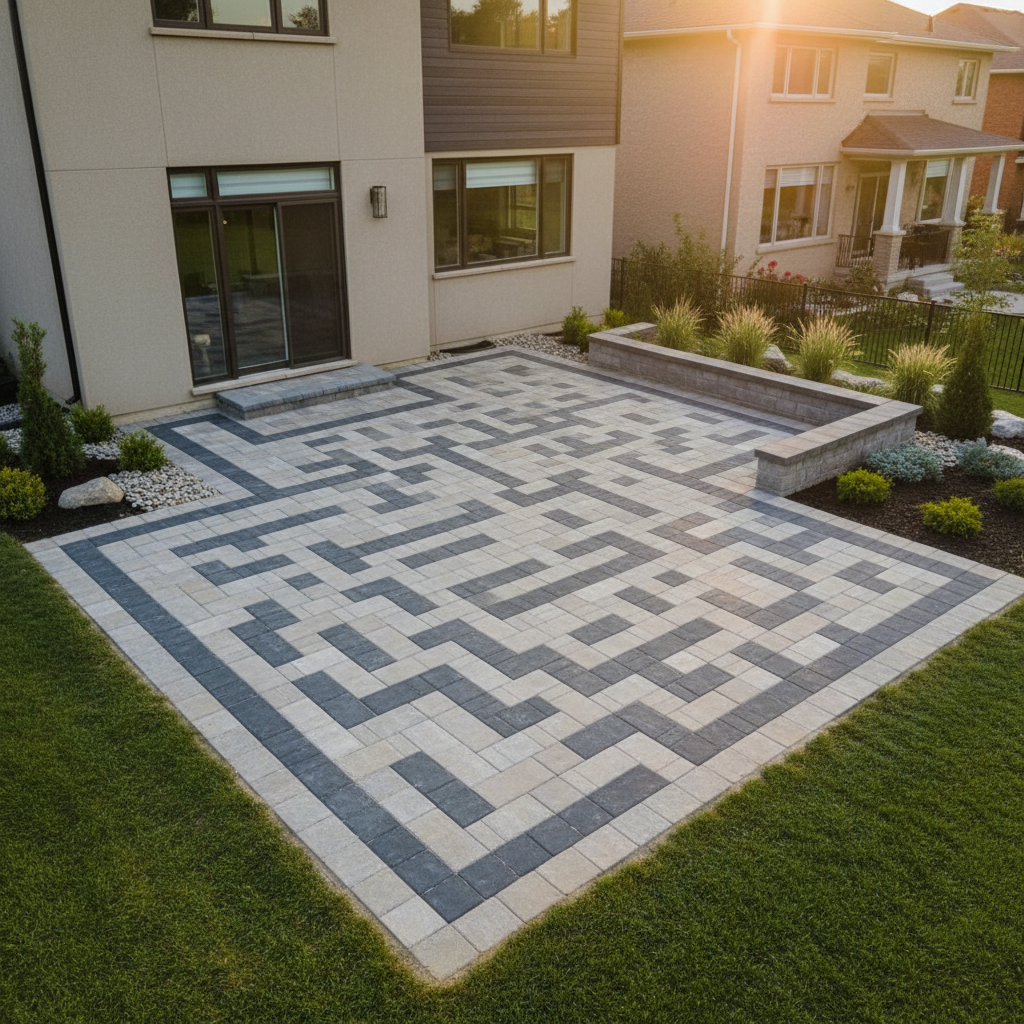
- Patios and walkways perform best with 1–2% surface pitch plus compacted base.
- Clean edge control reduces paver creep and helps keep polymeric sand intact.
- Lawn health:
- Consistent drainage lowers disease pressure by reducing soggy thatch zones.
- Even moisture helps sod root in 10–14 days under proper irrigation.
How Lawn Grading Works
Grading follows a measure–shape–lock sequence: establish reference elevations, cut or fill soil to meet target slopes, and compact in lifts so the surface holds. Tie the lawn’s pitch into patios, walkways, and swales, then finish with screened topsoil before sod or seed.
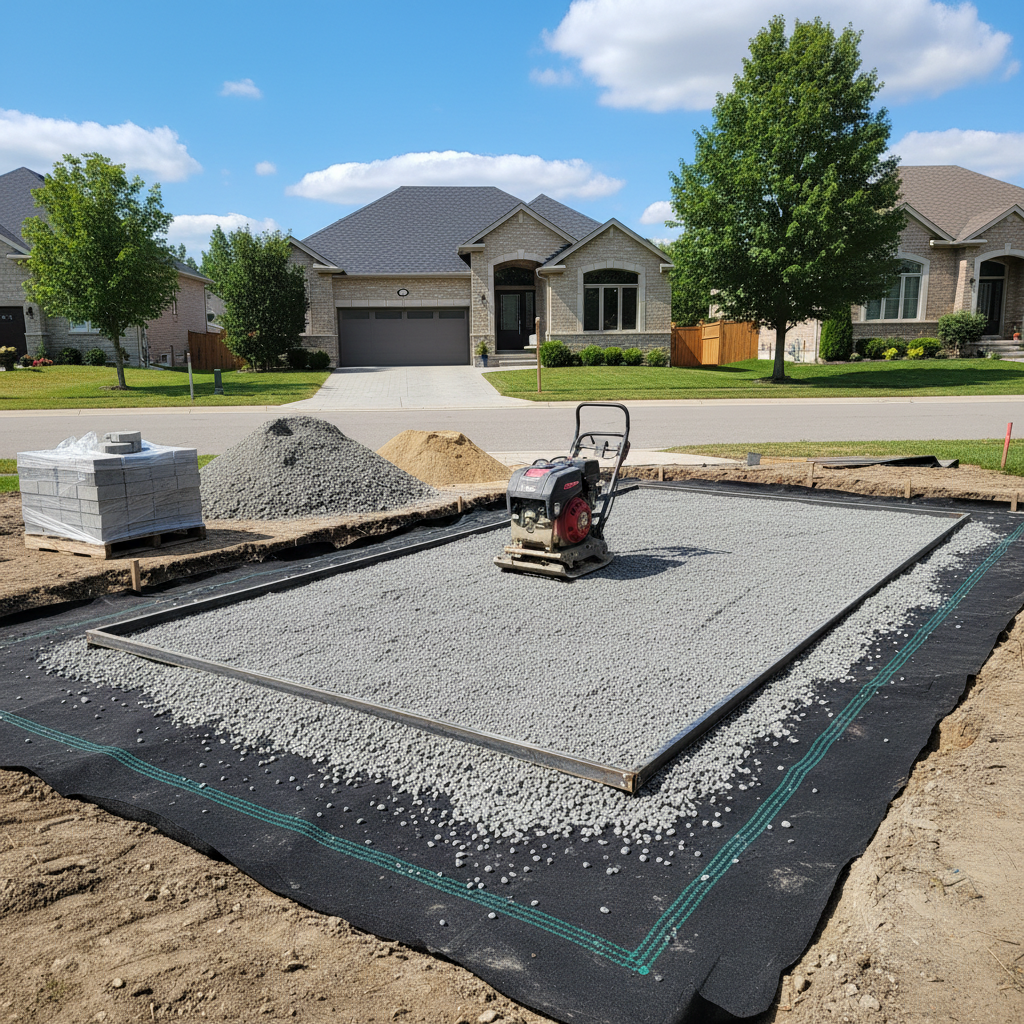
The workflow is repeatable: map high and low points, set string lines or a laser level, rough grade by cutting highs and filling lows, compact subgrade to a firm, uniform platform, place screened topsoil (4–6 inches), and fine-grade with a lute or screed. Each lift is lightly compacted to prevent post-rain settling. For problem zones, we introduce shallow swales (1–2% minimum) or a gravel trench drain wrapped in fabric. When an interlocking patio is part of the plan, we grade the subgrade first, then build the base with crushed stone to the right pitch so surface water exits cleanly.
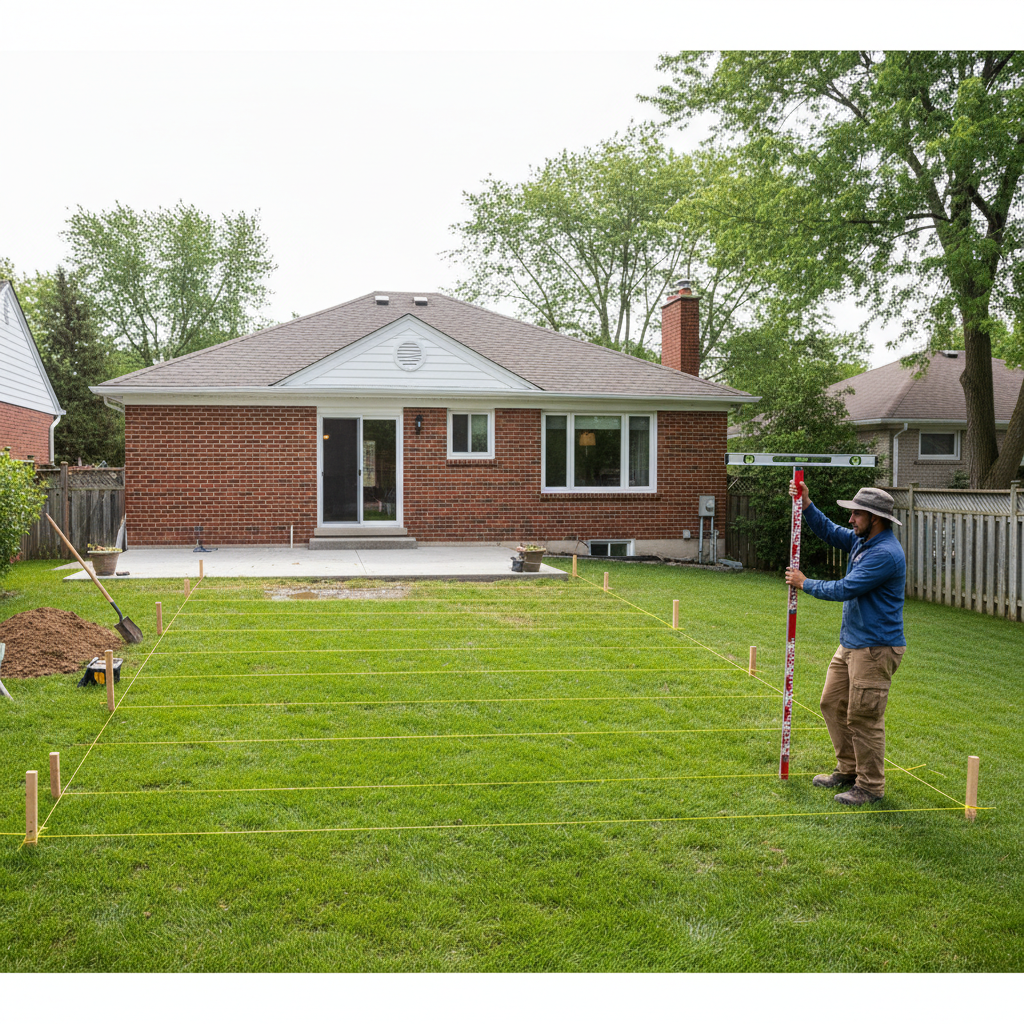
- Measurement methods:
- String and line level: Fast and inexpensive for 10–30 foot spans.
- Laser level/rotary level: Accurate over large yards and complex tie-ins.
- Smartphone clinometer: Quick slope checks (verify with a physical level).
- Shaping techniques:
- Cut and fill with a landscape rake and aluminum lute for hand work.
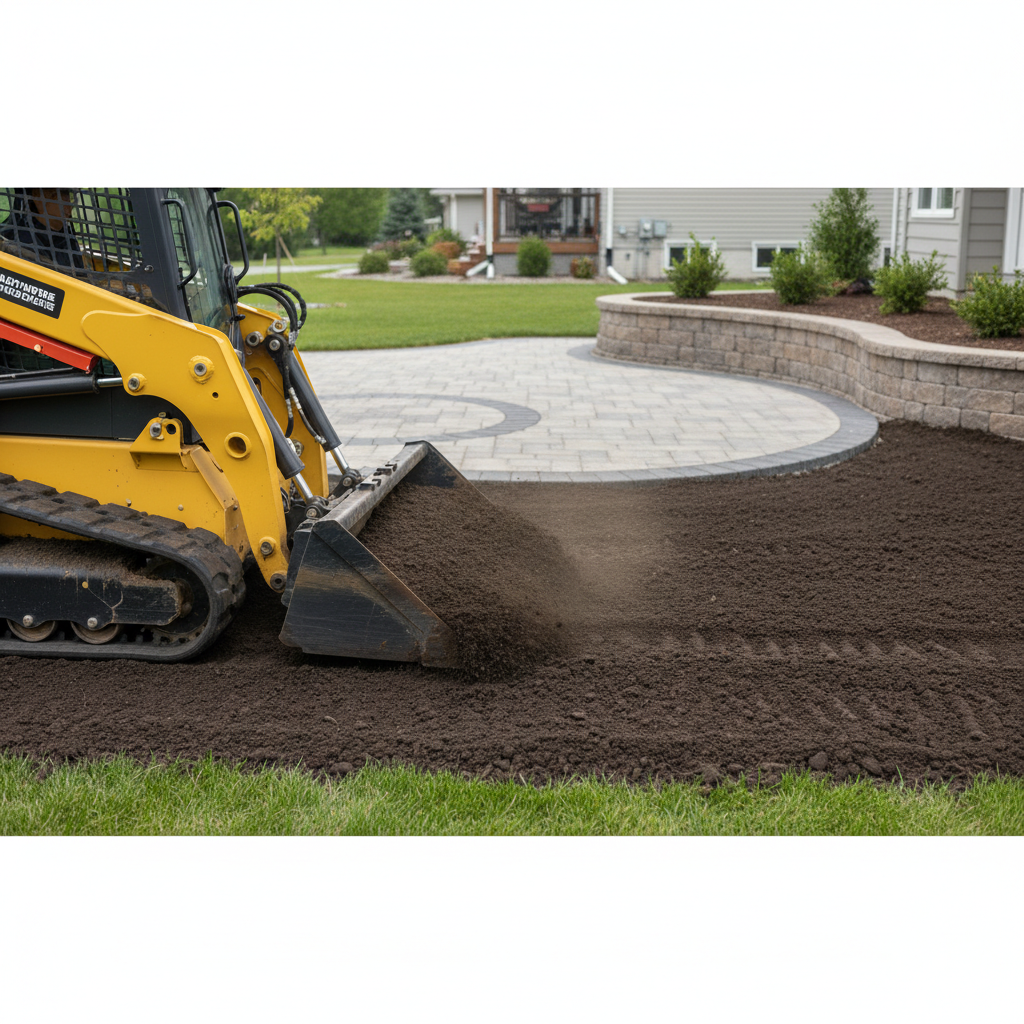
- Use a skid steer or compact track loader for bulk soil movement.
- Form swales along property lines to share drainage responsibly.
- Locking the grade:
- Compact subgrade and topsoil in 2–4 inch lifts for stability.
- Water-rolling lightly can reveal soft spots to correct before sod.
Types, Methods, and Approaches
Choose the simplest approach that moves water predictably: regrading with topsoil, shaping shallow swales, adding berms to redirect flow, or installing subsurface drains for persistent wet zones. Combine methods to tie lawns into patios, driveways, and retaining walls.
Every property is different. Small backyards often respond to topsoil regrading alone. Narrow side yards benefit from a gentle swale that leads to the front curb. For low spots over clay, a fabric-wrapped gravel trench (French drain) coupled with a 2% surface pitch prevents standing water. Where a slope is too steep, a low retaining wall or armor stone terrace can create flat, usable space while managing runoff safely. We match methods to soil type, site constraints, and adjacent hardscapes so the whole system works together.
- Common grading solutions:
- Simple regrade: Cut/fill and compact; ideal for mild pooling.
- Swale: Broad, shallow channel (1–2% slope) that collects and carries runoff.
- Berm: Low, planted mound that redirects overland flow.
- French drain: 6–12 inch wide trench with fabric and 3/4 inch clear stone.
- Area drain + solid pipe: Captures a localized low spot and conveys water away.
- Retaining solution: Wall or terracing where grade change is significant.
- When to integrate hardscapes:
- Interlocking patios/walkways: Build base to 1–2% pitch so the surface drains right.
- Driveways: Center crown or cross fall keeps cars out of puddles.
- Steps and stone work: Set treads with slight forward pitch for safety.
- Vegetative assists:
- Deep-rooted turf varieties stabilize soil and improve infiltration.
- Mulched beds (3 inches) around tree lines slow runoff and filter sediment.
Step-by-Step: Set Grade and Prep for Sod
Define the drainage path, set reference lines, cut highs and fill lows, compact in lifts, fine-grade with topsoil, and confirm slope before laying sod. Work from the foundation out, maintaining 5% near walls and about 2% across open lawn to guide water home.
This repeatable sequence works for most Mississauga yards: map where water should go, verify elevation changes with a string line or laser, shape the soil, and lock the surface with compaction. Add screened topsoil for root depth, then lay premium sod. Keep downspouts extended 6–10 feet. The goal is a lawn that sheds typical summer storms without puddles and holds its shape through freeze–thaw seasons.
- Define outlets: Choose curb, catch basin, or a vegetated swale as the end point.
- Mark high/low points: Flag where water should start and where it should end.
- Set control lines: Use string lines or a laser to mark the 2% fall.
- Rough cut & fill: Move soil from highs to lows; avoid burying surface organic debris.
- Compact subgrade: 2–4 inch lifts with a plate compactor to create a firm base.
- Install drainage (if needed): Swale or fabric-wrapped gravel trench with clear stone.
- Place topsoil: 4–6 inches of screened topsoil; lightly compact to seat.
- Fine-grade: Use a lute or 2x4 screed to achieve smooth, even pitch.
- Check slope: Confirm 5% within 5–10 feet of the house; ~2% beyond.
- Edge control: Establish clean transitions to patios, walks, and beds.
- Lay premium sod: Stagger seams; roll to ensure root-soil contact.
- Water & monitor: 1 inch per week; watch the first big rain to confirm flow.

Pro tip: A 10-foot 2x4 with a level is a reliable DIY slope gauge. At 2% pitch, the downhill end should be roughly 2.4–2.5 inches lower than the uphill end over 10 feet.
Best Practices We Use in the GTA
Start at the house, control edges, and compact in lifts. Use screened topsoil for uniformity, keep downspouts extended, and confirm drainage after the first heavy rain. In freeze–thaw climates, stability and clean transitions matter more than perfection on paper.
Our grading standard emphasizes durable construction and maintenance-first thinking. We prioritize a stable subgrade, clean tie-ins to interlocking, and consistent topsoil depth for sod. After installation, we revisit during or after a rain to validate performance and make touch-ups. This approach keeps lawns usable and hardscapes tight across Ontario seasons without constant rework.
- Foundation-first workflow: Grade 5% away from walls for the first 5–10 feet.
- Edge control everywhere: Tie lawns flush to patios, walks, and driveways.
- Compaction discipline: Subgrade and topsoil seated in thin lifts reduce settling.
- Right soil, right depth: Screened topsoil at 4–6 inches supports sod rooting and leveling.
- Validate in real weather: Watch a storm; adjust micro-highs or lows promptly.
- Downspout management: Keep discharge 6–10 feet from foundations, aimed at swales.
- Protect new sod: Keep foot traffic light until roots take (10–14 days).
Tools and Resources
You can grade a small yard with stakes, string, a line level, a 2x4 screed, rakes, and a plate compactor. For larger projects, rent a skid steer and a rotary laser. Stock screened topsoil, landscape fabric, and 3/4 inch clear stone if adding a drain.
Tools define your speed and accuracy. For side yards or townhome spaces, hand tools and a plate compactor are enough. For wide backyards or when you’re also building a patio, a compact track loader and rotary laser increase precision and cut hours. Always plan materials ahead—topsoil, fabric, and clear stone—so you can solve a wet spot on the same day rather than leaving it open to weather.
- Layout & measurement:
- Stakes, mason line, line level or rotary laser
- Measuring tape, marking paint, landscape flags
- Shaping & compaction:
- Landscape rake, aluminum lute, 10 ft 2x4 screed
- Plate compactor (handheld); roller for finishing
- Skid steer or compact track loader for bulk movement
- Drainage materials:
- Screened topsoil (4–6 inches final depth)
- Non-woven landscape fabric for trench drains
- 3/4 inch clear stone for French drains
- Solid-core pipe for moving discharge to a safe outlet
- Safety & protection:
- Utility locate before digging (call-before-you-dig service)
- High-visibility tape or fencing around open trenches
Free Grading & Sod Prep Checklist (Printable)
- Map outlets and flow lines
- Stake string lines to 2% pitch
- Cut highs, fill lows, compact in lifts
- Place 4–6 inches screened topsoil
- Confirm 5% near foundation; ~2% across lawn
- Lay premium sod; water and monitor first storm
Considering professional help?
We design, grade, and install premium sod, and we integrate grading with interlocking, retaining walls, and planting plans—so your lawn and hardscapes work together from day one.
Case Studies: Mississauga & GTA Examples
Real projects show how small grading changes solve big problems. From soggy side yards to patio tie-ins, we create predictable flow paths, stabilize soil, and deliver lawns that stay dry underfoot—even after summer thunderstorms and spring thaws.
We’ve graded and sodded hundreds of Ontario properties. The pattern is consistent: set a clear outlet, shape to 2% across open lawn, and protect foundations with 5% pitch. Tie-ins at patios and walkways are non-negotiable. Below are concise examples that mirror common Mississauga lot conditions.
- Side-yard swale and sod finish (Central Mississauga):
- Problem: Repeated puddling between two homes after 1–2 inch rains.
- Fix: Shaped a 2.5% swale to the front curb, added 4–6 inches of screened topsoil, and installed premium sod.
- Result: Water cleared within 30–45 minutes post-storm; lawns remained firm, no rutting.
- Patio tie-in with interlocking (Erin Mills):
- Problem: Water washing sand out of paver joints due to back-pitched lawn.
- Fix: Regraded the adjacent lawn to 2% away from the patio, corrected base edge control.
- Result: Clean runoff line; patio stayed debris-free during heavy July storms.
- Terraced rear lawn with low retaining (Port Credit):
- Problem: Steep yard with unusable slope and erosion channels.
- Fix: Installed a low retaining wall with drainage stone and geotextile; created two flat lawn terraces.
- Result: Usable play space; controlled flow through a planted swale to a safe outlet.
- Driveway extension & crown (Meadowvale):
- Problem: Puddling at driveway edge post-extension by previous contractor.
- Fix: Introduced a subtle cross fall toward the street and reset edge pavers with restraint.
- Result: No standing water; cleaner curb line after storms.
- Garden bed overhaul with berm (Cooksville):
- Problem: Beds washing mulch onto the lawn.
- Fix: Formed a low berm and added 3 inches of mulch with defined edging.
- Result: Beds held shape; lawn stayed clean after repeated summer rains.
FAQ: Lawn Grading Basics
Most lawns perform best with about a 2% slope away from structures, with 5% near foundations. Regrade before laying sod, compact in lifts, and confirm drainage with the first storm. Add swales or drains where water naturally collects.
- How do I tell if my lawn needs regrading?
Look for puddles that last more than 24 hours, soil erosion trails, damp basement corners, or paver joint washout. Place a 10-foot board and level on the lawn; if the downhill end isn’t 2.4–2.5 inches lower, you likely need more pitch. Check around downspout discharge points too.
- Is 2% slope always enough?
For open lawn, 2% works well. In tight side yards or heavy clay, increase to 2.5–3% and add a swale to move water reliably. Near foundations, maintain roughly 5% (about 6 inches fall over the first 10 feet) to keep moisture off walls.
- Can I grade first and sod later?
Yes. Grade and compact the subgrade, place 4–6 inches of screened topsoil, fine-grade, and then sod. Rolling the soil and watching one rainfall before sod helps reveal minor lows you can correct in minutes.
- Do I need a French drain?
Only if a naturally low area keeps water after regrading. A typical DIY trench is 6–12 inches wide with non-woven fabric and 3/4 inch clear stone, discharging to a safe outlet. Often, a simple swale plus 2% surface pitch solves the issue.
- What about winter and freeze–thaw?
Stable subgrade and light compaction reduce heaving. Keep downspouts extended and avoid traffic on saturated lawns during thaws. In spring, rake and topdress minor settled spots before they expand.
Conclusion
Set a clear outlet, pitch soil away from the house, and compact in lifts. With 5% near the foundation and about 2% across open lawn, you’ll stop pooling, protect hardscapes, and give sod the best possible start—season after season.
- Key Takeaways
- Target 5% near foundations; ~2% across the lawn
- Compact subgrade and topsoil in thin lifts
- Use swales or drains only where water naturally collects
- Confirm performance during a real rain and touch up early
- Next Steps
- Walk your yard after a rain to map flow and puddles
- Stake string lines to mark a 2% slope
- Plan soil, fabric, and stone before you open the grade
- Book a grading and sod assessment with our Mississauga team
Local Tips
- Tip 1: If your lot backs onto storm infrastructure near Matheson Blvd E, confirm your outlet ties into an approved swale or curb cut—don’t send water onto sidewalks.
- Tip 2: Plan grading during spring thaw or late summer; avoid heavy equipment on saturated clay after long rains to reduce rutting and compaction.
- Tip 3: When adding interlocking or driveway extensions, set subgrade pitch first; it’s far easier than trying to fix back-pitch after the surface is installed.
IMPORTANT: We integrate grading with sod, interlocking, and retaining solutions so your space drains right from day one.
Schedule a grading and sod consultation
Based in Mississauga, we service the GTA and Southern Ontario. We’ll walk the site, map flow paths, and give you an action plan that connects lawns, hardscapes, and planting.
Related Articles
These topics build on lawn grading basics by connecting drainage, hardscapes, and healthy turf. Use them to plan cohesive, low-maintenance outdoor spaces that look intentional and perform in real weather.
- Lawn replacement methods: when to sod vs. seed after regrading
- Interlocking pavers: base prep and edge control that last
- Retaining walls: small terraces that add usable lawn
- Downspout strategies: directing water without eyesores
- Mulch and garden beds: shaping beds to slow runoff