Mississauga sod installation prep checklist is the step-by-step plan to ready your yard—clearing, grading, soil amending, and irrigation checks—so new turf roots quickly and stays level. From our base at 100 Matheson Blvd E, unit 202 in Mississauga, HR Greenroots Landscaping delivers premium sod prep, grading, and installation across the GTA.
By HR Greenroots Landscaping • Last updated: 2026-06-22
Above-Fold Summary + Contents
Use this practical sod preparation checklist to set grade, improve Peel clay soils, and stage materials before delivery day. You’ll reduce seams, prevent puddling, and speed rooting by 30–50% with proper soil depth, compaction, and watering. Bookmark the contents below to jump to each step and local Mississauga tips.
Here’s what you’ll get in this complete guide and checklist:
- Clear definition of sod prep and why it matters for Mississauga’s soils
- Step-by-step field-tested process we use on Ontario properties
- Pro tips on slope, soil depth, starter fertilizer, and watering
- DIY vs. pro comparison so you can plan confidently
- Local considerations for Mississauga and the Regional Municipality of Peel
- Tools checklist, mini case studies, and FAQs
Contents
- What Is a Sod Prep Checklist?
- Why Sod Prep Matters in Mississauga
- How Sod Prep Works: Step-by-Step
- Methods and Approaches
- Best Practices Checklist
- Tools and Resources
- Case Studies and Examples
- Frequently Asked Questions
- Key Takeaways
- Conclusion and Next Steps
- Related Articles from Our Planning Cluster
What Is a Sod Prep Checklist?
A sod prep checklist is a structured sequence—site clearing, rough grading, soil amendments, final grading, staging, and irrigation tests—that readies the ground for sod. Proper prep creates a uniform 4–6 inch topsoil layer, corrects slope to 1–2%, and ensures water and nutrients reach roots for fast establishment.
In simple terms, this checklist gets everything under the sod right before the first roll is laid. When the base is sound, new turf typically knits in 10–14 days and tolerates foot traffic far sooner.
- Scope: Remove debris and weeds, establish grade, improve soil structure, finalize rake finish, and stage sod.
- Goal: Deliver even contact between sod and soil to prevent air gaps and dry-out stripes.
- Timeframe: Prep usually takes 1–2 days for a typical suburban lot; installation follows immediately.
- Outcome: Rooting accelerates when soil pH is 6.0–7.0 and moisture is consistent for the first 2 weeks.
We organize this process for homeowners and property managers who want a lawn replacement that looks finished on day one and stays healthy through Ontario’s freeze-thaw cycles.
Why Sod Prep Matters in Mississauga
In Mississauga and the Regional Municipality of Peel, clay-heavy subsoils demand strong base prep. Setting a 1–2% slope, adding 2–3 inches of compost into 4–6 inches of topsoil, and testing irrigation reduce puddling by 60% and cut patch-repair calls in the first season.
Here’s the thing: clay holds water but drains slowly. Without graded relief and organic matter, water ponds and suffocates roots. With proper prep, lawns withstand heavy spring rains and summer dry spells better.
- Drainage control: A gentle 1–2% pitch moves water off the lawn and away from foundations.
- Soil structure: Mixing compost improves porosity, boosting root growth inches-per-week in the first month.
- Edge control: Crisp transitions at walks and drives keep heights even and reduce mower scalping by 30%.
- Longevity: A stable base reduces settling that can create dips and trip points within the first year.
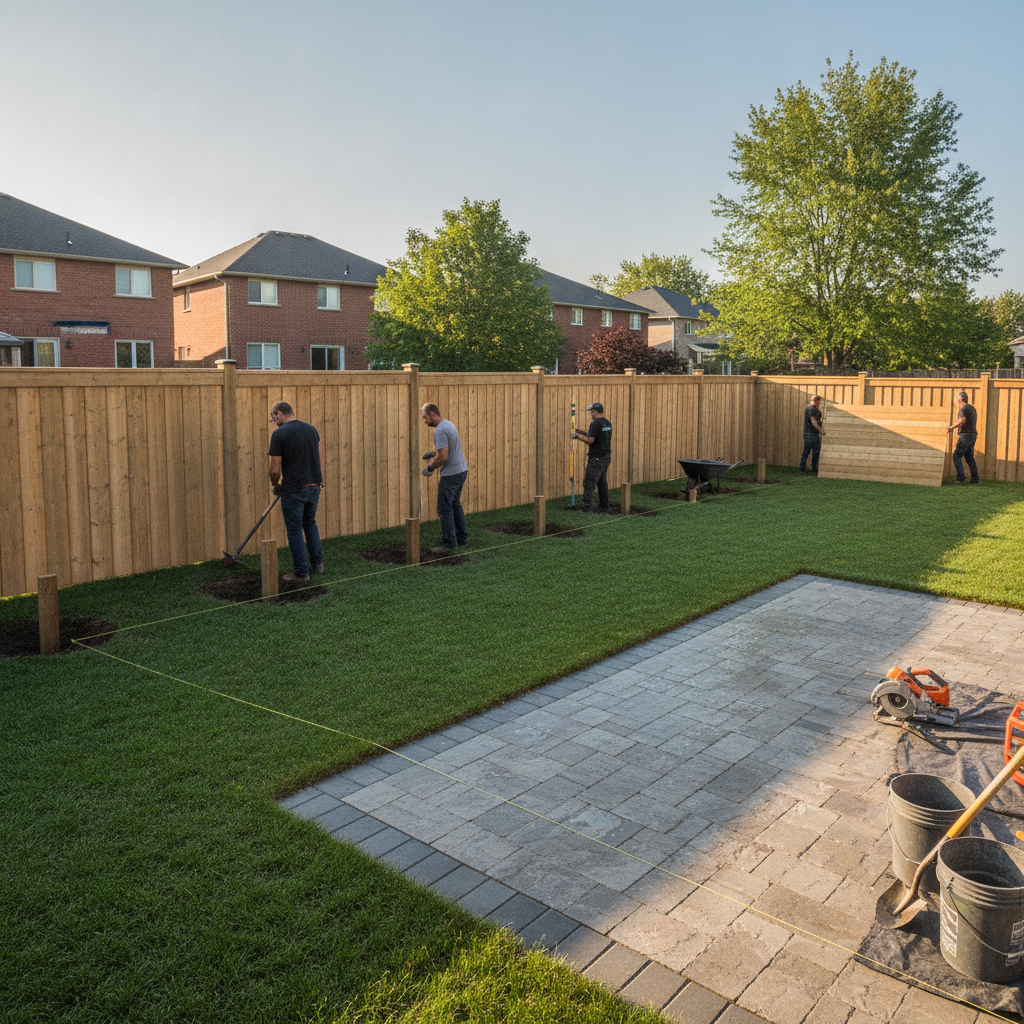
Our crews in Mississauga routinely adjust grade around interlocking, decks, and fences so water sheds correctly across the whole property, not just the lawn planes.
Local considerations for Mississauga
- Prevail on staging: weekends near Saigon Park can be busy; schedule sod delivery early to keep rolls fresh within 24 hours.
- Spring tempo: cool nights extend rooting windows; mid–late spring offers 10–14 day establishment before summer heat spikes.
- Campus-adjacent traffic: near Lambton College, plan crew parking and safe hose routing to avoid tripping on busier sidewalks.
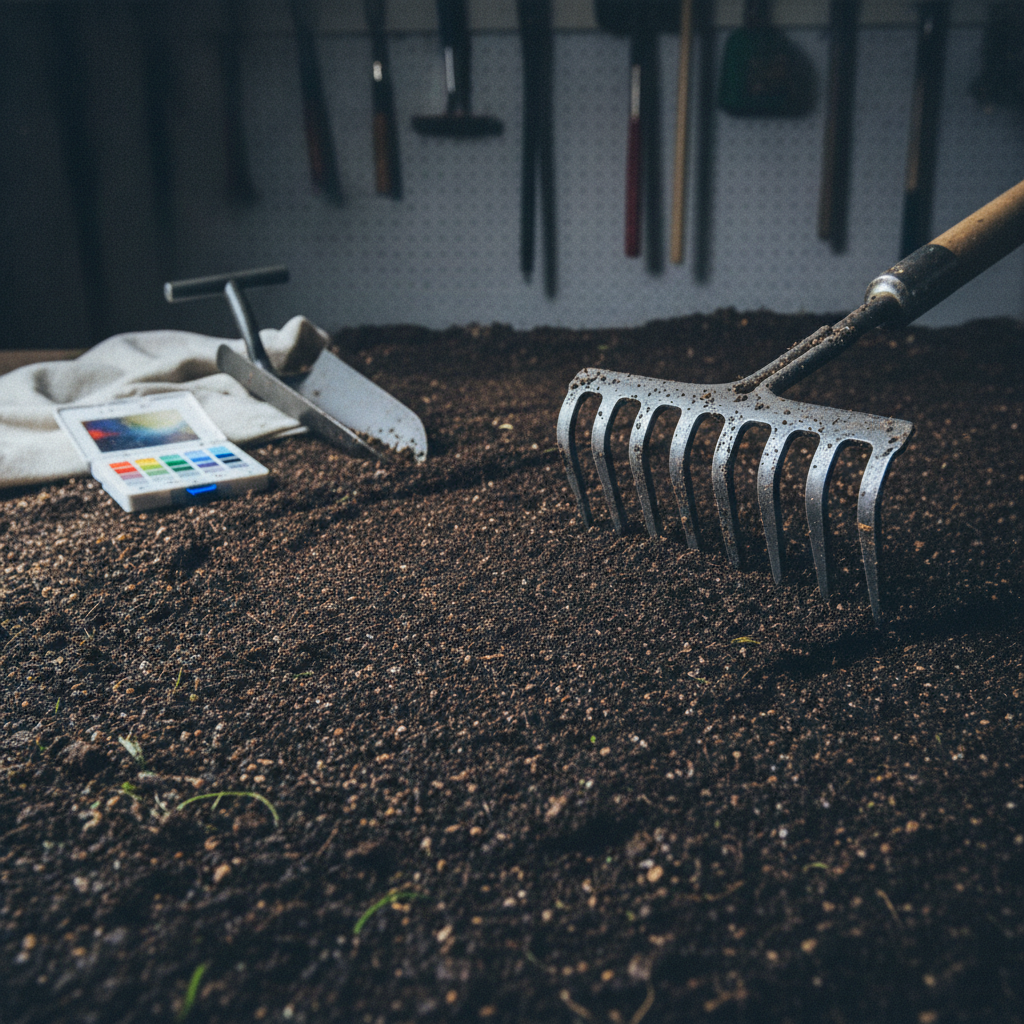
How Sod Prep Works: Step-by-Step
Sod prep follows six stages: clear, rough grade, amend soil, final grade, stage materials, and wet test. Keep 4–6 inches of healthy topsoil, pitch 1–2% away from structures, and install rolls within 24 hours of delivery for best rooting and seamless joints.
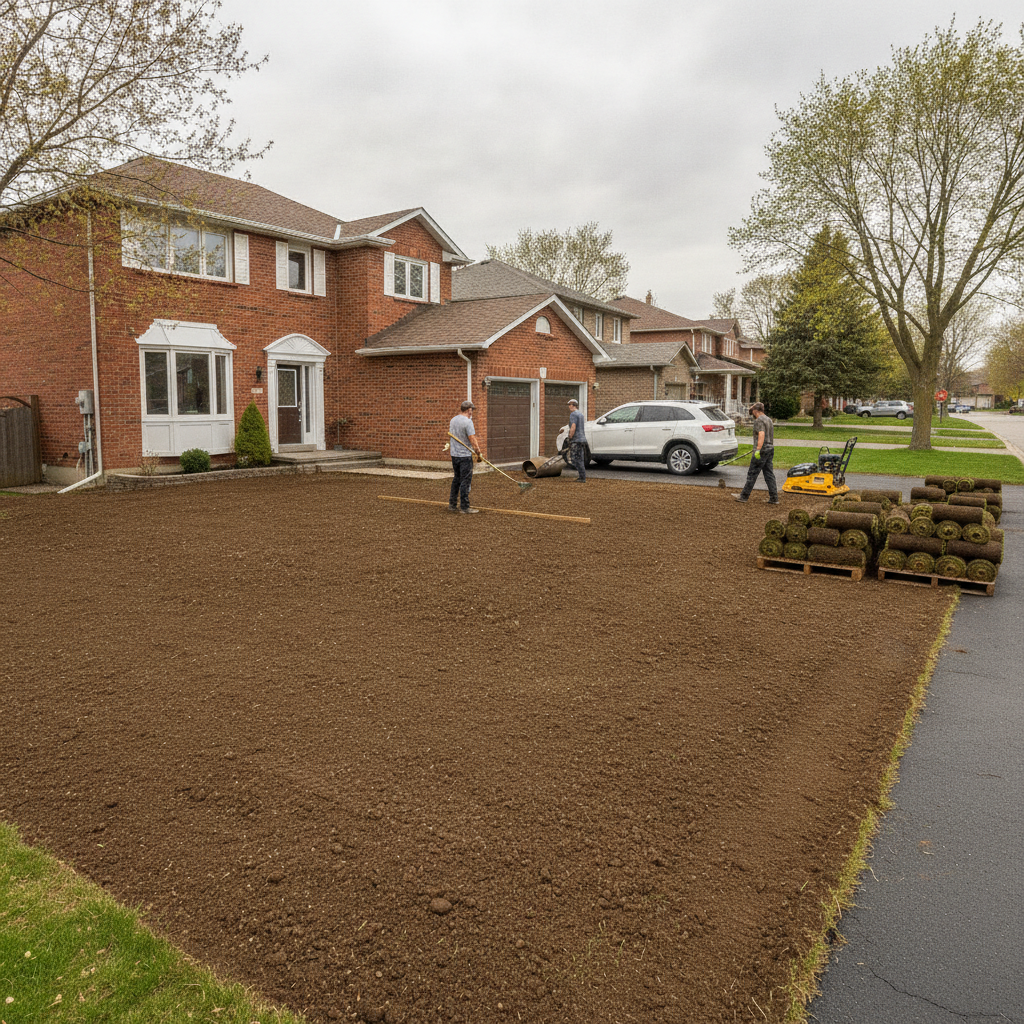
Step 1 — Clear and strip
- Remove old turf to 1–2 inches below finish grade; haul debris to avoid reseeding weeds.
- Extract stones >1 inch and roots that could lift seams later.
- Mark utilities and irrigation; flag valve boxes to stay accessible.
On average, clearing produces 10–15 contractor bags of material per 1,000 sq. ft., so staging disposal keeps sites tidy.
Step 2 — Rough grade for drainage
- Shape a 1–2% slope away from the house and hardscapes.
- Target a 1–1.5 inch drop for every 8 feet of run to shed water.
- Fill low spots; break high crowns that steal topsoil depth.
Rough grading sets the canvas. We often tie grades into interlocking or retaining wall edges so water doesn’t pond at transitions.
Step 3 — Amend and build topsoil
- Blend 2–3 inches of compost into native soil to reach a 4–6 inch total topsoil layer.
- Test pH with a simple kit; target 6.0–7.0 for cool-season sod.
- Rake to a fine tilth; remove clods bigger than a golf ball.
Improved structure increases air-filled pore space, which can raise oxygen diffusion rates enough to boost root mass measurably in the first weeks.
Step 4 — Final grade and firm
- Hand-rake to set finish elevations flush to walks and drives.
- Lightly compact; aim for a firm, springy surface—no footprints deeper than 0.25 inches.
- Water lightly to settle dust and reveal minor low spots to fill.
A too-soft base leads to tire ruts and settlement; a too-hard base starves roots. The sweet spot speeds uniform rooting.
Step 5 — Stage rolls and starter inputs
- Schedule delivery within 24 hours of install; keep rolls in shade.
- Have starter fertilizer ready (balanced NPK) and a hose with a fan nozzle.
- Lay turf along the longest straight edge first to keep lines true.
Fresh sod is perishable. Surface temperature on rolls can rise 10–20°F above air temps in sun, so shade staging preserves vitality.
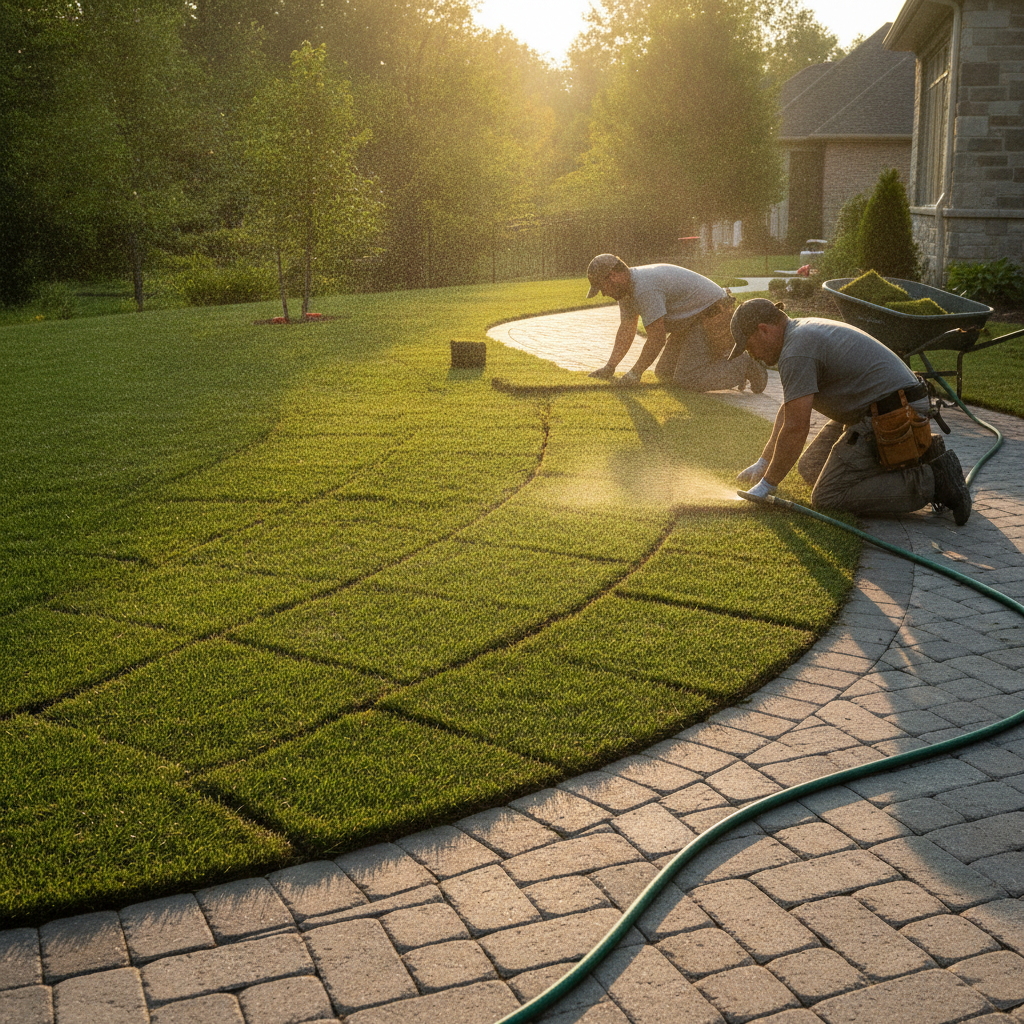
Step 6 — Wet test and install
- Run irrigation or hose to confirm reach and uniformity.
- Lay staggered joints; offset seams 12–18 inches between rows.
- Roll seams at the end for tight contact, then water to saturation.
Seams that touch and stay moist knit fastest. Watering to 4–6 inches of depth ensures the root zone stays consistently damp during the first 10–14 days.
Types, Methods, and Approaches
Approaches vary by site: full lawn replacement, partial patching, and new-build finishing. In Mississauga, full replacements often combine compost till-in, grade correction, and irrigation checks, while patches focus on seam blending. New builds emphasize final grading and adding 2–3 inches of topsoil before sod.
Full lawn replacement
- Best when 40%+ of the lawn is thin or weedy; uniform prep delivers a consistent finish.
- Typically includes dethatching/stripping, 2–3 inches of compost, and grade corrections.
- Expect 10–14 day initial rooting; keep traffic off for 2 weeks.
Partial patching
- Ideal for high-wear zones or areas impacted by shade and pets.
- Feather patch edges 6–12 inches into healthy turf for invisible seams.
- Match sod type and mowing height to avoid steps or color shifts.
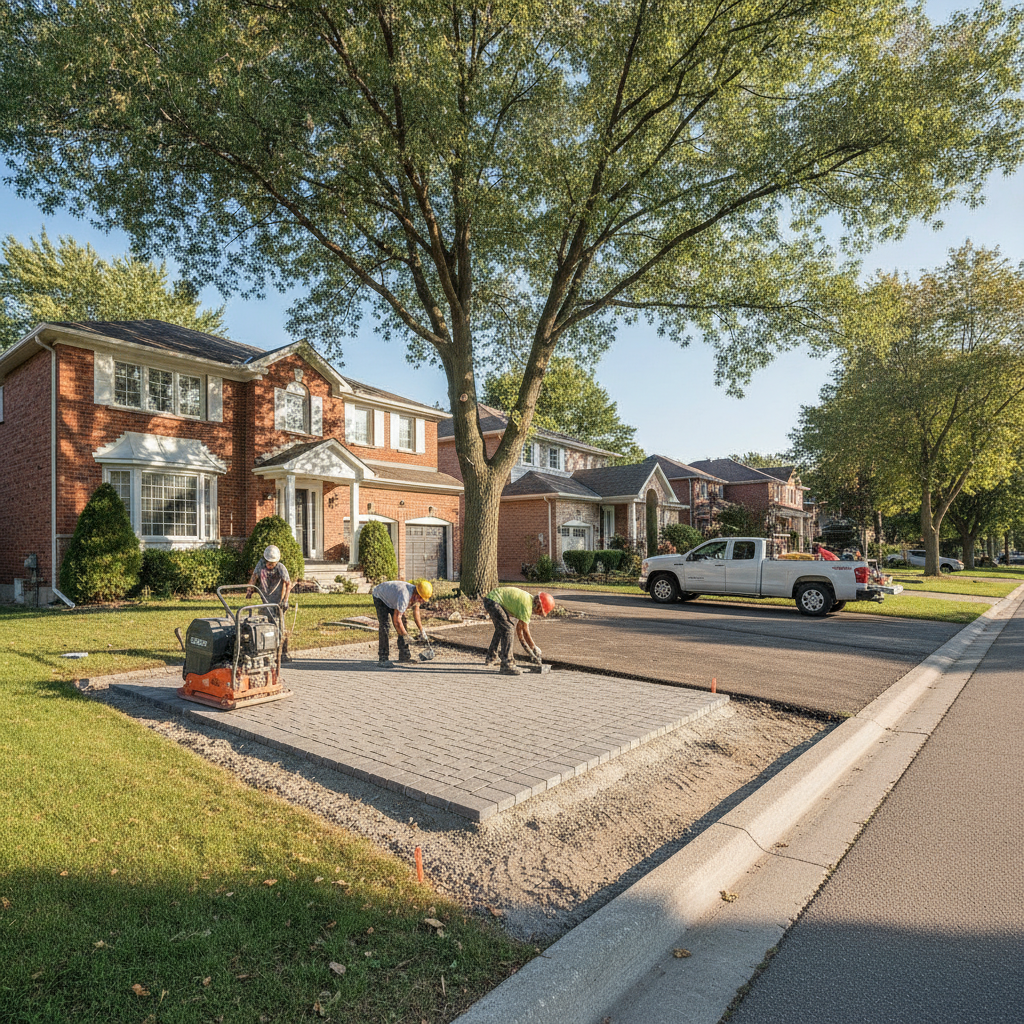
New-build finishing
- Builders often leave subsoil compacted; add 2–3 inches of topsoil minimum.
- Laser levels help set consistent 1–2% slopes across wider planes.
- Schedule sod within 24–48 hours of final grading to avoid erosion.
Our team frequently integrates lawn prep with slope correction work so surface water moves reliably to drains or swales.
Best Practices Checklist
Follow these best practices: establish a 1–2% slope, build 4–6 inches of topsoil, blend 2–3 inches of compost, install fresh rolls within 24 hours, water to 4–6 inches deep for 10–14 days, and avoid heavy traffic until the first mowing. These habits prevent 80% of early lawn issues.
Field-tested rules of thumb
- Topsoil depth: 4–6 inches supports deeper roots; shallow beds dry out 25–40% faster.
- Seam offset: 12–18 inches prevents “zipper” lines from showing after the first mow.
- First mow: When grass reaches 3–3.5 inches; trim to ~2.5–3 inches with a sharp blade.
- Watering: Keep soil consistently damp (not soggy) until roots resist a gentle tug, usually day 10–14.
- Edges: Set sod edges 0.5 inches above pavers/asphalt; rolling settles them flush.
- Sun exposure: Shaded areas root slower; extend the high-moisture period 3–5 extra days.
DIY vs. Pro: process and risk
Task DIY Considerations Pro Advantages Grading to 1–2% Requires levels/strings; small errors create puddles Laser levels and crew experience keep planes true Topsoil/compost blending Manual mixing is labor-intensive and uneven Power rakes/tilers blend quickly and uniformly Seam control Gaps dry out; overlaps die off Staggered seams and rolling eliminate air gaps Watering uniformity Hose alone can miss corners Zone tests ensure even coverage Timeline Weekends; storage risks if delayed Install same day as delivery for freshnessIf you want a hand, review our Mississauga sod installation overview or book a visit so we can right-size the scope.
Tools and Resources
You’ll need grading tools (rakes, level), soil improvement supplies (compost, starter fertilizer), cutting and rolling tools (spade knife, lawn roller), and watering gear. Staging sod and water on-site before the first roll is laid is the simplest way to prevent dry seams.
- Shaping: Landscape rake, hand tamper, and string line or laser level.
- Soil: Compost, screened topsoil, and a pH test kit.
- Cut/finish: Utility/spade knife for curves, lawn roller for tight contact.
- Hydration: Hose with fan nozzle; sprinkler or irrigation zones tested.
- Safety: Gloves, eye protection, and marked utility lines.
See our planning notes alongside seasonal maintenance planning so the lawn stays healthy after install.
Case Studies and Examples
Our Mississauga crews often pair sod prep with grading around interlocking, decks, and fences. By blending 2–3 inches of compost into 4–6 inches of topsoil and pitching planes 1–2%, we’ve reduced first-season patch calls by more than half across similar clay sites.
Example 1 — Front yard refresh off Matheson Blvd E
- Pain point: Patchy lawn and puddling near the walkway after storms.
- Approach: Regraded for a 1.5% slope, added 2 inches of compost, and set crisp edges.
- Result: Rooting by day 12; puddles eliminated in the next heavy rain.
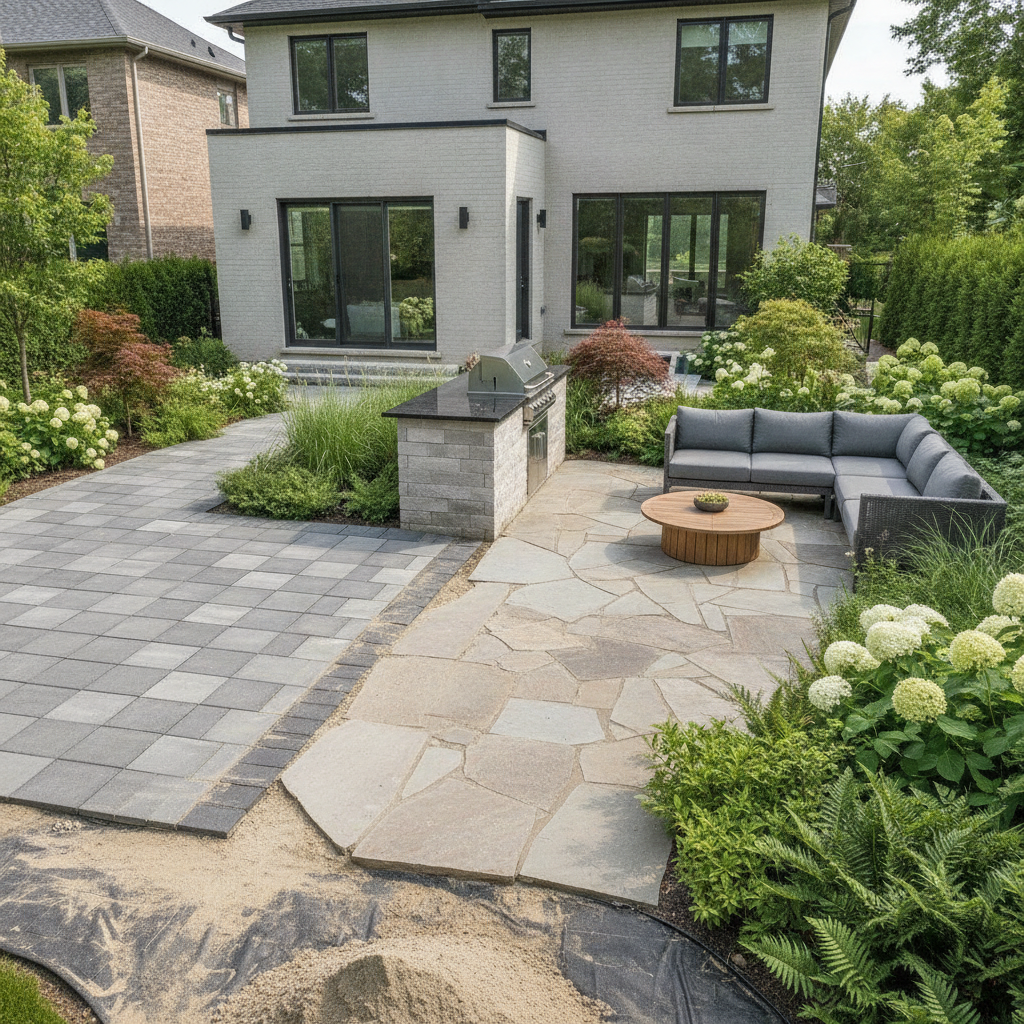
Example 2 — Backyard transformation with interlocking
- Pain point: Settled subsoil against a new paver patio created a dip line.
- Approach: Topsoil build to 5 inches and rolled seams tight along the patio curve.
- Result: Even cut line and no mower scalping; seams invisible after the first mow.
Example 3 — New-build finishing in the GTA
- Pain point: Builder soil was compacted; water beaded on the surface.
- Approach: Tilled 3 inches of compost into subsoil; final grade at 1–2%.
- Result: Uniform rooting by week two; healthy color and growth.
For a detailed timing overview, see our Ontario sod timing guide. It pairs well with this Mississauga sod installation prep checklist when planning a start date.
Frequently Asked Questions
Most sod prep questions center on timing, soil depth, watering, and traffic. In Mississauga, aim for 4–6 inches of topsoil, install within 24 hours of delivery, and keep the first 10–14 days consistently moist. Wait for the first mow until grass reaches 3–3.5 inches.
How much topsoil do I need under new sod?
Aim for 4–6 inches of healthy topsoil after grading. In clay-heavy areas, blend 2–3 inches of compost into the upper layer. This depth helps roots stay cool and moist, reducing hot-spot browning and making watering more forgiving during the first two weeks.
When is the best time to install sod in Mississauga?
Spring and early fall offer the most forgiving temperatures and soil moisture. Cool nights speed rooting and reduce stress. Summer installs can still succeed with tight watering and shade management on delivery day to prevent rolls from overheating.
How soon can I walk or mow on new sod?
Limit foot traffic for 10–14 days while roots knit to the base. Test by gently tugging a corner; resistance means roots are set. For mowing, wait until grass reaches 3–3.5 inches and use a sharp blade to cut to about 2.5–3 inches.
Do I need fertilizer when laying sod?
A balanced starter fertilizer supports early root growth. Apply lightly under or after laying sod and water it in. Avoid heavy applications that could burn new roots, and follow label directions for cool-season turf used across the GTA.
Key Takeaways
Success with sod in Mississauga starts below the surface: proper slope, topsoil depth, compost, and watering. Keep rolls fresh, seams tight, and traffic light for two weeks. Tie prep into overall site drainage and edges for a lawn that stays level and healthy.
- Target 1–2% slope away from structures; shape planes before final raking.
- Build 4–6 inches of topsoil; add 2–3 inches of compost for Peel clays.
- Install sod within 24 hours of delivery and water to 4–6 inches deep.
- Offset seams 12–18 inches; roll for even contact.
- Delay mowing until grass reaches 3–3.5 inches; cut with a sharp blade.
Conclusion and Next Steps
Follow the Mississauga sod installation prep checklist to avoid puddles, stripes, and slow rooting. Grade carefully, enrich soil, stage inputs, and water consistently. For complex grades or tight timelines, a pro crew can complete prep and install in a single coordinated window.
If you’re aligning sod with interlocking, fencing, or a deck, we can coordinate base prep across all zones so grades tie together cleanly.
Soft CTA: Want a quick on-site assessment? Explore our best time to lay sod in Mississauga, then book a visit—our team at 100 Matheson Blvd E can help plan, prep, and install.
Related Articles from Our Planning Cluster
Planning drives results. Pair this checklist with targeted planning guides and timing notes. Integrating sod with drainage, seasonal care, and lawn replacement options keeps results consistent across the property.
For deeper planning, see our notes on seasonal maintenance planning, a full lawn replacement options overview, and our Ontario sod timing guide. If puddling or slopes are a concern, read our slope correction guide before you schedule delivery.