A Practical Guide to Stone Work for Front Entrance
A well-executed front entrance does more than welcome guests—it sets the tone for the entire property and stands up to daily wear. This guide walks through practical decisions that help you design, build, and care for stone work for front entrance spaces, whether you are refreshing a small landing or rethinking steps, walkways, and thresholds as a cohesive entry sequence.
Define your objectives and constraints
Before choosing stone or sketching patterns, align on goals and limits. A short planning session reduces cost overruns, change orders, and mismatched materials later.
- Function: Who uses the entrance (kids, guests, deliveries), how often, and in what seasons?
- Scope: Landing only, steps, walkway to the curb or driveway, or a full stoop rebuild?
- Durability: Tolerance for wear from foot traffic, bicycles, strollers, and parcel carts.
- Maintenance: Comfort level with sweeping, joint touch-ups, resealing, and snow management.
- Architecture: Colours and textures that complement siding, brick, or cladding.
- Budget window: A range helps balance material quality, labour intensity, and extras like lighting.
- Site realities: Grade changes, shaded/moss-prone areas, and water flow away from the house.
Choose stone and complementary materials
Your material set does the heavy lifting for durability and visual coherence. Decide on a primary surface, then select complementary edging, risers, caps, and accents.
Natural stone options
- Granite: Dense, highly wear-resistant, available in flamed or bush-hammered textures for traction. Good for treads and high-traffic landings.
- Limestone: Uniform look with subtle veining; choose denser varieties and slip-resistant finishes for exposed entries.
- Sandstone: Warm tones and natural cleft textures; seal thoughtfully to help resist staining.
- Slate: Rich colour range with a cleft surface; consider thickness consistency for even steps and landings.
Engineered options
- Concrete pavers: Dimensional consistency speeds installation and patterning. Many collections include matching coping and step modules.
- Porcelain pavers: Crisp edges and stain resistance; ensure appropriate slip rating and proper support over a rigid base or pedestal system where specified.
Supporting pieces and textures
- Step treads/caps: Often thicker units with eased or bullnose edges for comfort and clarity.
- Edging: Stone, concrete, or steel to lock borders and keep joints stable.
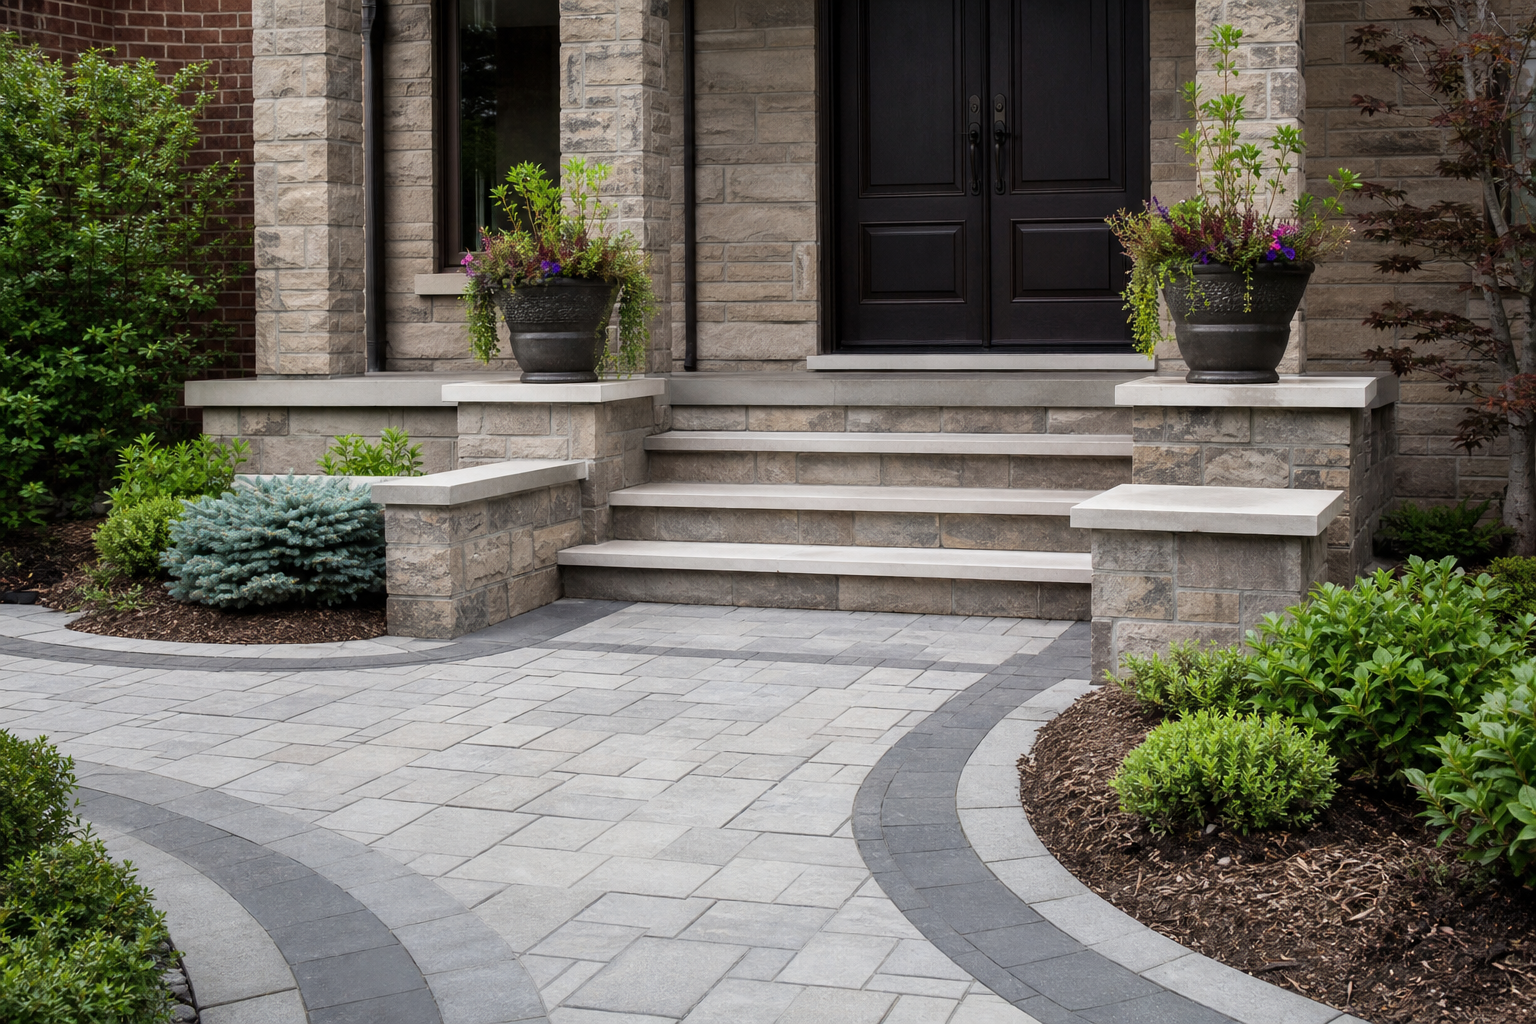
- Inlays/borders: Subtle banding can visually widen a narrow walk and protect edges from chipping.
Tip: Prioritize slip resistance at entries. Textured finishes (flamed, brushed, cleft, or matte pavers) help with traction in wet or snowy conditions.
Design the layout for flow and safety
A front entrance should feel intuitive from sidewalk or driveway to door. Thoughtful geometry improves comfort, accessibility, and clear sightlines.
- Walkway width: Target generous clearance so two people can pass comfortably. Consider widening near curves or at the landing.
- Curves vs. straights: Curves soften long approaches and guide movement; straight lines suit formal facades. Use consistent radii if curving.
- Patterns: Running bond and herringbone resist directional shift; ashlar adds texture. Avoid tiny slivers at edges—adjust layout to full or half units.
- Landing size: Provide a pause zone at the door for opening, stepping back, or handling packages.
- Lighting readiness: If adding path or step lighting later, plan conduit runs before base compaction.
If your design includes steps, sketch riser counts and approximate tread depths early. Small changes in grade can shift the number of steps, overall landing heights, and railing needs.
Site preparation, base, and drainage
Stone work is only as reliable as the base beneath it. A sound foundation helps minimize settlement, shifting, and freeze–thaw movement.
- Excavation: Remove organic material and soft subsoil until firm, undisturbed ground is reached across the entire footprint.
- Subgrade shaping: Establish a gentle pitch away from the house so surface water moves off the entry and does not collect at the threshold.
- Base layers: Use well-graded, compactable aggregate in lifts. Compact each lift thoroughly with appropriate equipment.
- Screed/course bedding: For pavers, a consistent bedding layer supports even surfaces. For large-format stone, consider a mortar or polymer-modified bed over a rigid or well-prepared base as specified by the system.
- Drainage details: Keep door thresholds slightly higher than adjacent stone. Where needed, incorporate linear drains or discreet catch points to move water away.
Avoid shortcuts like placing stone directly over uncompacted fill. Differential settlement is difficult to fix without rework.
Constructing steps and landings
Steps concentrate load and require precise detailing for comfort and safety. Consistent riser heights and tread depths reduce trip risk and improve rhythm.
- Structure: Build steps on a stable foundation. Options include interlocking step systems, reinforced concrete cores with stone facing, or solid stone treads on a compacted base.
- Riser consistency: Keep risers uniform from first to last step. Even small variations can be noticeable.
- Tread texture: Choose non-slip textures for exposed conditions. A slight nose (rounded or eased edge) improves comfort and visibility.
- Water management: Pitch treads slightly forward to shed water and avoid pooling at the door.
- Side returns: Finish exposed sides with matching riser stone or caps for a clean, durable edge.
Note: For structural, safety, or railing requirements, consult local building rules or a qualified professional. Site-specific conditions can affect compliant step design and anchoring details.
Edge restraint, joints, and sealers
Small finishing choices keep the entrance looking tight and reduce maintenance.
- Edge restraint: Use stone, concrete, or steel edging secured to the base to prevent migration and spreading at the borders.
- Joint material: For pavers, polymeric sand helps resist washout and weed growth when installed and cured correctly. For natural stone on mortar beds, follow the specified grout or jointing compound.
- Expansion breaks: Where stone abuts the house or concrete, include appropriate separation or flexible joint detail to accommodate movement.
- Sealers: Optional, depending on stone type and desired sheen. Choose breathable, penetrating sealers for natural stone to help with stain resistance while preserving texture.
Weather and seasonal performance
Front entrances experience repeated wet–dry and freeze–thaw cycling. Design for seasonal resilience.
- Pitch and runoff: Maintain subtle slopes away from doors and walls to move water off the surface quickly.
- De-icing compatibility: Verify that your stone and any joint/seal products are compatible with your de-icing approach. Use traction aids thoughtfully to protect finishes.
- Snow removal: Choose patterns and borders that withstand scraping. A border band can sacrifice wear so the field stays pristine.
- Sun and shade: Dark stones can warm and melt snow faster but may show salt residue more readily; lighter stones can hide residue and scratches.
Practical aesthetics that last
Beauty and practicality reinforce each other when you consider wear paths, colour stability, and visual hierarchy.
- Colour strategy: Pull a dominant hue from your facade (brick or siding) and repeat it in the entrance field; add contrast in borders or step treads.
- Scale harmony: Pair large-format pieces on landings with smaller-format units on steps or approaches to prevent visual monotony.
- Threshold clarity: Use a contrasting nosing stone or border to define edges in low light.
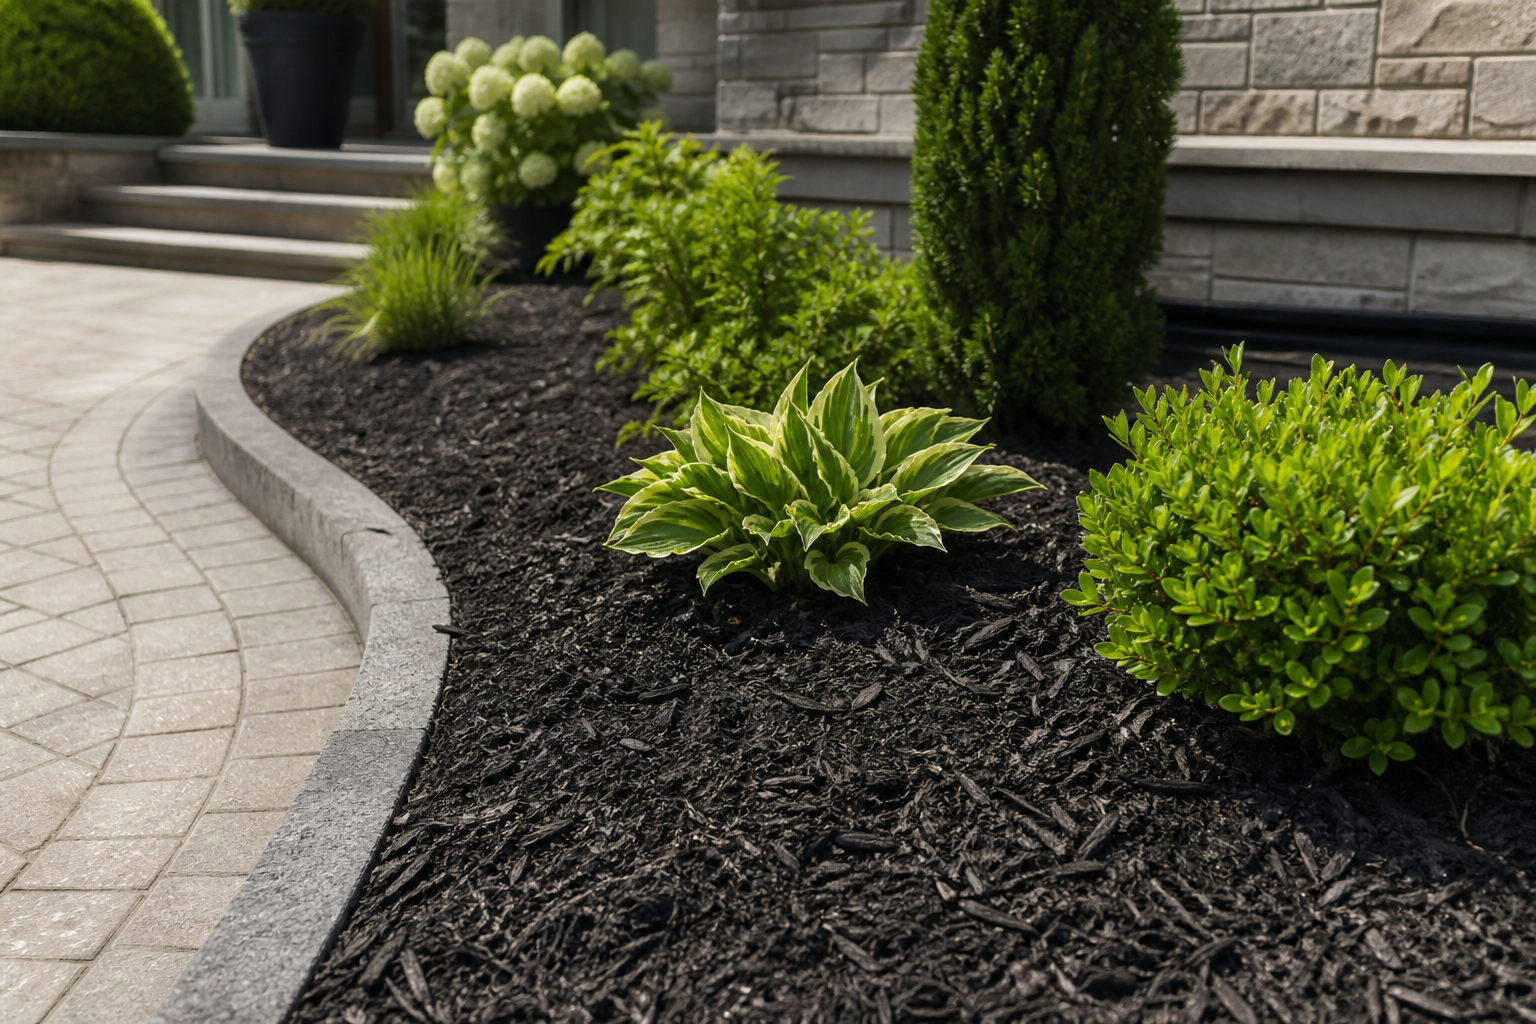
- Green accents: Low-maintenance beds or planters can frame the entrance without crowding the walk.
Installation checklist
Use this quick list to keep your project on track from demo to finish.
- Document measurements, elevations, and target slopes.
- Confirm material quantities with overage for cuts and future repairs.
- Mark utilities and plan lighting or irrigation conduits in advance.
- Excavate to firm subgrade and shape for drainage.
- Place and compact base aggregate in lifts across the full area and beyond edges.
- Install edge restraints before setting the field where system-appropriate.
- Set steps and caps square and level with consistent risers.
- Lay field stone to pattern, avoid small slivers at edges, and keep joints even.
- Install joint material per manufacturer guidance; fully activate/cure polymeric sands.
- Rinse carefully, allow to dry, and apply sealer if specified.
- Final inspection: check transitions, door clearance, slopes, and cleanup.
Care and maintenance
Routine attention extends the life and look of your front entrance.
- Regular cleaning: Sweep debris and rinse dirt. Address leaf tannins or rust marks promptly with stone-safe cleaners.
- Joint touch-ups: Top up polymeric sand if you see washout. For mortared joints, repair hairline cracks before they widen.
- Sealer cycles: Reapply penetrating sealer as needed for your stone type and exposure.
- Winter habits: Use compatible de-icers; avoid metal edges on shovels where possible.
- Vegetation control: Keep edges trimmed and roots away from borders to prevent lifting or creeping over joints.
Budgeting, scope, and hiring questions
Upfront clarity reduces surprises. When speaking with a contractor or planning a DIY approach, the following questions help define scope and expectations:
- What base depth and aggregate specification will be used for my soil conditions?
- How will you handle drainage at the landing and away from the threshold?
- What is the plan for step structure, riser consistency, and tread finish?
- Which edge restraints are specified, and how are they anchored?
- What jointing material and sealer (if any) are included, and what is the curing process?
- How are cuts planned to avoid small slivers and maintain pattern integrity?
- What protection measures will be taken for adjacent doors, siding, or plantings?
- What does the cleanup and disposal plan include after completion?
- What are the recommended maintenance steps and intervals for these materials?
FAQ: Stone work for front entrance
What stone is best for front steps and landings?
Dense natural stones like granite, as well as engineered step modules or pavers with matching caps, are common choices for durability. Focus on slip-resistant textures and edge details that clearly define the step nosing. If you prefer limestone, select dense, exterior-rated units in a finish that balances traction and cleanability.
How thick should the base be for a front walkway?
There is no one-size-fits-all answer because soils, loads, and climate vary. In general, walkways are built on multiple compacted lifts of well-graded aggregate to reach a stable base thickness suitable for foot traffic. The key is consistent compaction, proper grading for drainage, and full support under edges and borders. Discuss site-specific depth with a qualified installer.
Can I install stone over existing concrete?
In some cases, yes—if the concrete is sound, slopes correctly for drainage, and provides adequate door clearances after adding stone thickness and setting materials. Bonded systems and overlay pavers each have requirements for preparation, movement joints, and edge transitions. Evaluate the slab’s condition and height constraints carefully before choosing an overlay approach.
Do I need to seal my front entrance stone?
Sealing is optional and depends on stone type and performance goals. Penetrating, breathable sealers can help with stain resistance on some natural stones without creating a glossy film. Engineered pavers may benefit from sealers that enhance colour and ease cleaning. Always confirm compatibility and follow manufacturer guidance.
What patterns hold up best under frequent foot traffic?
Interlocking patterns that distribute load—such as herringbone or a running bond perpendicular to the primary travel direction—resist shift well. Large-format slabs are attractive on landings; pair them with reliable edge restraint and suitable bedding to support their span.
Next steps
A practical next step
To discuss the options that apply to your situation, contact HR Greenroots Landscaping and request the relevant details before moving forward.